Tomato and Avocado Salad with Orange, Fennel and Fresh Herbs

  
Tomato and Avocado Salad with Orange, Fennel and Fresh Herbs

This fresh summer salad is perfect for a large group and it makes its own dressing!

Ingredients:


8 large tomatoes

1 red onion

4 oranges

4-5 haas avocados

Olive oil

Salt and pepper

1/4 cup fresh tarragon

1/4 cup fresh basil

1 bulb fennel

Directions:


Core tomatoes and cut into wedges. Place in a large mixing bowl and set aside.

  
Slice onion thin and add to tomatoes.

  
Remove skin from oranges and cut into segments. Add to tomatoes and onions and toss lightly.

  
Cut avocados in half, remove pit and scoop out of the skin with a large kitchen spoon.

  
Slice avocados into wedges and add to tomatoes. Drizzle with olive oil, add salt and pepper and fresh herbs and gently toss to coat.

  
Turn out onto a large platter and sprinkle with a little more salt and pepper.

  
Shave fennel on a mandoline slicer and place in the center of the salad. Serve immediately.

Advertisement

Chasing Katahdin

  
I had the great fortune to leave work today just as the glorious steamship Katahdin passed the eastern shore of the island. She gave a hearty bellow from her great horn as she passed by in all her splendor. I followed in her wake for a short time enjoying the magnificence of this, one of the last great steamships, here or anywhere in this beautiful country.

 katahdin steamship moosehead lake 

The Kathadin or, “The Kate,” as she is affectionately called was built just over 100 years ago, in 1914, at The Bath Iron Works. She is the oldest vessel still afloat built at Bath and one of only a few surviving early lake boats in Maine. After a full restoration by The Moosehead Marine Museum, she still proudly tours Moosehead Lake in the summer months, delighting all who see her and offering cruises to passengers several times each week.

 katahdin steamship mt kineo 
As we headed toward Mt. Kineo, I marveled at the passing of time. Here we were, over 100 years later, and Katahdin was still making the same trek she was built for in 1914. It is a testament to the character of the people inhabiting these great North Woods of Maine. They are truly stewards of this land they call “God’s Country,” and of all it’s wonderful history and tradition.

 katahdin steamship mt kineo 
According to the National Register of Historic Places:

“Katahdin is a bluff-bowed steamer, 102 feet long, with a beam of 28 feet and a hull depth of 9 feet. Her hull is steel, with two wooden decks. Her typical draft is 3 feet 9 inches. Her original configuration included enclosed passenger spaces on two decks, with an open area at the stern on the lower deck, and surrounding the enclosed area on the upper deck. The pilot house is located at the front of the upper deck enclosure. The main passenger entryways are located on the lower deck on either side of the pilot house. She was shipped in sections to Greenville, where final assembly took place. Her primary use when launched was to deliver tourists and supplies to the Mount Kineo Resort from Greenville Junction, but she also offered cruises on the lake.”


For more information about the Moosehead Marine Museum or to book a cruise or private event, visit Katahdincruises.com.

 katahdin steamship greenville 

Day off in Greenville

Today I enjoyed some free time in Greenville, Maine. I had such a nice day and saw so many gorgeous sights I wanted to share a few photos.

  
Greenville, Maine

  
Moosehead Lake


Lunch at Stress Free Moose


Stopped at Northwoods Outfitters’ Hard Drive Cafe for the best coffee in town.

  
Picked up a few essentials at Maine Mountain Soap and Candle Company

  
Historic Train Depot

  
Mountain View Pond


East Outlet


Heading back to Rockwood

  
I had a great day in Greenville, Maine. After a delicious lunch and a nice walk around town, I did some exploring and saw some amazing sights. I love that even after spending four summers here, I still feel like I have only just begun to enjoy all this town has to offer.

Beautiful Day On Moosehead Lake

Yesterday I indulged in a rare pleasure. I had a little extra time in the afternoon so I decided to go for a walk on the southwest shore of the island. It was a gorgeous, sunny day here in the North Woods of Maine. Afterward, I felt peaceful and relaxed. I invite you to join me on my walk around Moosehead Lake.


When I returned to the kitchen, there was a beautiful fish waiting for me.

  
I built a fire and roasted it whole over the hardwood coals.

  
After dinner was served, I cleaned up and prepared for the short boat ride home. On the way, I enjoyed the spectacular views of The Spencer Mountains, Mt. Katahdin and Mt. Kineo.


Lobster BLT Lettuce Wrap

  
Lobster BLT Lettuce Wrap

I love a good Lobster BLT. The crispy bacon, sweet lobster salad and acidic tomato on toast with crunchy lettuce and mayonnaise is one of my favorite combinations.

Lately though, more and more guests are avoiding bread for a variety of reasons. While I love the classic, I felt a need to update this delicious dish to keep up with changing tastes so I ditched the bread and put the lettuce on the outside. Here is my recipe for Lobster BLT Lettuce Wraps.

Lobster BLT Lettuce Wraps

Makes 6 wraps

Ingredients:

Lobster Salad:

1/4 cup celery, small dice

1/3 cup mayonnaise

2 cups lobster meat cut into large pieces

Salt and pepper to taste

Wrap and Garnish:

6 romaine leaves

10 grape tomatoes, quartered

4 strips bacon (or more) cooked

Chives

Directions:

To make lobster salad, combine all ingredients in a bowl and stir briefly. Season with salt and pepper and set aside. 

Trim the root end off the romaine leaves. Rinse and dry thoroughly.

  
Chop bacon and chives and quarter tomatoes.

  
Place lettuce rib side down and fill with lobster salad.

Garnish with tomatoes, bacon and chives.

Serve immediately.

Lobster Quiche and Beef Tenderloin

Lobster Quiche and Beef Tenderloin

Today was the last day one of my favorite groups would be with us. They have humorously dubbed themselves, “The Youth Group,” and they are always a joy to cook for. I must admit, I am a little biased because I look forward to seeing them all when I return to Florida for the winter. I wanted to share a few of the gastronomic highlights of their last day on the island.


Lobster, Chanterelle and Chive Quiche


Grilled Whole Beef Tenderloin

  
Tomato and Avocado Salad with Orange Segments, Fresh Herbs and Aged Balsamic Vinegar


Dessert for Lovers
  
A Bittersweet Boat Ride Home


Mixed Berry Crumbles with Gingersnap Streusel

  
One of my favorite and most successful desserts this summer has been one of the easiest to execute. A filling of sweet and tart berries is topped with a crispy streusel made with Gingersnap cookies, flour, sugar and butter. Bake in the oven and top with ice cream for a dessert that is sure to please after any meal. I hope you enjoy my recipe for mixed berry crumbles with Gingersnap streusel.

  
Mixed Berry Crumble with Gingersnap Streusel

Makes enough to fill 10 six ounce ramekins.

Ingredients:

Filling:

36 ounces fresh or frozen berries. (You can use just about any berry. I used a mixture of quartered strawberries, raspberries, blueberries and blackberries)

3/4 cup sugar

2 Tbsp cornstarch

Gingersnap Streusel Topping:

1 cup all-purpose flour

2/3 cup granulated sugar

1 stick cold butter, cut into small cubes

1 1/2 cups Gingersnap crumbs

Directions: 

Preheat oven to 350 F.

Combine all ingredients for filling in a large bowl and stir to combine.

 
Spoon filling into ramekins until they are 3/4 full.


To make streusel topping,  combine flour, sugar and butter in a large bowl and mix with your hands. Work the butter into the mixture until it is crumbly.
  
Smash Gingersnap cookies and then pulse in a food processor until it is mostly crumb with a few larger pieces.

  
Combine with flour mixture and spoon on top of Berry filling, mounding slightly.

  
Line a sheet tray with parchment and place ramekins at even intervals.

  
Bake in preheated oven for 30-35 minutes, until berry mixture is bubbling and streusel topping is crispy.

Remove from oven and allow to cool slightly.

  
Top with ice cream and serve immediately.

Oven-Dried Tomatoes (and what to do with them)

It is finally the peak of summer here in Maine and beautiful, fresh produce is piling up in home gardens and farm stands all across the state. We recently found ourselves with an abundance of perfectly ripe tomatoes that were begging to be preserved at the height of their flavor and I knew just what I wanted to do with them.


Oven-drying tomatoes is an easy way to concentrate their flavor while extending their shelf life. The tomatoes come out of the oven with a deep, rich flavor that will take your BLT or burger to the next level.

You can use oven-dried tomatoes almost anywhere you would used sliced tomatoes but my favorite thing to do is make them into a spread. Before we get to that, let’s talk about how to make oven-dried tomatoes.

Oven-Dried Tomatoes

Ingredients:

Tomatoes

Olive Oil

Kosher Salt

Sugar

Directions:


Preheat oven to 325 F.

Slice tomatoes at least one inch thick, discarding the top and bottom. I usually get two slices out of a medium tomato and three out of a large.

Coat the tomatoes in olive oil and sprinkle liberally with salt and sugar.

Line a sheet pan with aluminum foil (this will make clean up a breeze later) and place a rack on top.

Lay your tomatoes out on the rack being careful not to let them touch each other. Place in the preheated oven and set a timer for 3 hours.

  
After 3 hours, remove from the oven and check tomatoes. If they are still a little moist on top, flip the tomatoes over and put them back in the oven for 30 more minutes.

  
Remove from the oven and allow to cool.

Oven-Dried Tomato Spread


Ingredients:

1 pound oven-dried tomatoes

1/8 cup packed basil leaves

1 shallot, quartered

1/2 garlic clove, crushed

1/8 cup red wine vinegar

1/8 cup water

1/4 cup olive oil

Directions:

Combine all ingredients except olive oil in a food processor, making sure garlic and shallot are on the bottom.
Pulse several times and then add the olive oil gradually while the machine is running.

  
Remove from processor and refrigerate until ready to use.

Spread on your favorite sandwich as a condiment, use in place of tomato sauce or top crostini with feta and olives for a fantastic appetizer.


BBQ Baby Back Ribs

Today I tried something I’ve never done before and I must admit, I was a little intimidated. After I tasted the results, I couldn’t believe I had ever done it any other way. I’m talking about slow smoking BBQ Baby Back Ribs and I’m here to tell you that the BBQ purists are fanatical about this with good cause.

 Smoked BBQ Baby Back Ribs 
A long time ago, while working as a line cook in a small kitchen, I learned the method of braising ribs ahead of time to make them tender. This allowed us to simply heat, sauce and serve rack after rack at a moments notice. While I appreciate the economy of time that is necessary in a busy restaurant, I have come to realize that I was sacrificing flavor for convenience. After smoking my own baby back ribs over the coals of a hardwood fire, I now see the error of my ways and have become a true BBQ convert.

I was pleasantly surprised at how simple the whole process was and delighted with the results. These were the best ribs I have ever tasted, hands down. They were tender while maintaining a satisfying, meaty bite with an incomparable smoky flavor. I hope after I share a few tips and tricks, you will see how easy it is to make your own amazing BBQ baby back ribs.

Slow Smoked BBQ Baby Back Ribs

Total time: about 6 hours

Ingredients:

3 racks baby back ribs

Kosher salt

Vegetable oil

Dry rub:

1/2 cup brown sugar

1/4 cup smoked paprika

1 Tbsp granulated garlic

1 Tbsp onion powder

1 Tbsp black pepper

1 Tbsp chili powder

Directions:

Rinse ribs in cold water and pat dry. Using your fingers, peel off the thin membrane on the back of the ribs (or ask your butcher to do this when purchasing). Generously sprinkle the ribs with kosher salt. Use about 1/2 tsp salt per pound of meat (Ribs are generally half meat and half bone so divide the total weight of the ribs in half and you will know how much salt you should use.). Place on a rack and let sit at room temperature 1-2 hours. This step, called dry-brining, is important to help the ribs retain their moisture while smoking. Do not try to rush it.

  
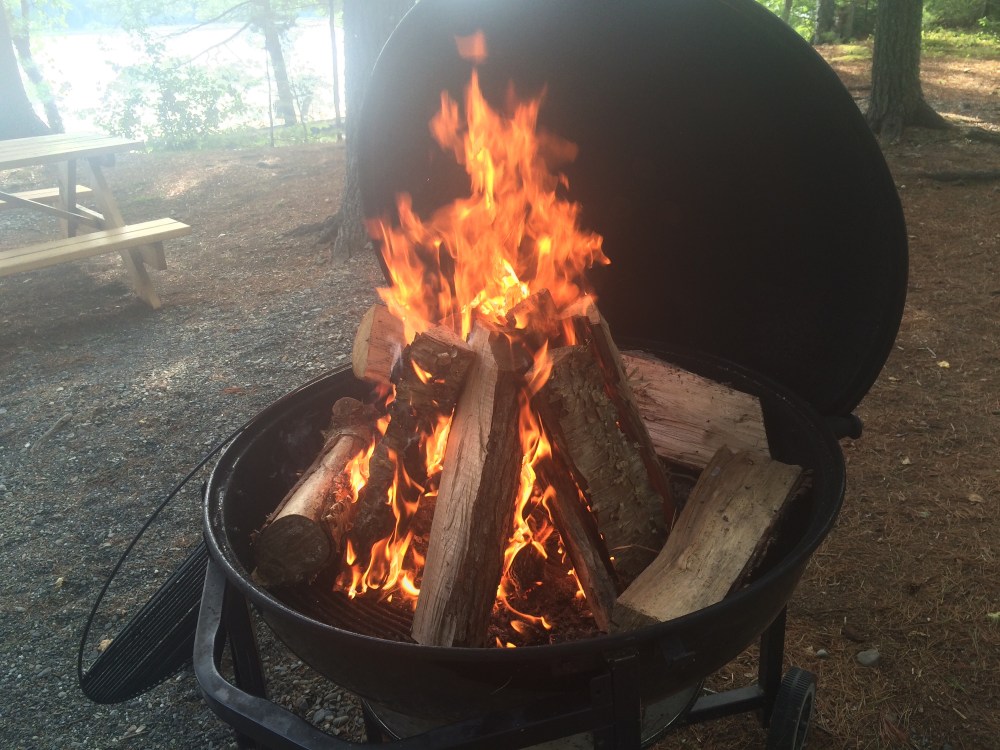
Meanwhile, build a raging fire in a kettle grill with a lid and let it burn down to coals or fire up your smoker. You can also use a propane grill with a smoker box or a combination of untreated (not match-lite) charcoal and a smoker box with wood chips. You are looking to maintain a consistent temperature of 225 F for the four hours it will take to smoke your ribs. I used an oven thermometer and checked every half an hour to make sure the temperature did not drop below 200 F or rise above 250 F. The thermometers that are built in to grill lids are often unreliable so make sure you are using an accurate thermometer.

  
Combine all ingredients for the rib rub and whisk to break up any lumps. Coat the ribs in vegetable oil and dust with the rub (you may have a little left over). This will help to develop the bark, the crusty, spicy layer on the outside of the ribs. Give the ribs a quick rub with your hands to evenly distribute the spices.

  
When the fire has burned down to coals, push it over to one side of the grill. You will be cooking the ribs on the other side using a method called indirect cooking. Using an oven thermometer, close the lid, making sure the vents are open and check the temperature of your grill. If it is above 250 F, let it burn down a little more. If it is below 200 F, build it up with a little more wood.

  
When the temperature is around 225-250 F, place your ribs on the side of the grill opposite the coals and close the lid, making sure the vents are open. Kick back and relax because the hard work is done. Enjoy a refreshing beverage and the smell of the hardwood smoke. Check every thirty minutes and add wood as necessary to maintain your temperature. After 3-4 hours the meat should have shrunk back a little, exposing the tips of the bones and the color should have darkened from a bright brick red to a deeper brown.


Remove from the grill and serve with your favorite side dishes. May I suggest a Brussels Sprout Slaw with Granny Smith Apples and Gorgonzola?

Lobster Roll

 lobster roll 
This week we ordered a few extra lobsters so we could enjoy an iconic Maine treat for lunch one day. The classic lobster roll is usually pretty simple. It is most often lobster meat tossed in mayonnaise or melted butter on a roll, maybe with a little chopped celery. I wanted to dress it up a little but not too much so I added some shallots and fresh herbs from the garden and the results were spectacular! I hope you enjoy my recipe for Maine lobster rolls.

maine lobster  
Lobster Rolls with Fresh Herbs

This recipe makes enough lobster salad for 8 lobster rolls.

Ingredients:

1 1/4 pounds lobster meat
1/8 cup minced shallot

1 1/2 Tbsp fresh lemon juice

1/2 Tbsp white wine

1/4 cup mayonnaise

1 Tbsp chopped fresh tarragon

1 Tbsp chopped fresh parsley

1 Tbsp chopped fresh chives

1 cup diced celery

Salt and pepper to taste

8 split top hot dog buns

Butter at room temperature

Directions:

Cut lobster meat into 1-2 inch pieces, removing any roe, bits of shell and the vein that runs down the middle of the tail. Set aside.

  
Combine shallot, lemon juice and white wine in a large bowl and whisk together.

  
Add mayonnaise, black pepper and fresh herbs and whisk to combine.

 tarragon parsley chives  

Add lobster meat and chopped celery and gently toss to coat. Taste and adjust seasoning if necessary.

 lobster salad 
Heat up a griddle or large frying pan. Butter hot dog buns on both sides. This is just like making a grilled cheese sandwich but without the cheese.

  
Toast the buns on both sides and remove from griddle. Allow to cool slightly.

  
Fill the buns with lobster salad and watch them disappear!