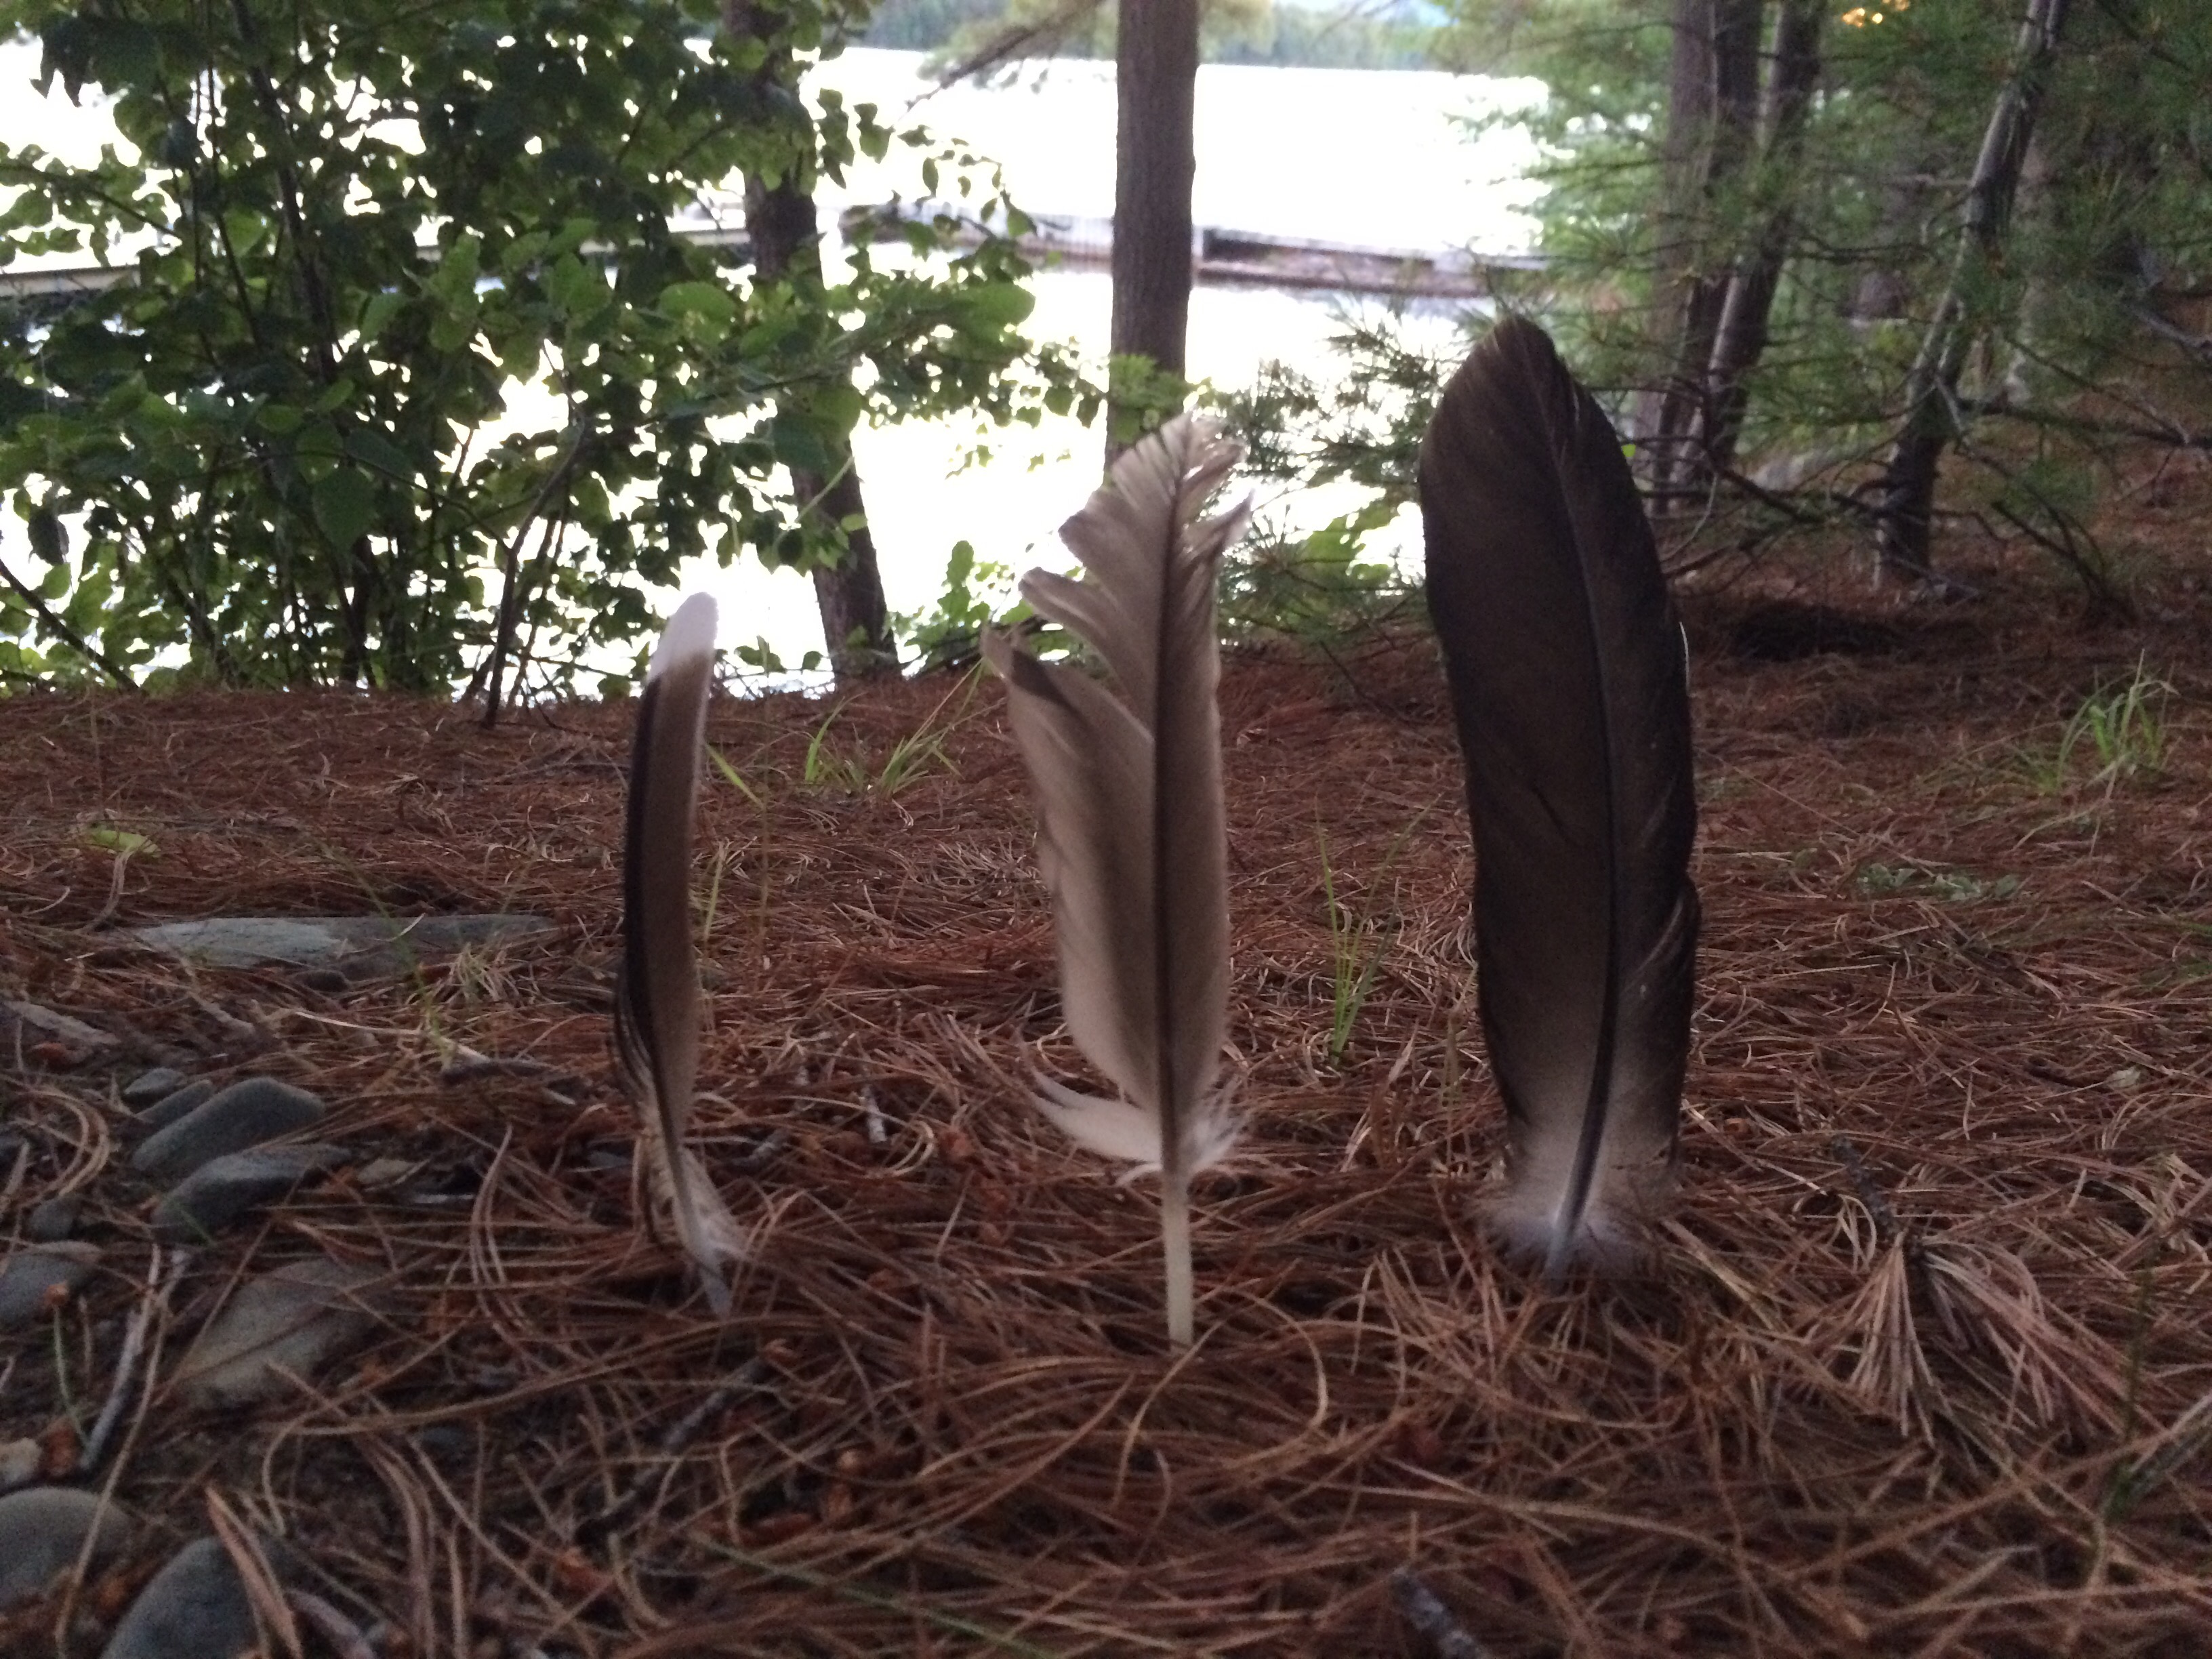
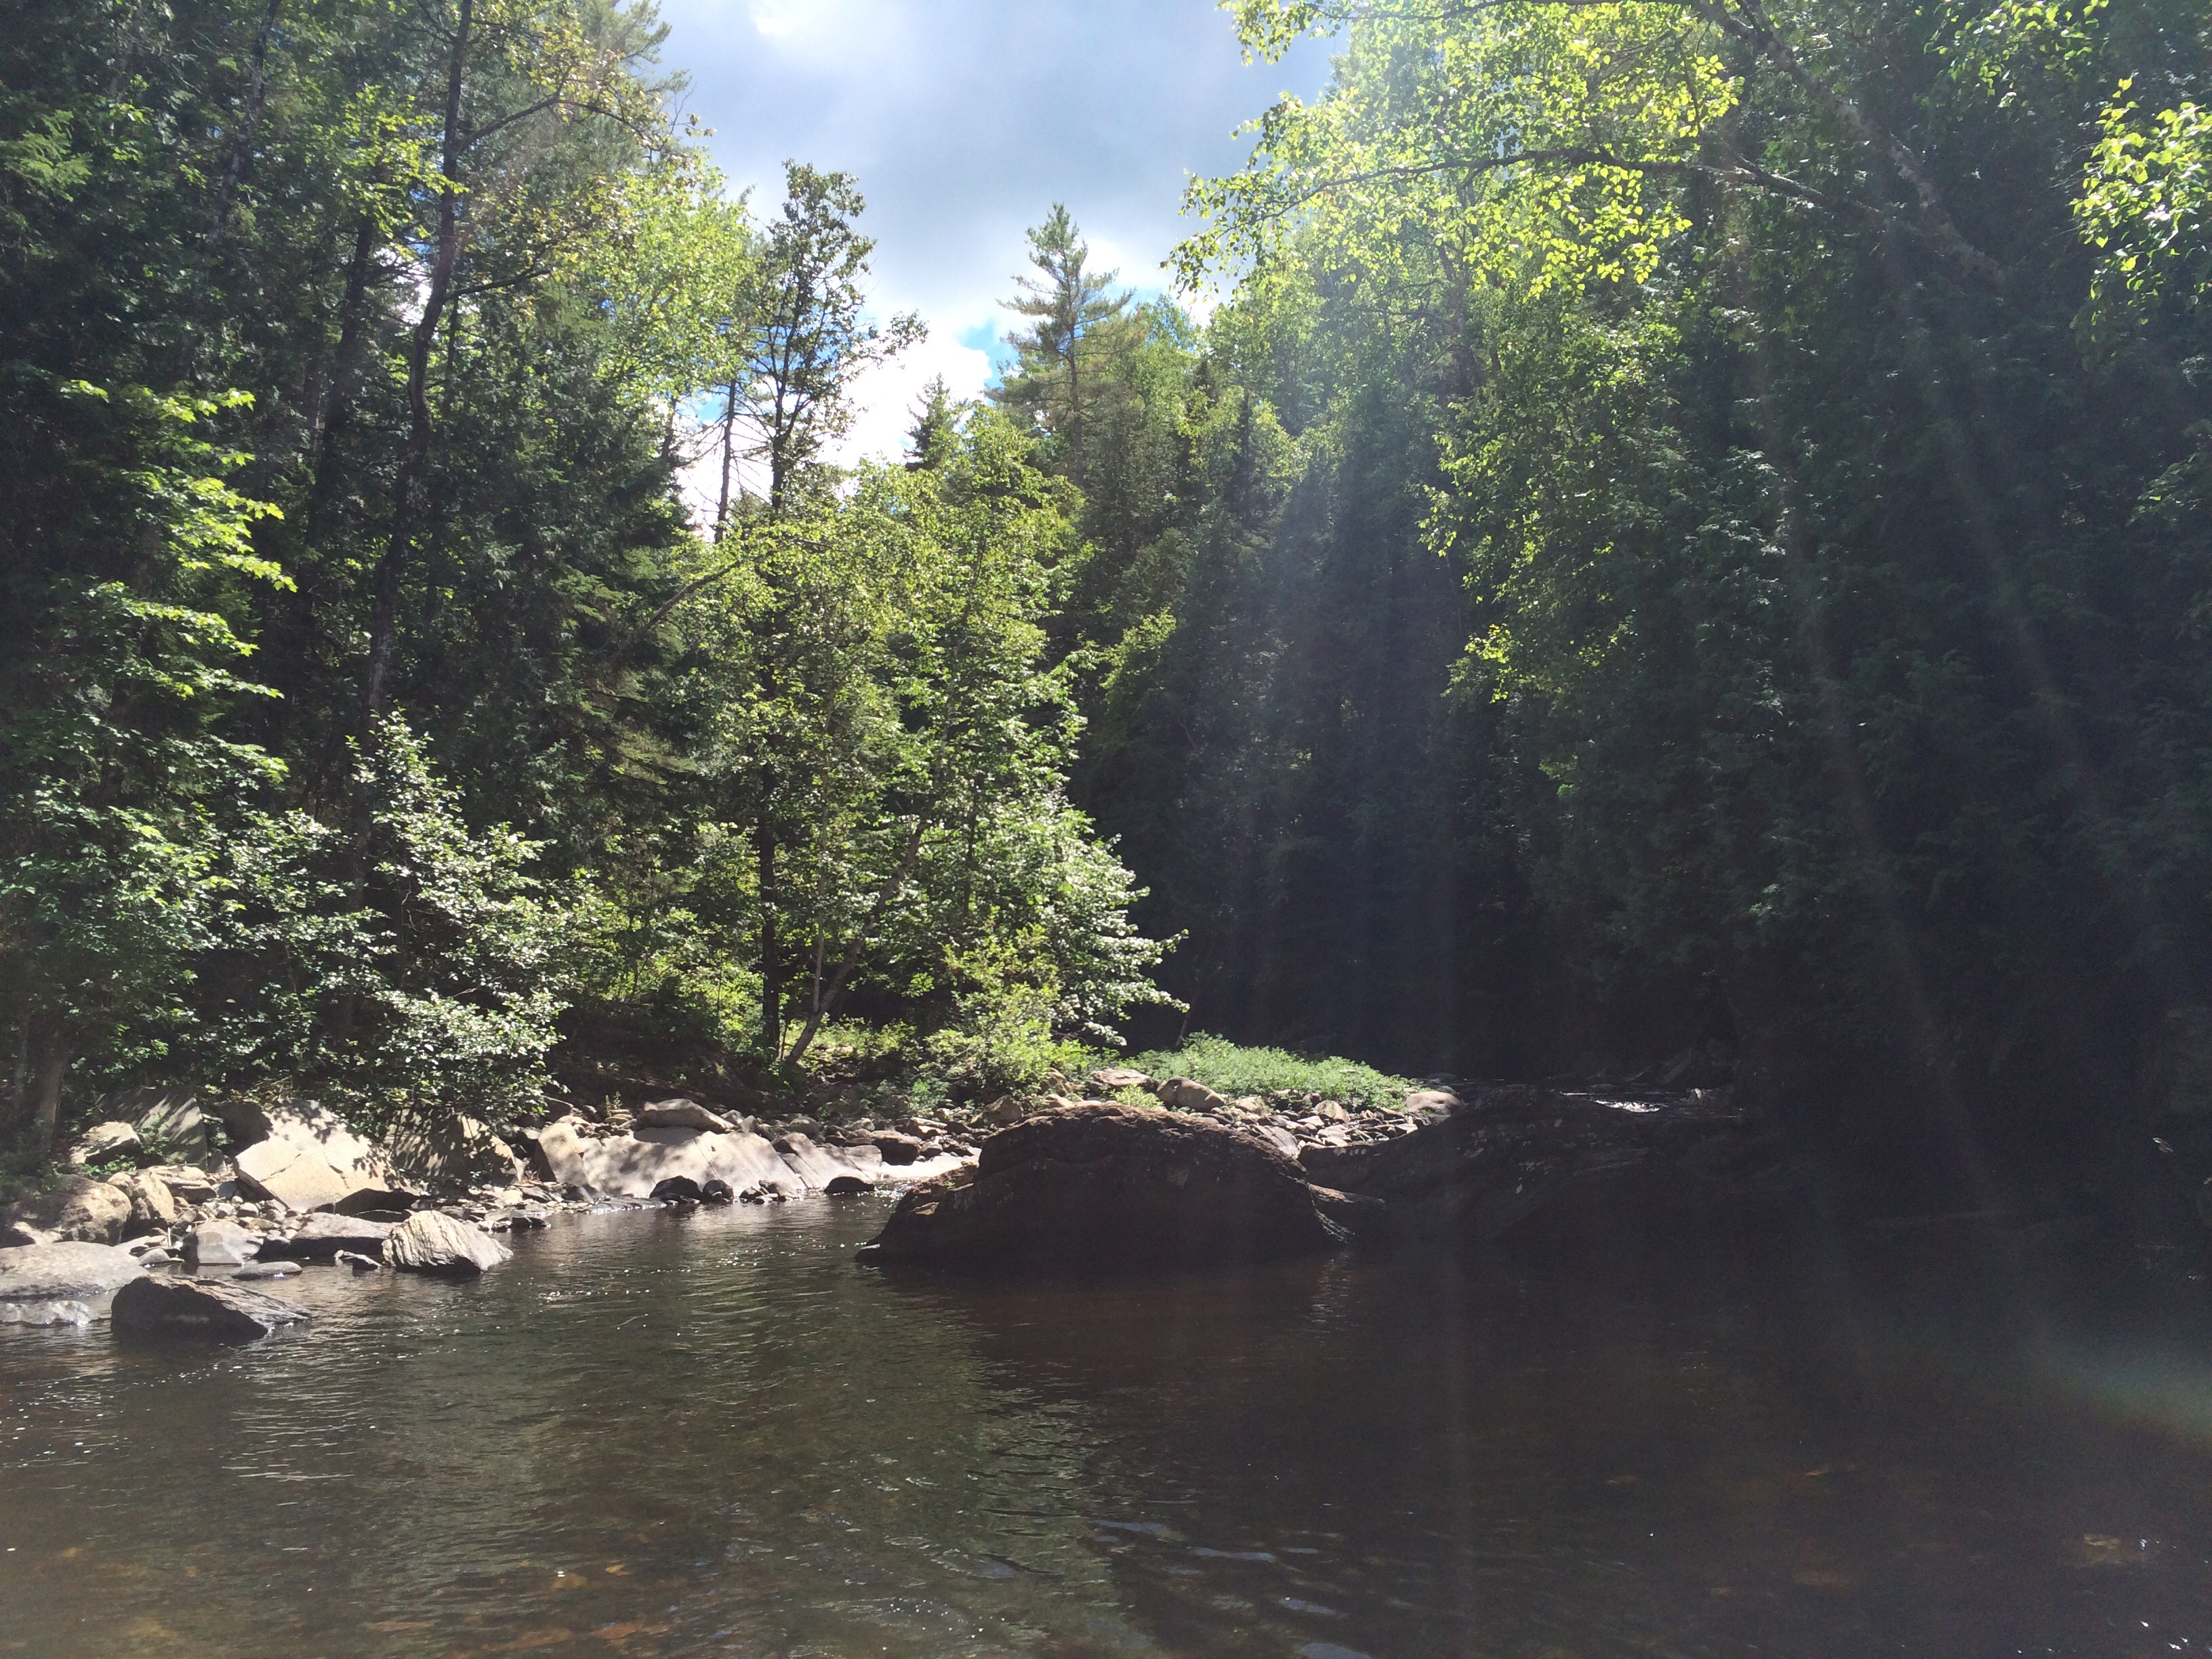
Highlight Reel
It has been such an awesome summer on Moosehead Lake. Here are a few highlights from our summer in Maine!
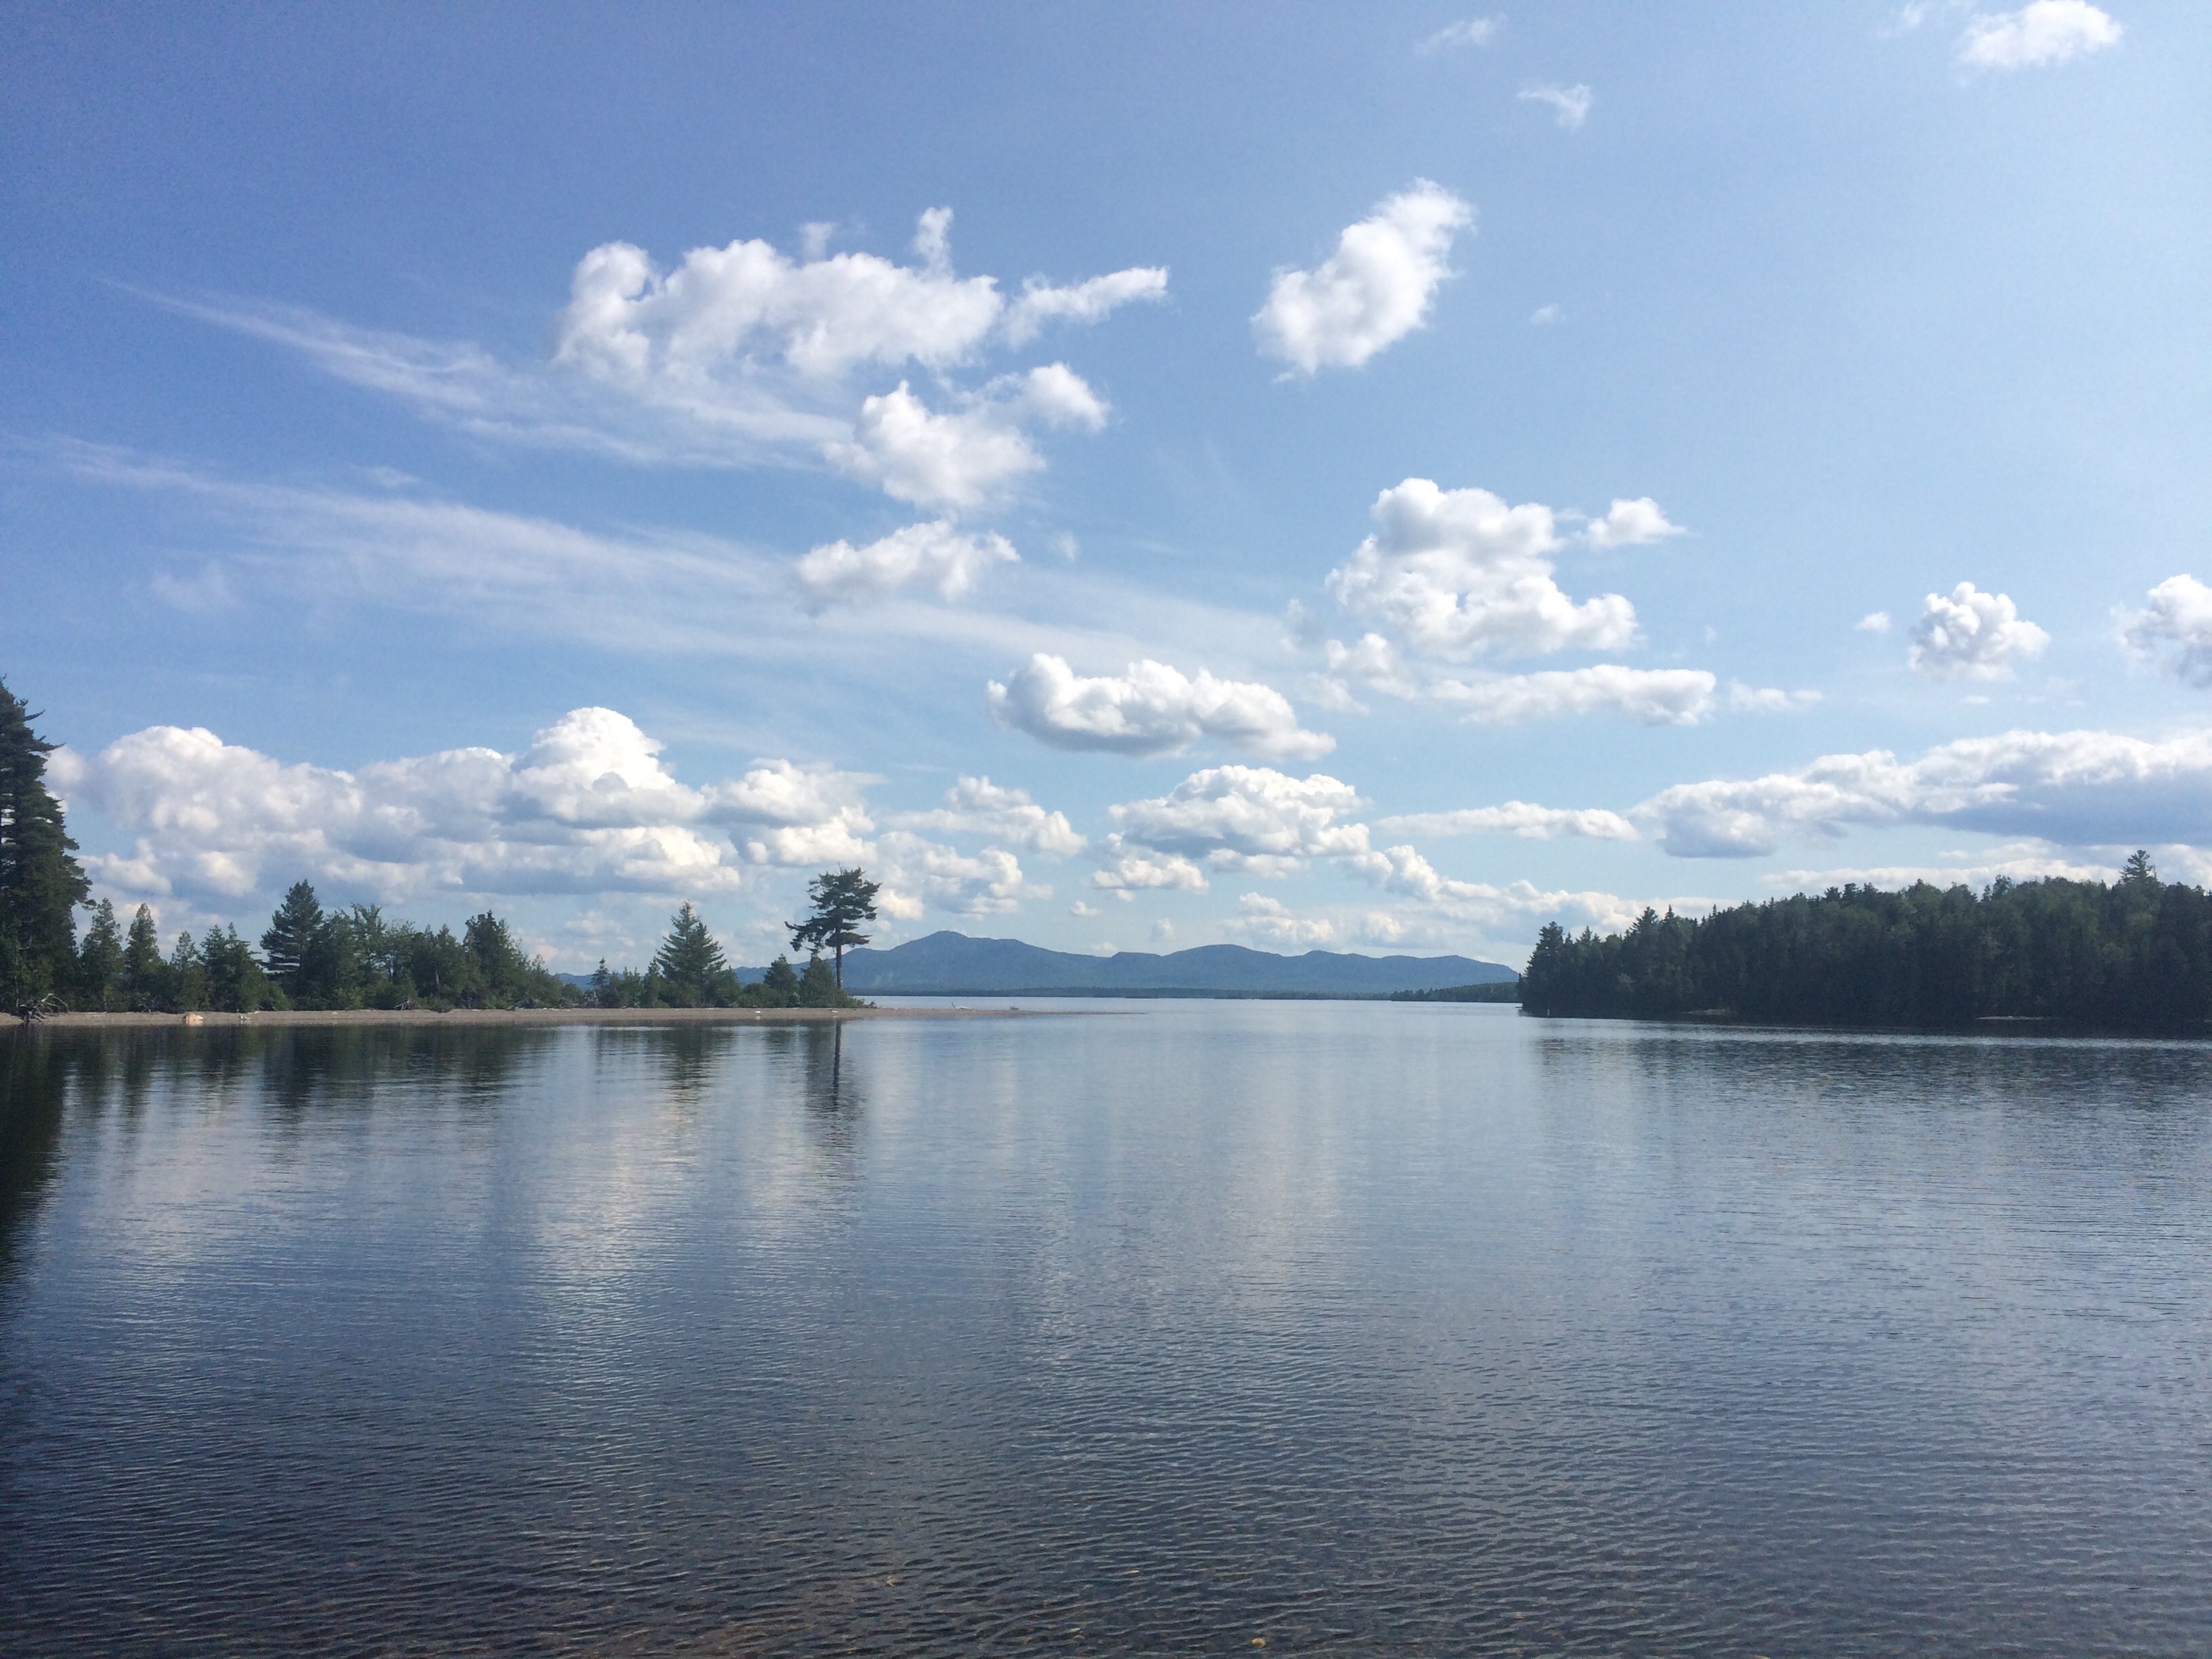


It has been such an awesome summer on Moosehead Lake. Here are a few highlights from our summer in Maine!
It has been a beautiful summer on Moosehead Lake. Here are some of the highlights.


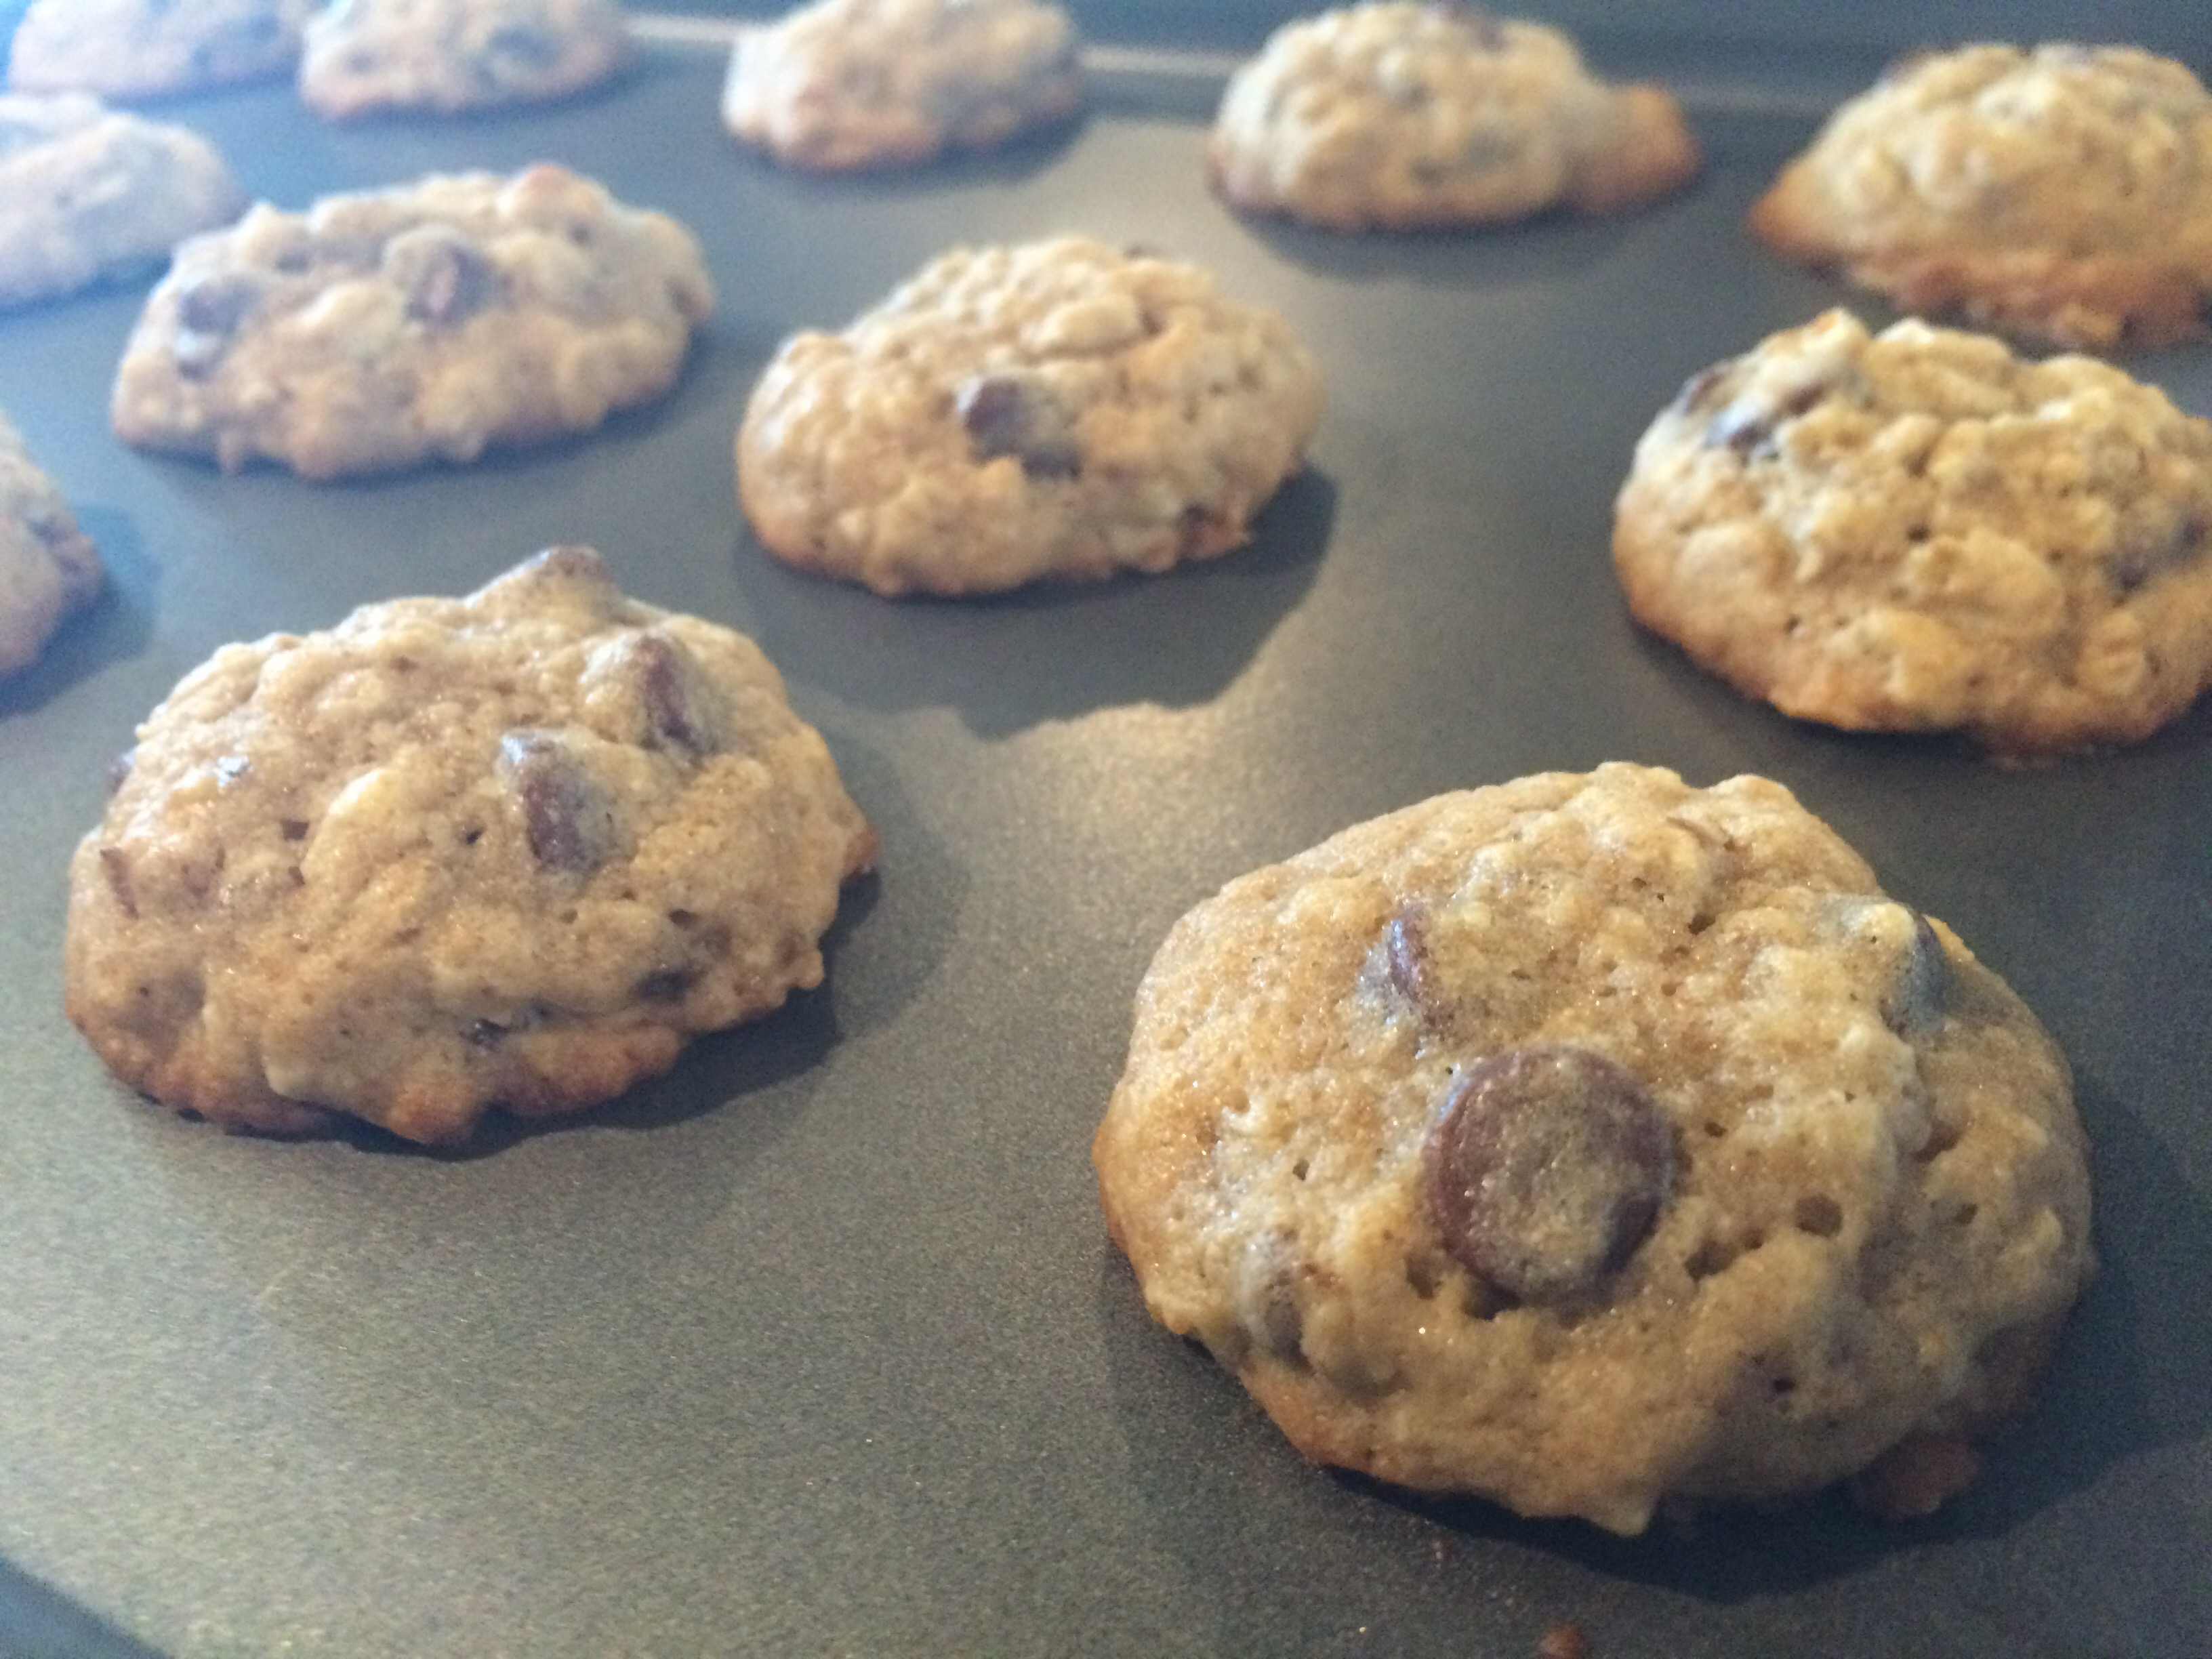
Banana Walnut Chocolate Chip Cookies
I am always looking for new cookie recipes to try, especially ones that sneak in some healthy stuff but are still delicious. This week, I tried a recipe from Martha Stewart that blew me away. These cookies are phenomenal. Imagine you combined a banana bread with an oatmeal chocolate chip cookie. The banana flavor is not too strong, the old-fashioned oats and walnuts give them a nice crunch and who doesn’t love chocolate? I really liked these cookies. I know you will too!
Banana Walnut Chocolate Chip Cookies
Ingredients:
1 Cup All-Purpose Flour
1/2 Cup Whole-Wheat Flour
1 tsp Kosher Salt
1/2 tsp Baking Soda
3/4 Cup (1 1/2 Sticks) Butter, Softened
1/2 Cup Granulated Sugar
1/2 Cup Packed Brown Sugar
1 Large Egg
1 1/2 tsp Vanilla Extract
1/2 cup Mashed Banana (about 1 large)
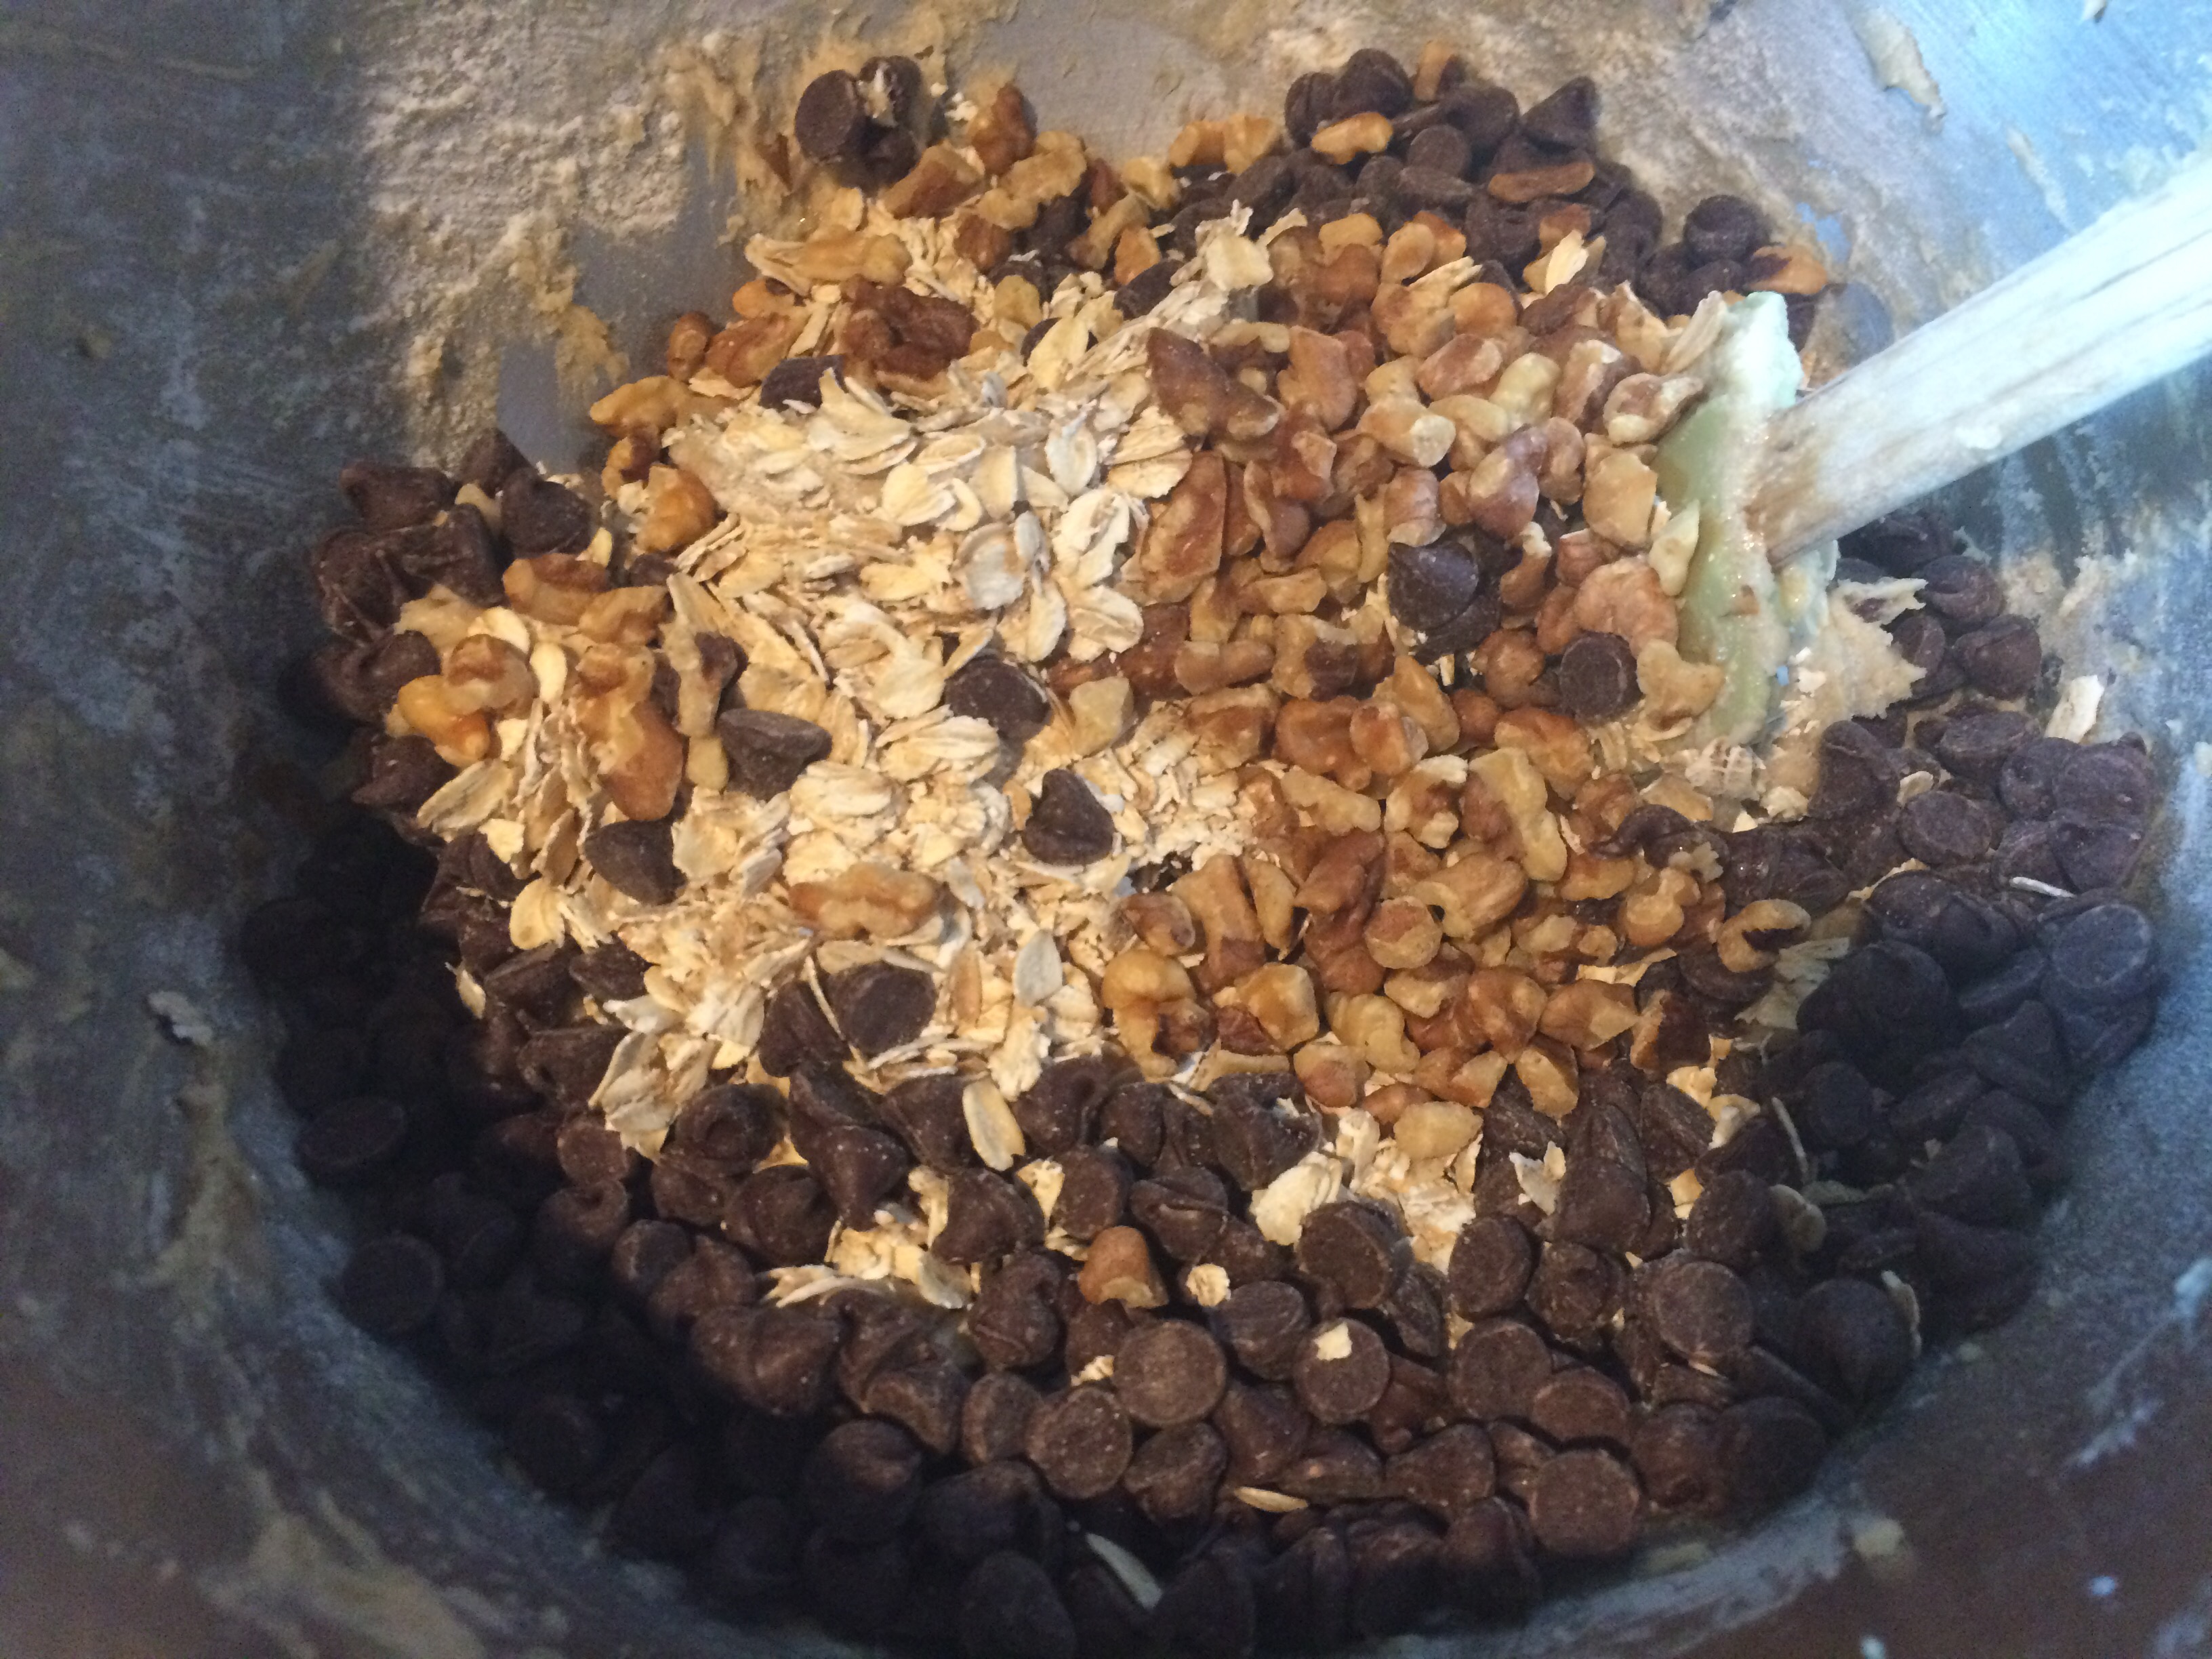
1 Cup Old-Fashioned Rolled Oats
8 Ounces Chocolate Chips (I used Ghiradelli semi-sweet)
1/2 Cup Coarsely Chopped Walnuts (about 2 ounces), Toasted
Directions:
Preheat oven to 375 degrees. Whisk together flours, salt, and baking soda in a small bowl; set aside. Put butter and sugars into the bowl of an electric mixer fitted with the paddle attachment. Mix on medium speed until pale and fluffy. Reduce speed to low. Add egg and vanilla. Mix until combined. Mix in banana. Add flour mixture. Mix until just combined. Stir in oats, chocolate chunks, and walnuts.
Using a 2 tsp disher, drop dough onto baking sheets lined with parchment paper (or roll into balls about one inch in diameter) spacing about 2 inches apart. Bake cookies, rotating sheets halfway through, until golden brown and just set, about 9 minutes. Let cool on sheets on wire racks 5 minutes. Transfer cookies to wire racks; let cool completely. Cookies can be stored in airtight containers up to 2 days.


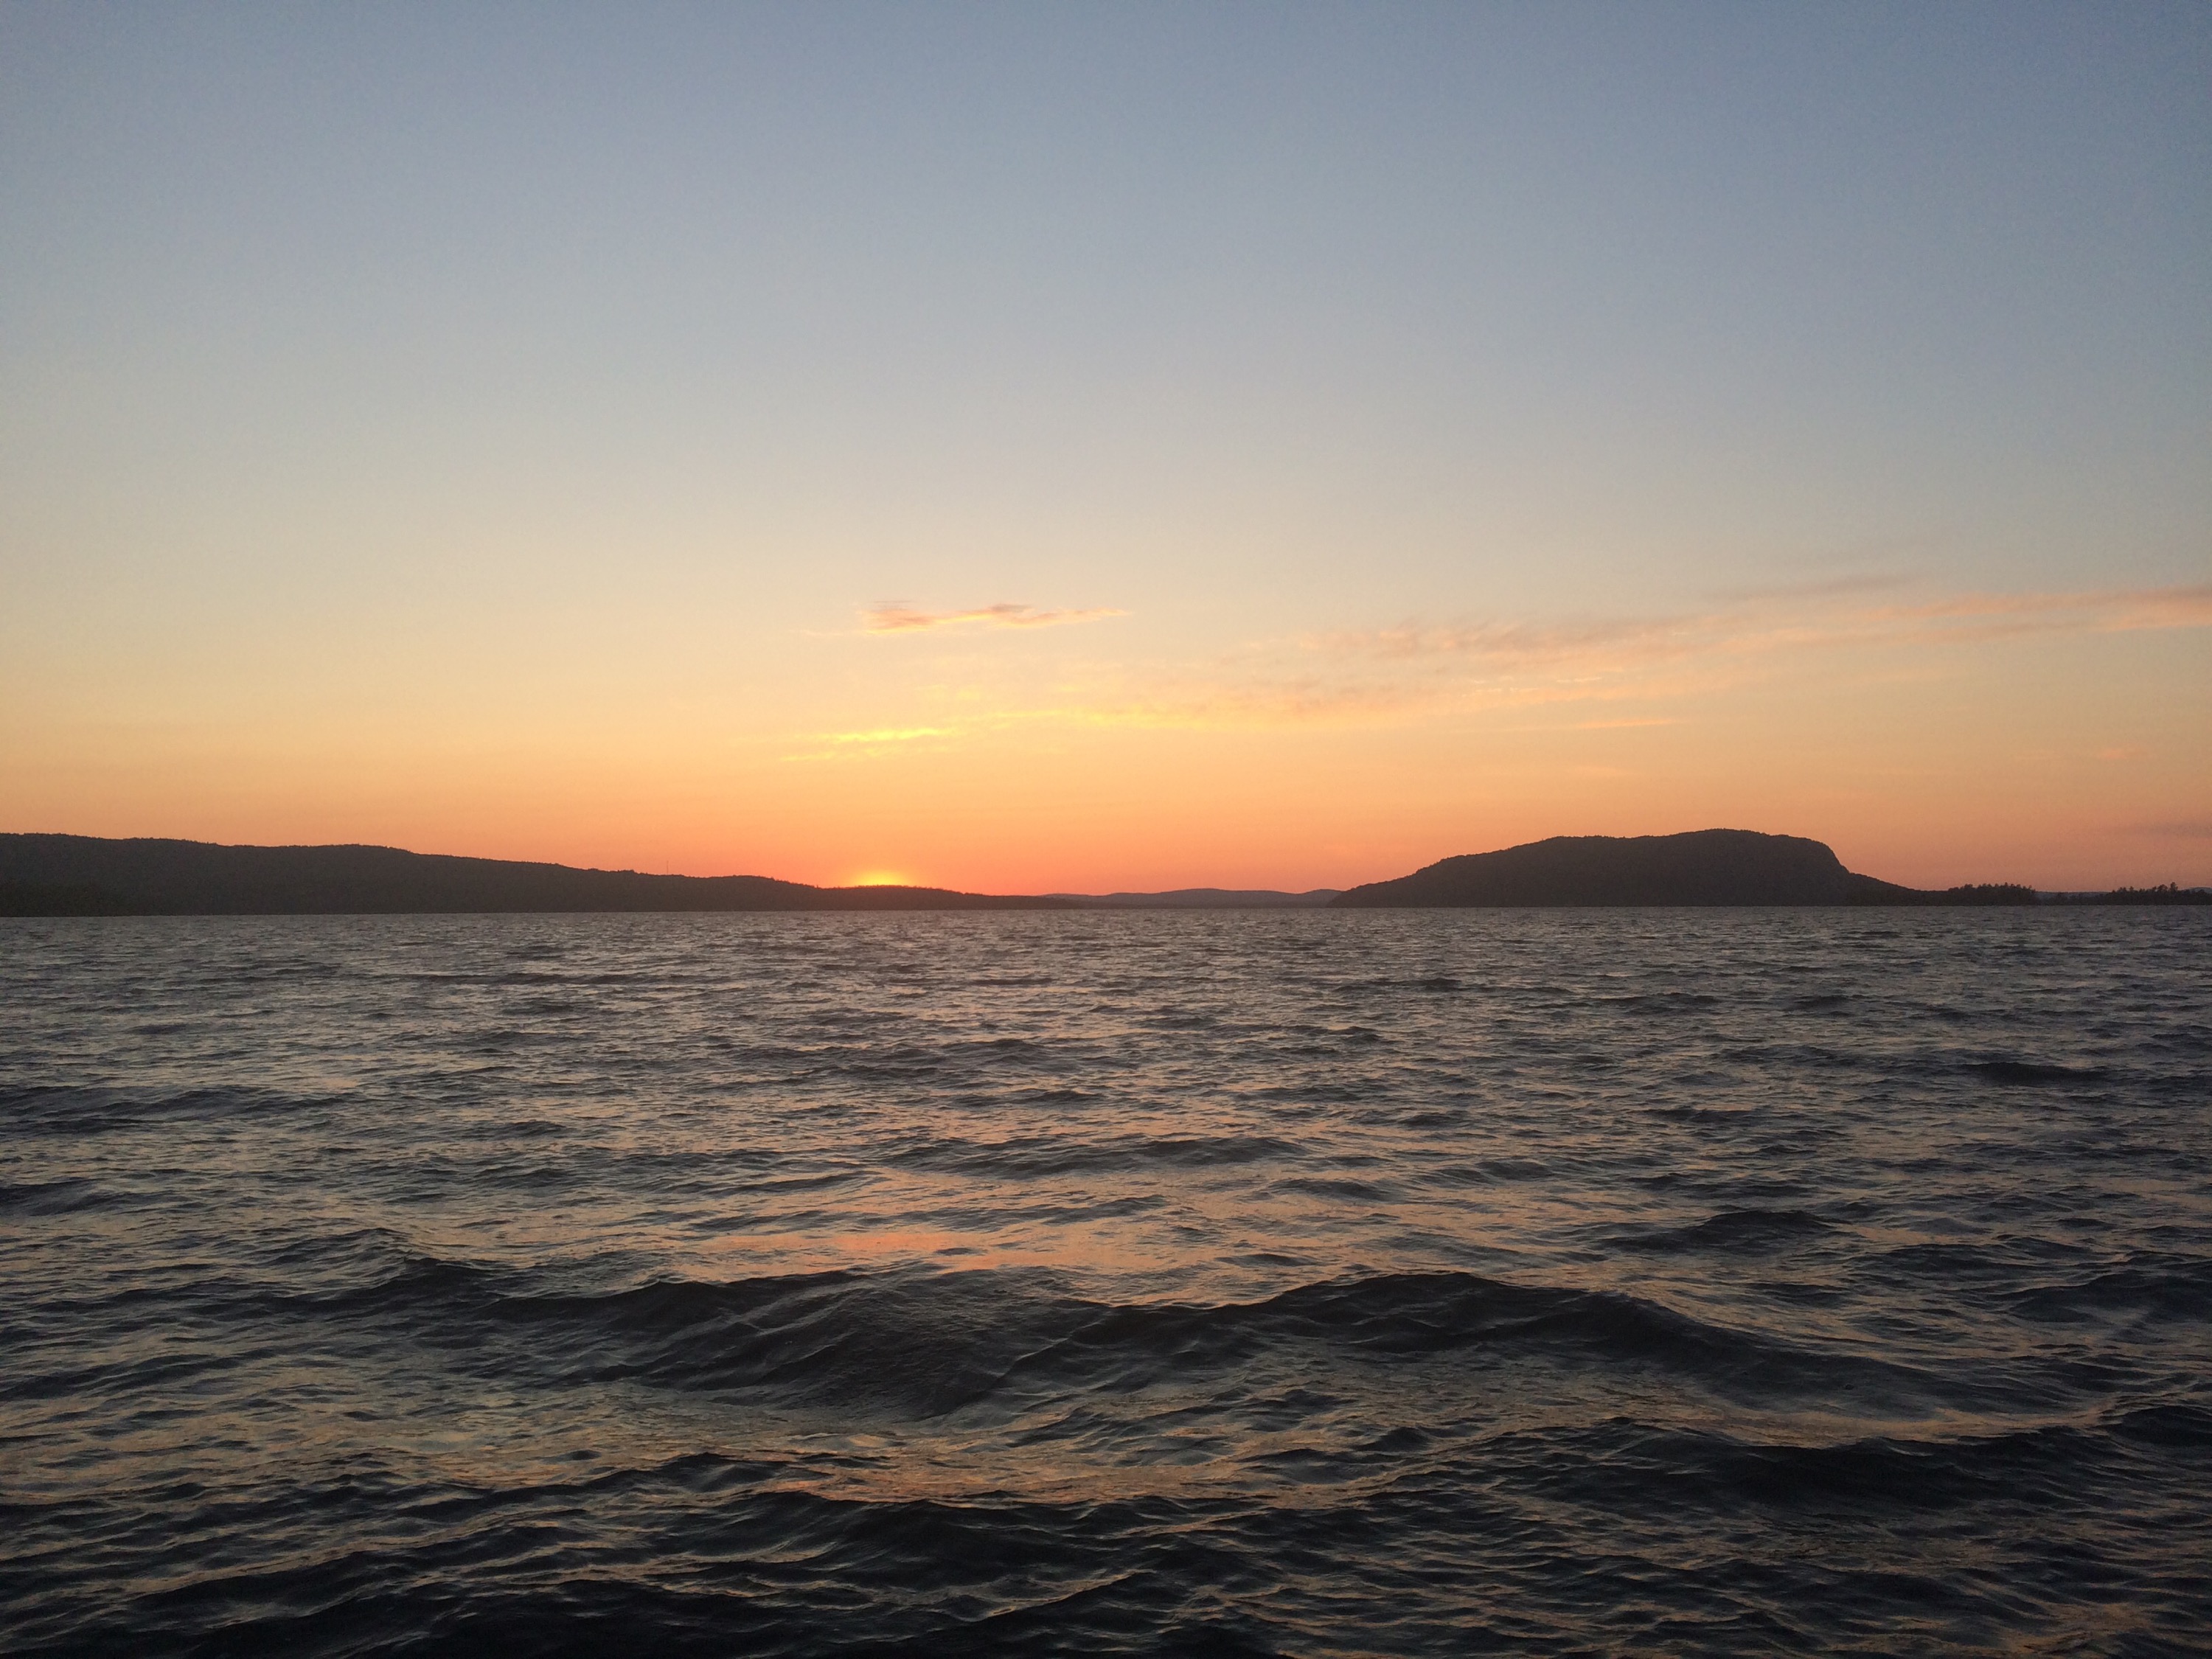
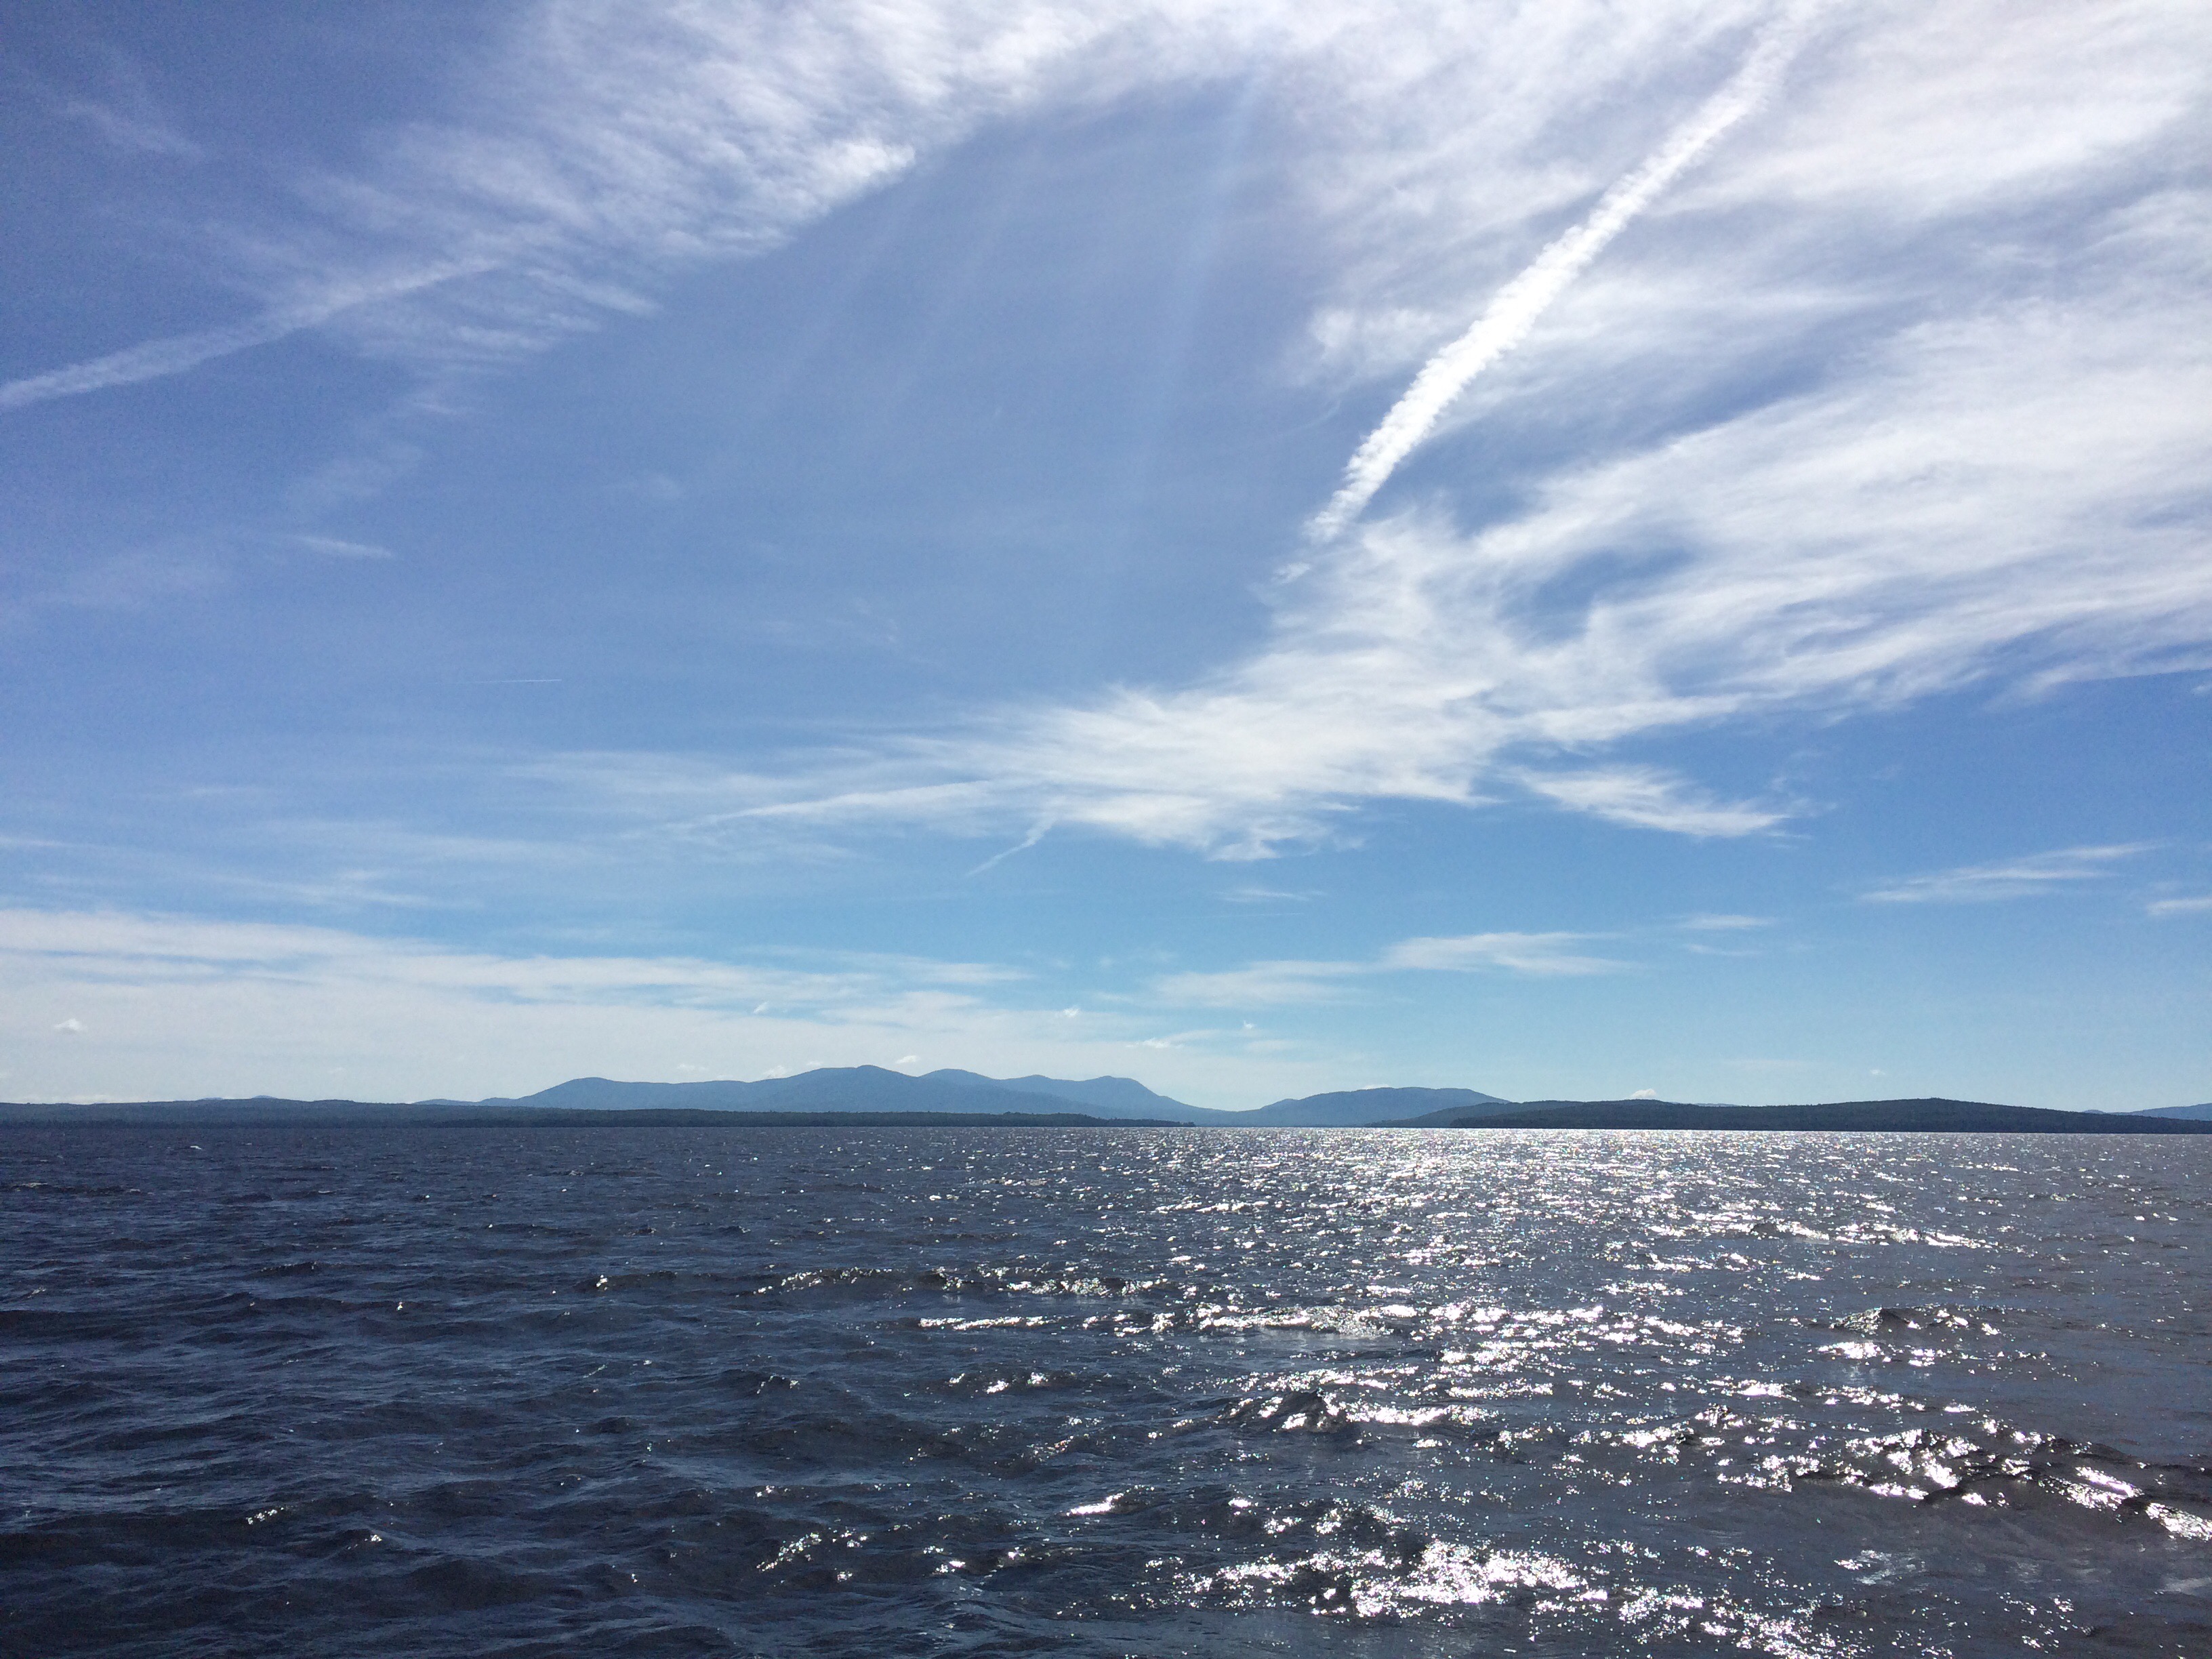
Even after five summers in Rockwood, Maine, I am still struck by the sheer beauty of the Great North Woods and Moosehead Lake. On mornings like this, it is easy to see why this place is called America’s crown jewel.

It’s not just the place, although the scenery is truly magnificent and changes constantly. The people that live here are a true community. Everybody knows everyone else and people wave to you as you drive down the road. As I stop in the Post Office to pick up the mail, a friendly golden retriever pokes his nose through from the opposite side of the mailbox to say hello and give me a sniff.

I head across the street to the Kineo Dock and enjoy the gorgeous view while I finish my morning coffee. Mount Kineo towers above the town of Rockwood and Moosehead Lake like a cathedral, beautiful and majestic.

I enjoy watching the few boats come and go and listening to the sound of the waves on the shore. I feel like I could sit here all day and watch the clouds blow by, one by one.

After what seems like a peaceful eternity, I pick up my empty coffee cup and start heading back to camp. I stop at the local store on my way to pick up a few things and catch up on the local gossip. There is going to be live music and a celebration at the local bar and grill tonight, maybe I will go.

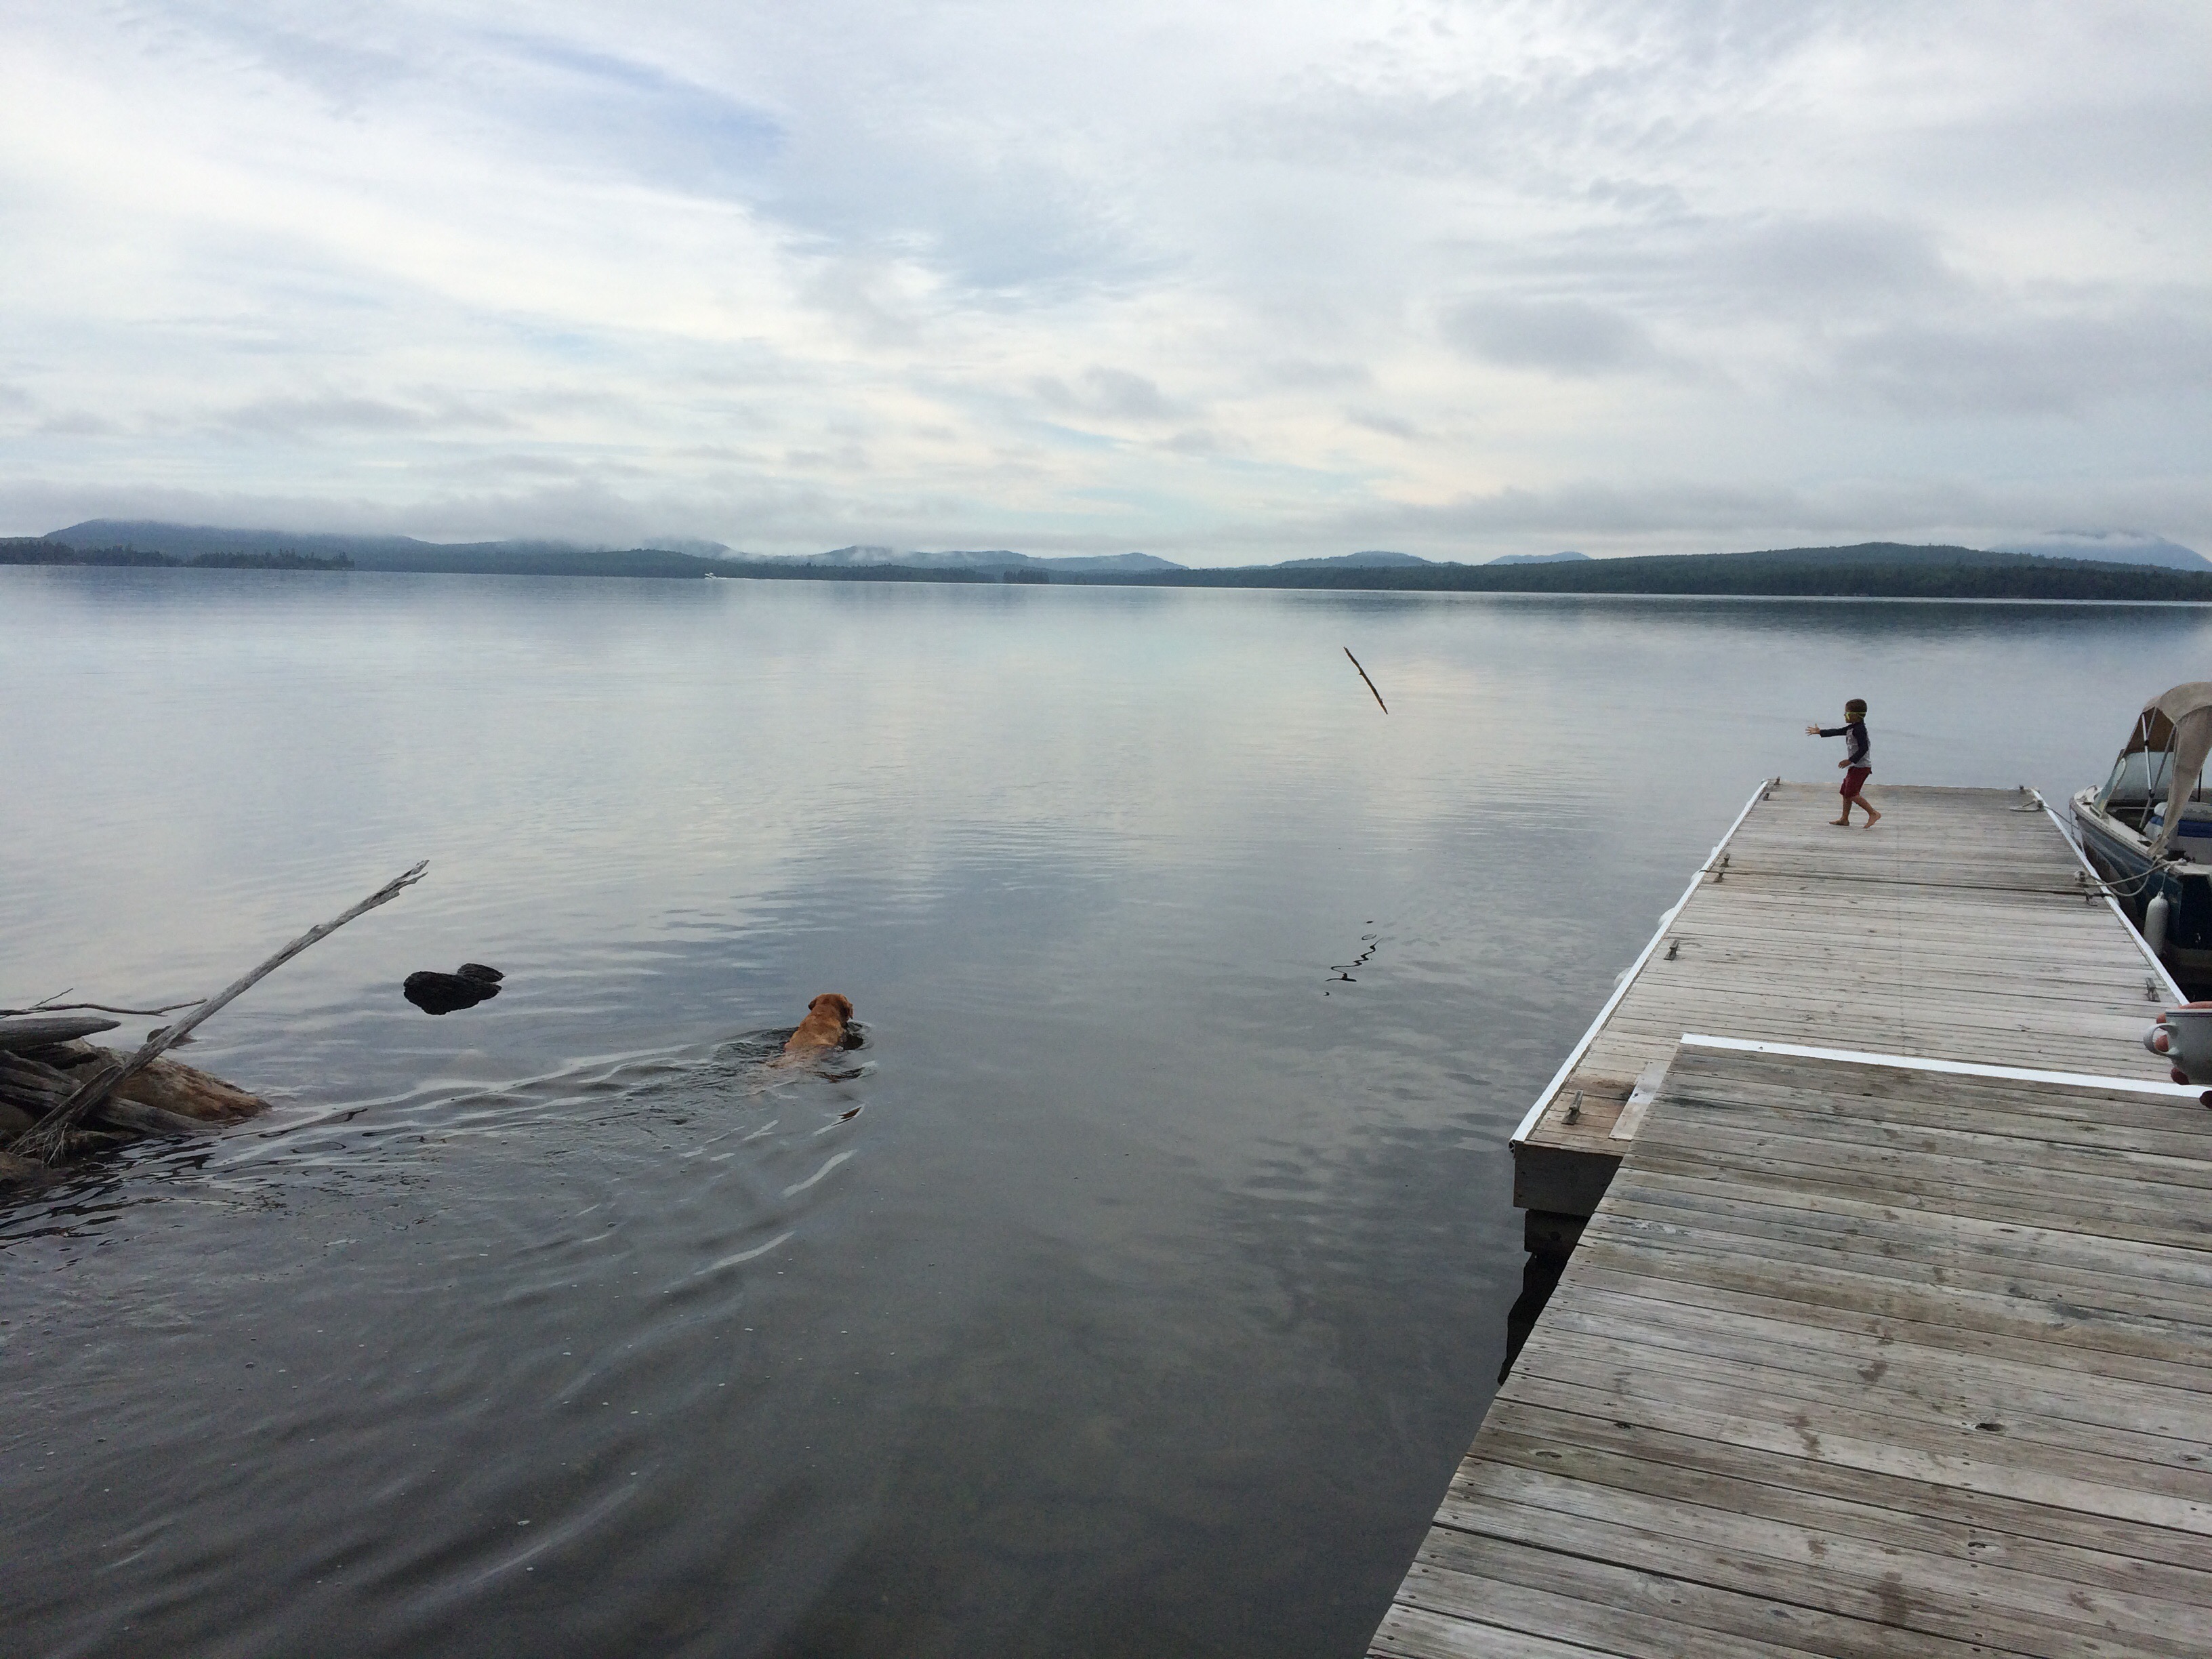
As I pull off the tar onto the gravel road leading to camp, I reflect on the last five summers spent on Moosehead Lake with my family. I feel grateful my wife and children have been able to spend their summers surrounded by natural beauty, far away from the stresses and worries of the big city. We are truly lucky to have found a life filled with hiking through the forest, swimming in the lake, picking blueberries, catching frogs and skipping stones here in Rockwood, Maine.

It’s been a beautiful week on Moosehead Lake. It’s hard to believe that the summer is almost over. There is a feeling of change in the air, of seasons shifting and changing weather. It is about this time every year that I smoke the salmon and trout that has not found another purpose in our summer menu.
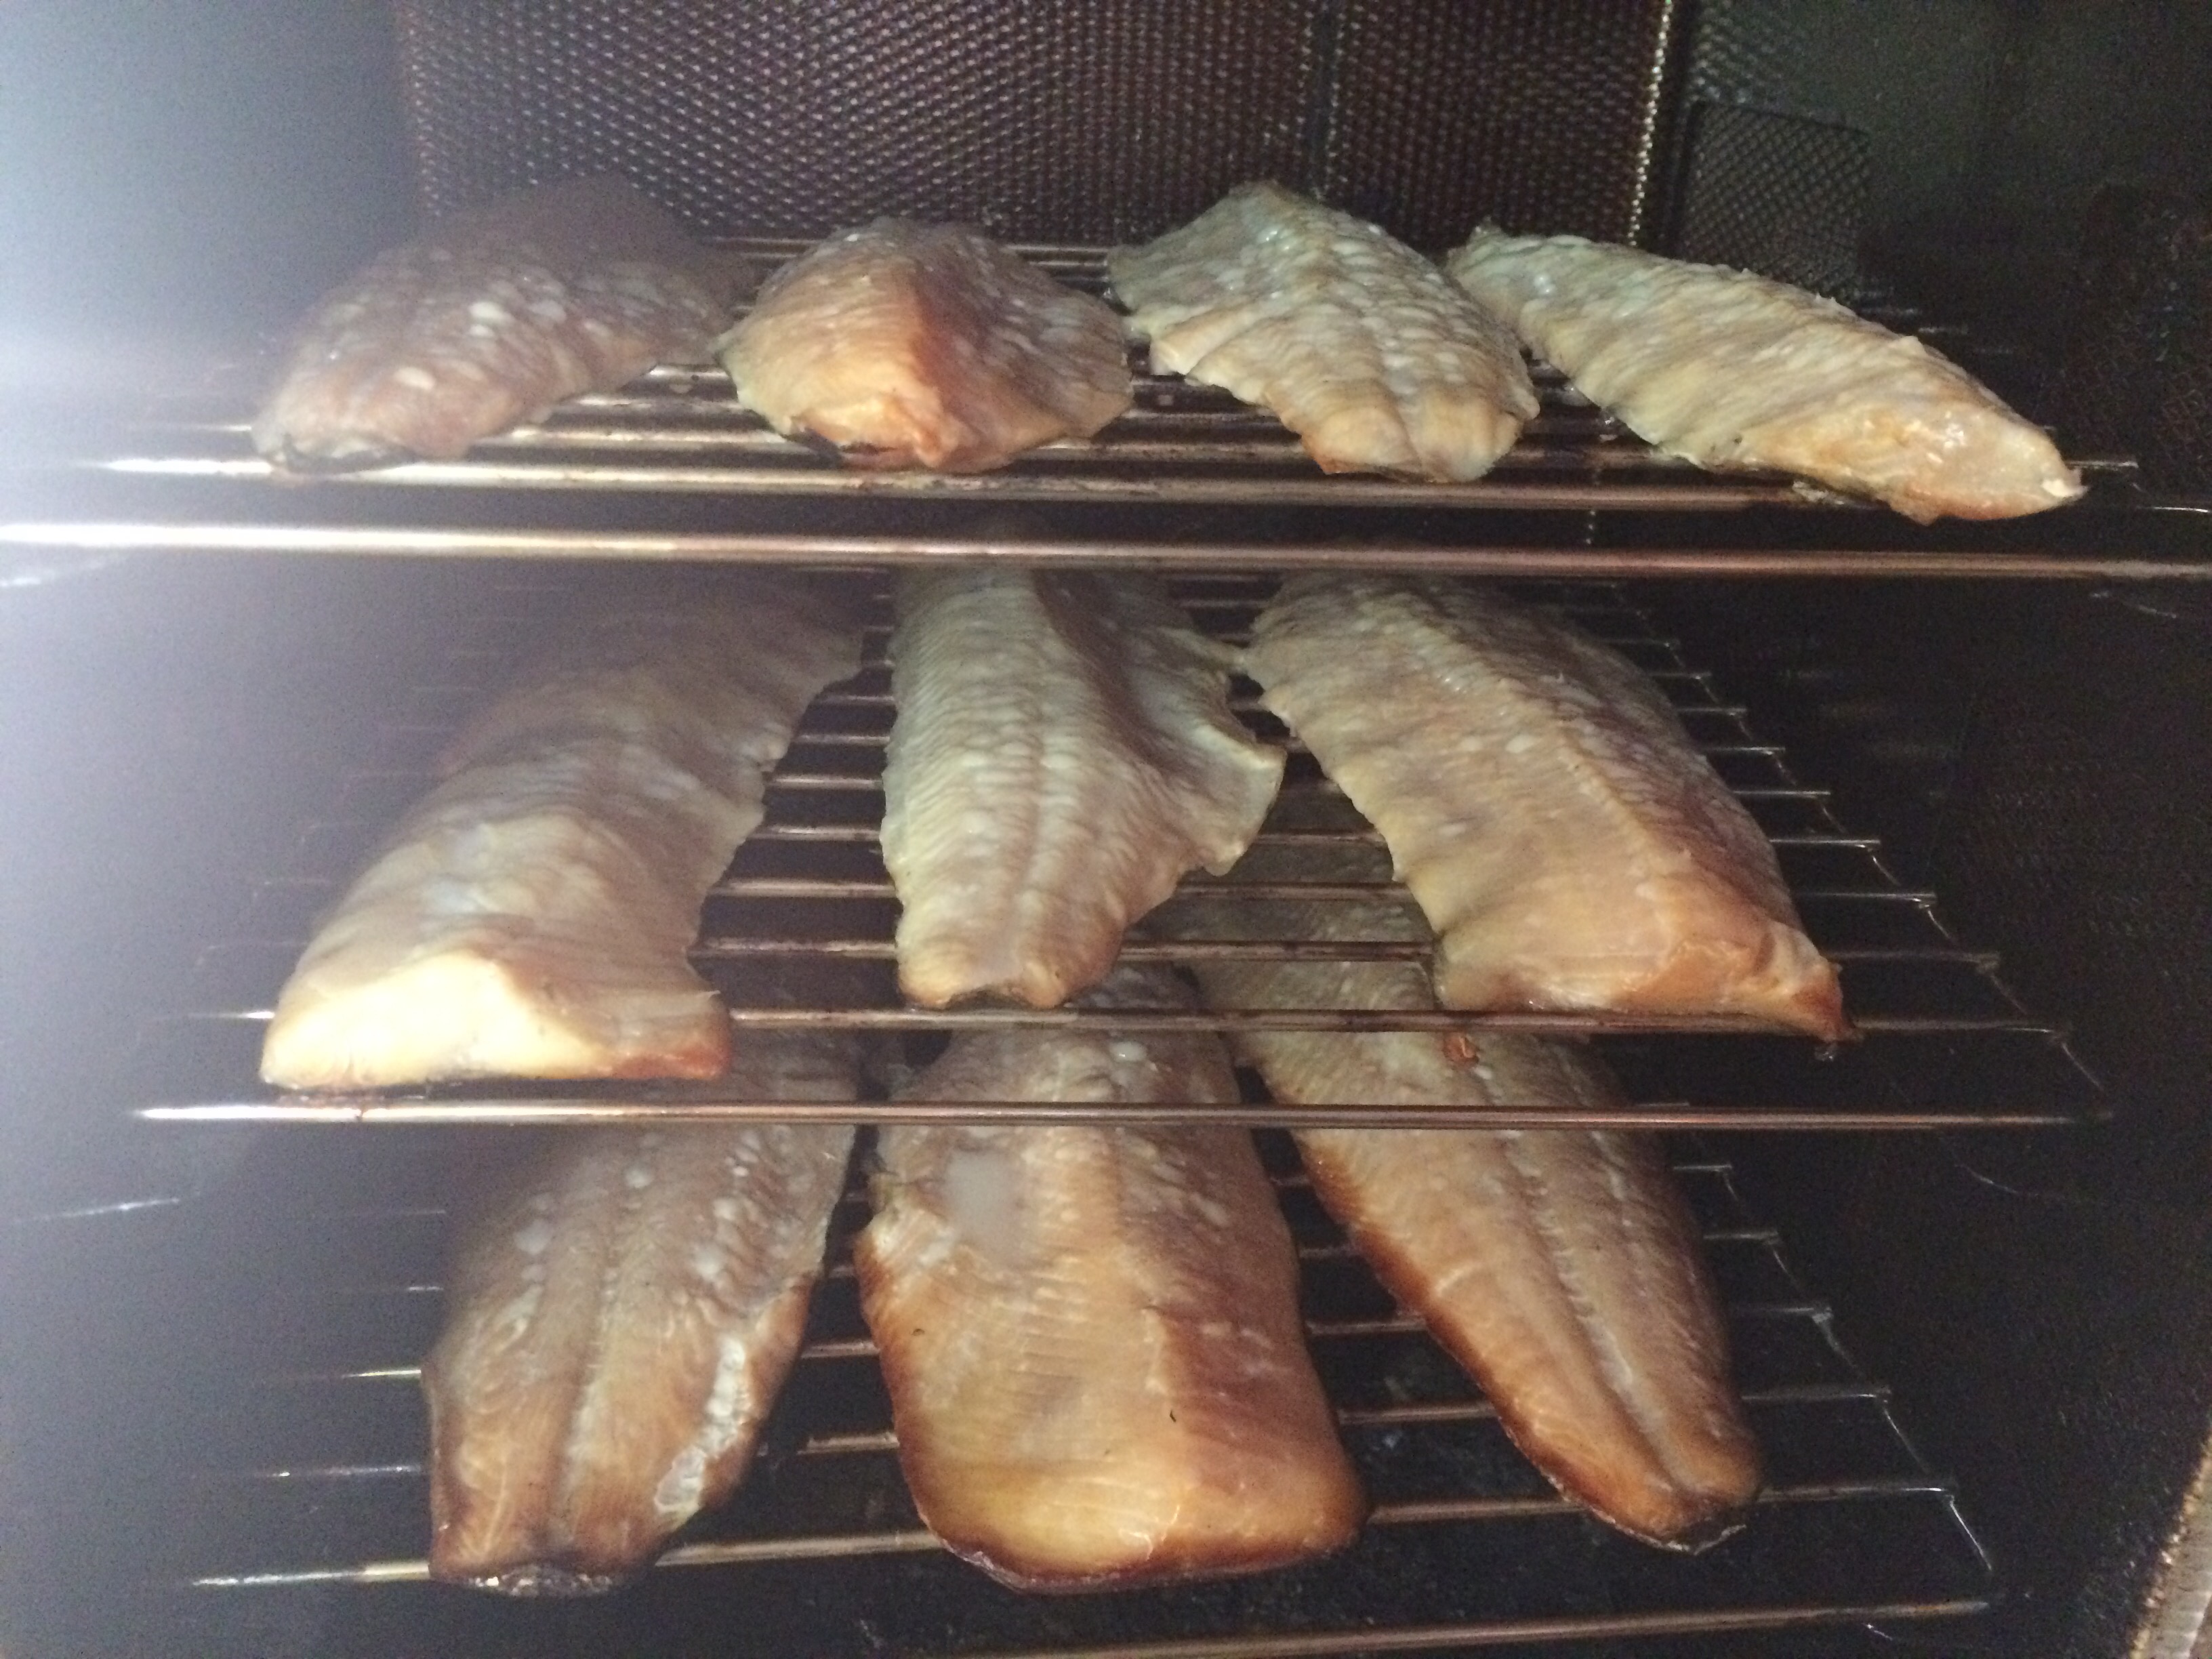
Every year I have been here, I have learned a little more about this process. Every year I have made minor adjustments to my technique that improved the final product. This is my fifth year cleaning, brining and smoking fish from Moosehead Lake and I am thrilled to report that it is the best ever. I am excited to share my technique with you. I hope you enjoy it as much as I have.
Smoked Fish
Total time: 5 hours
Step 1: Make the brine
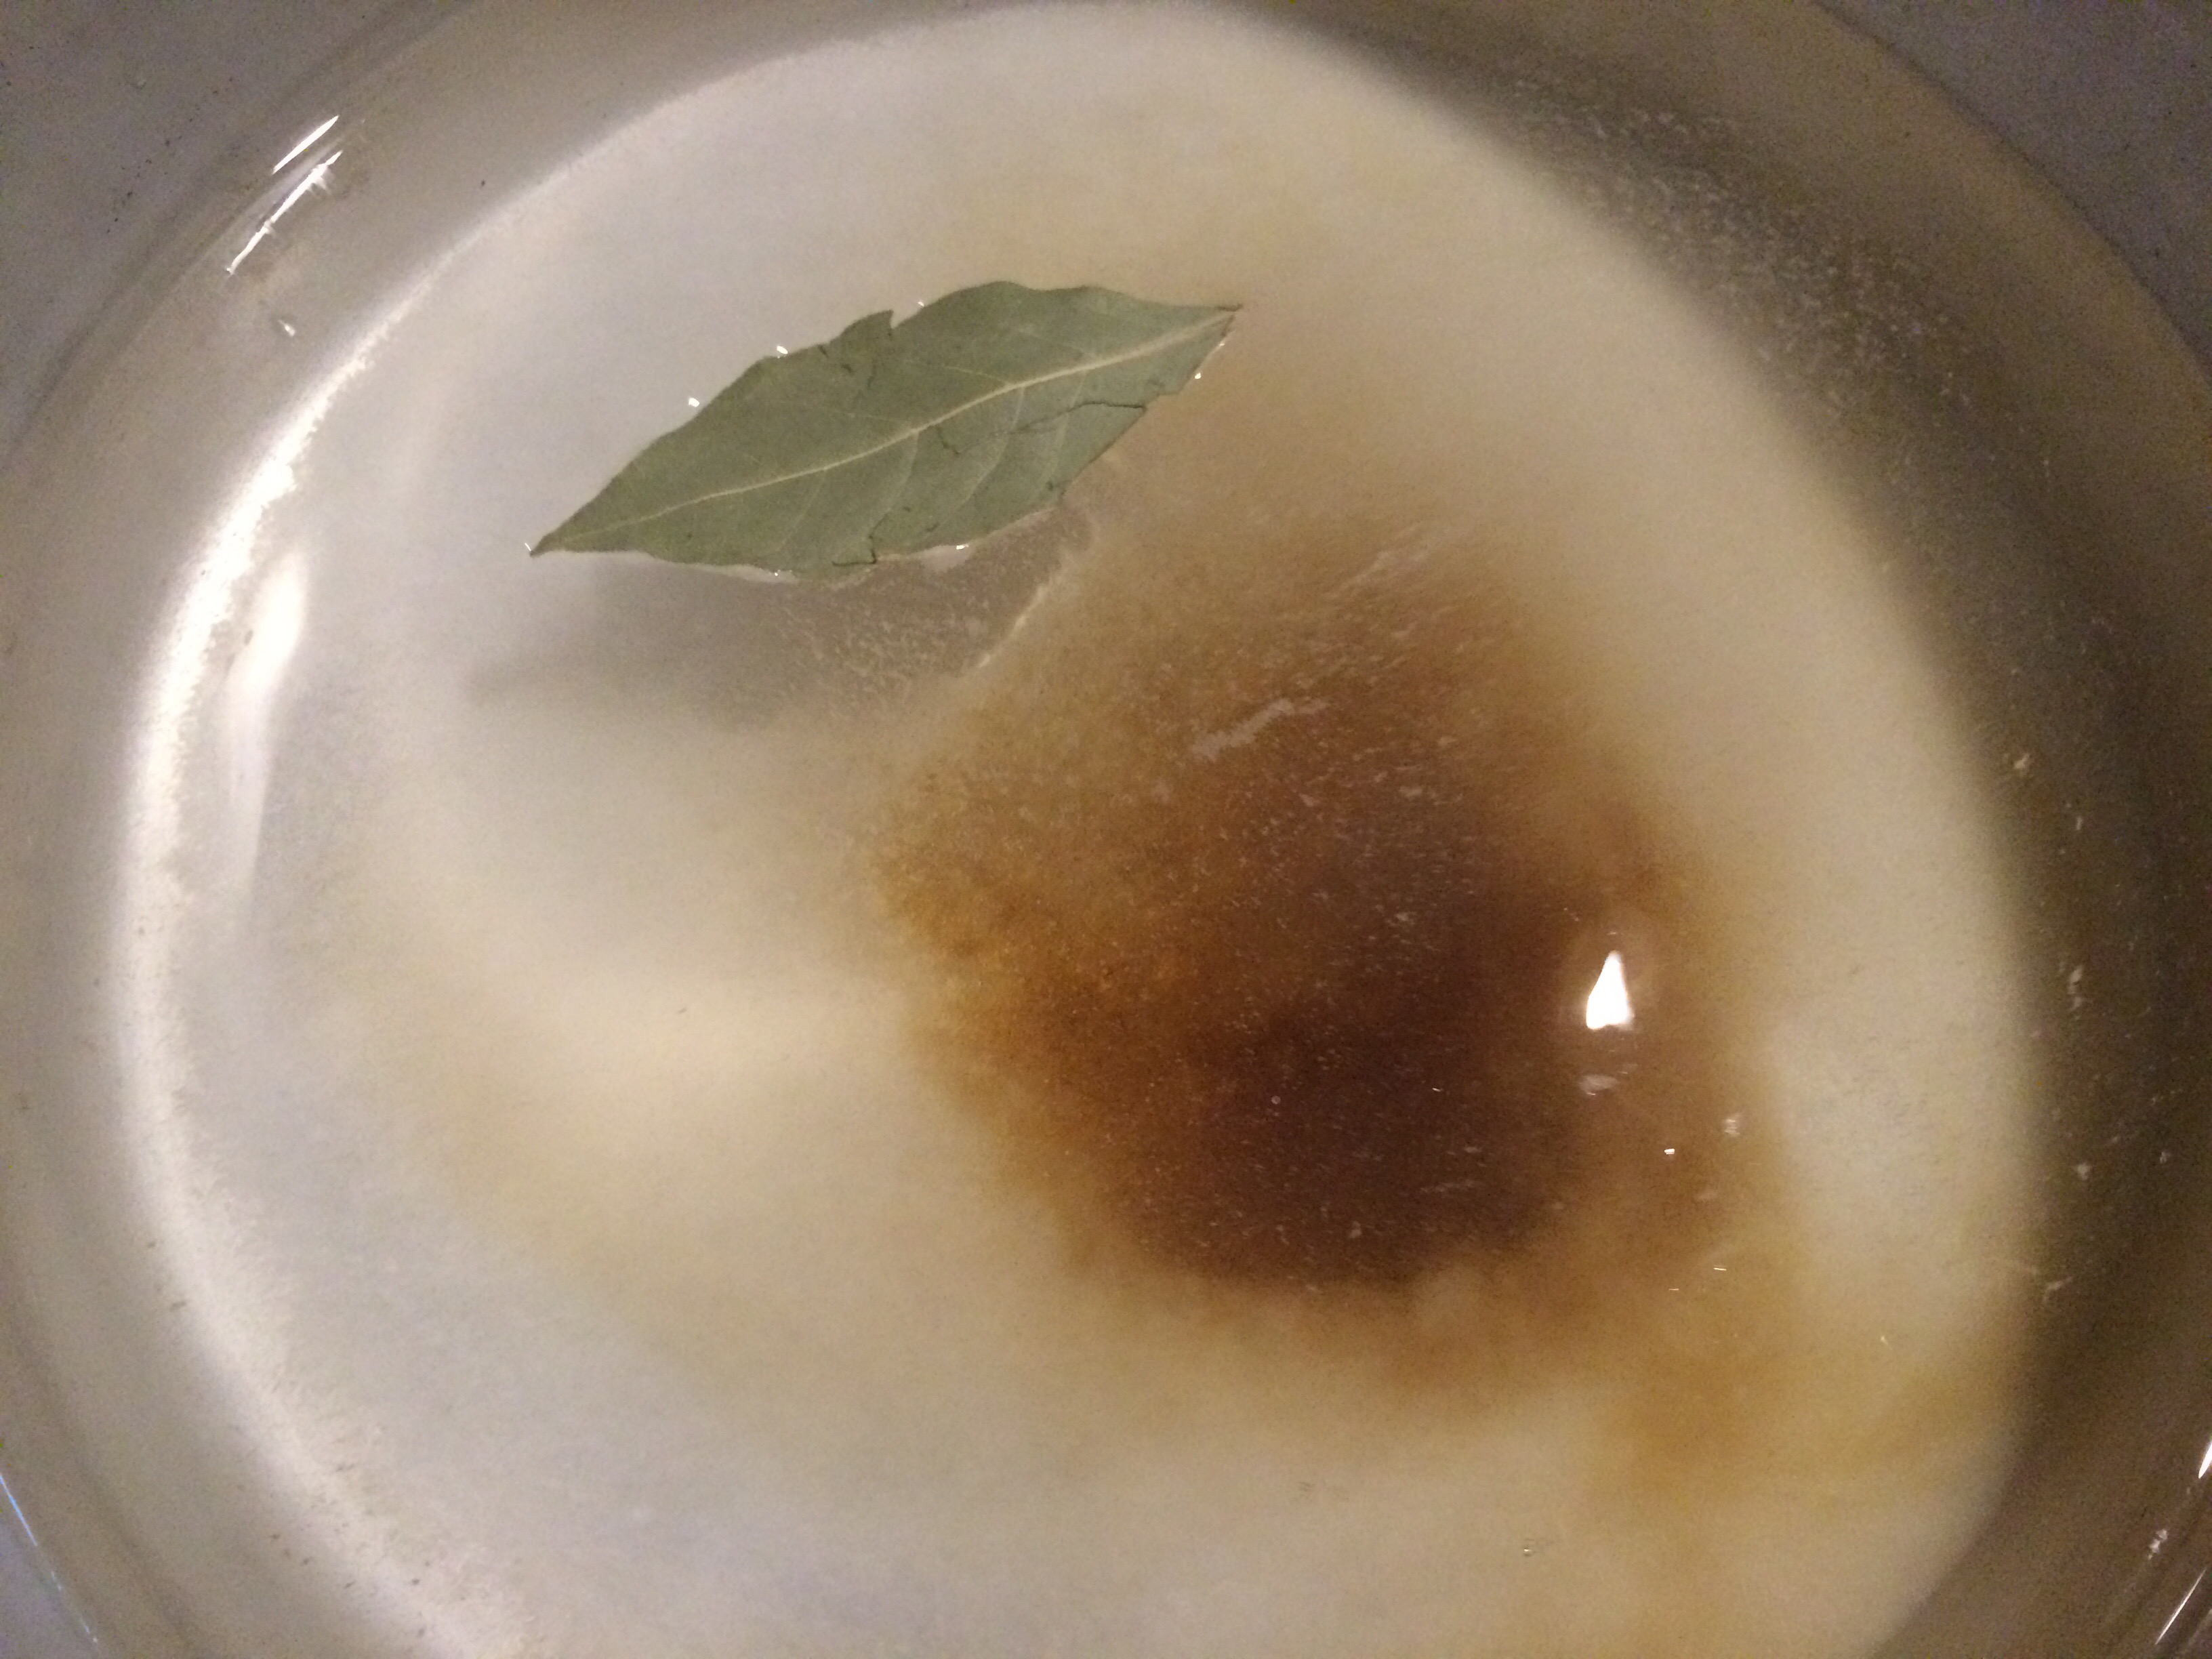
Ingredients:
8 Cups Water
1 Cup Kosher Salt
2 Tbsp Brown Sugar
1 Bay Leaf
Directions:
Combine all ingredients in a pot and bring to a boil, stirring occasionally. Remove from heat and cool to room temperature or colder.
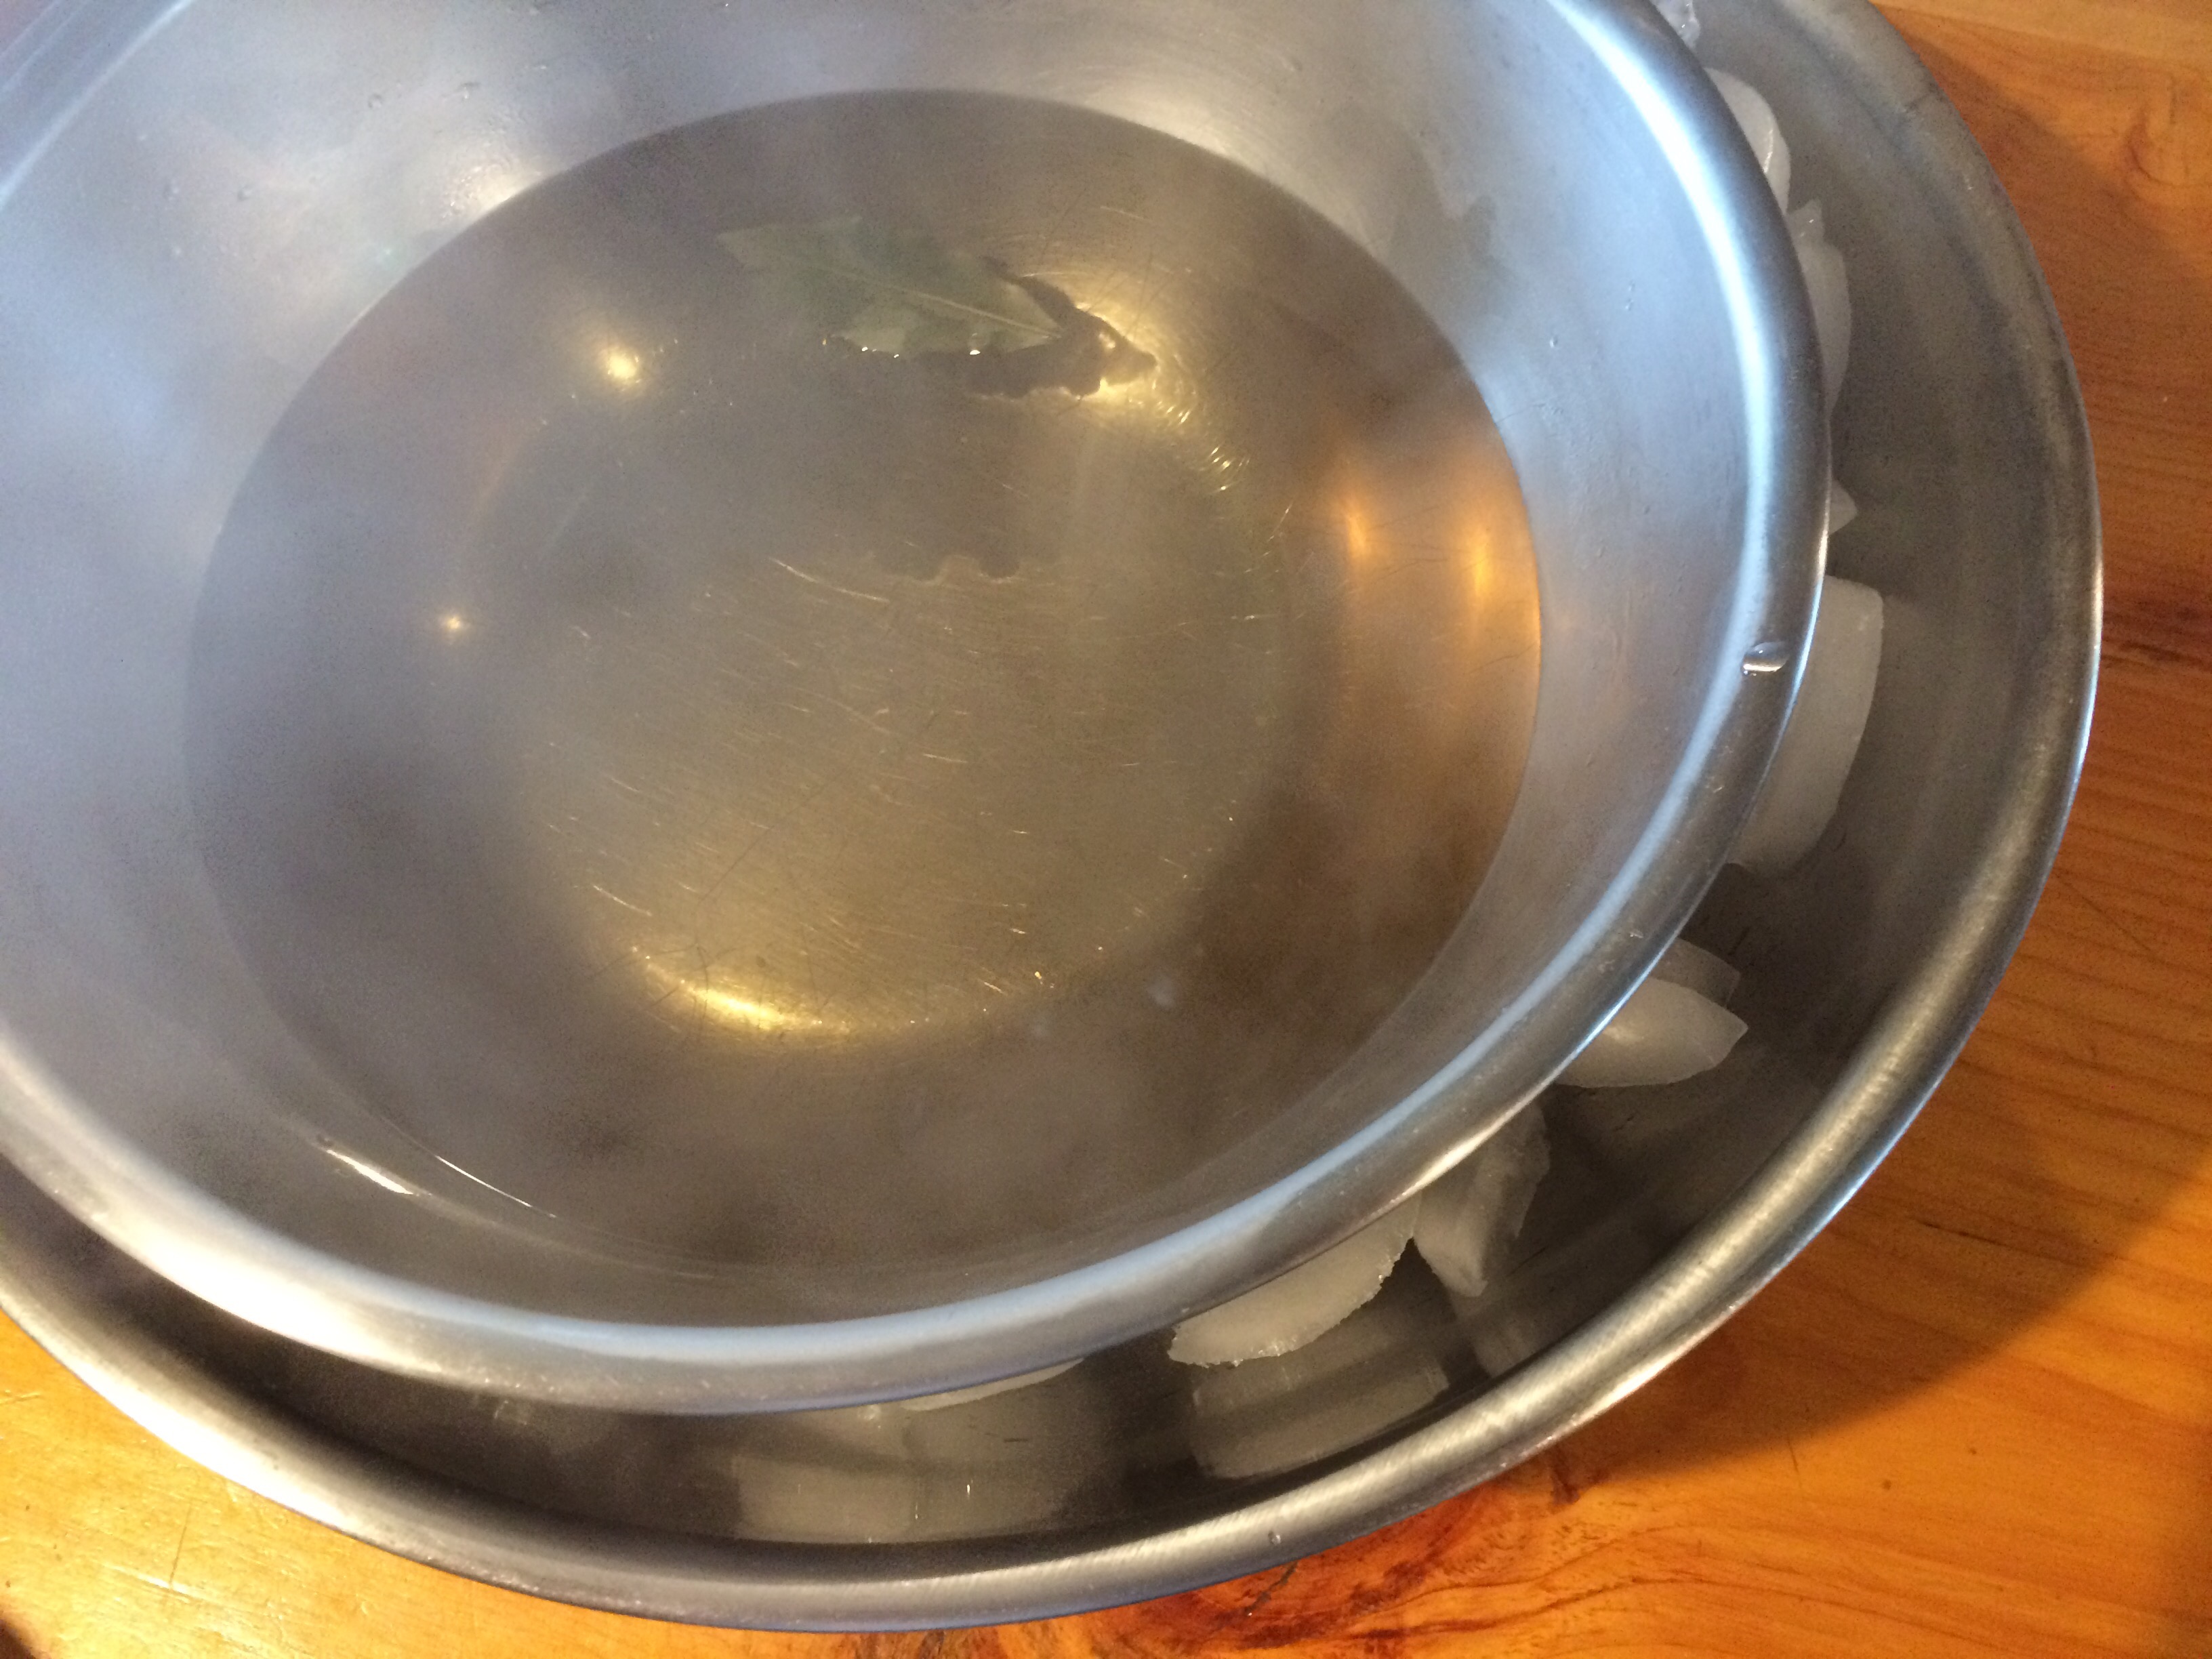
The quickest method I have found for cooling the brine is in an ice bath. Fill a large bowl or other container halfway with ice and place a slightly smaller bowl or container on the ice, pushing it down so the ice comes up around the sides. Pour hot brine into the smaller bowl and leave to cool. The brine should be chilled in about 30 minutes.
Step 2: Clean the fish
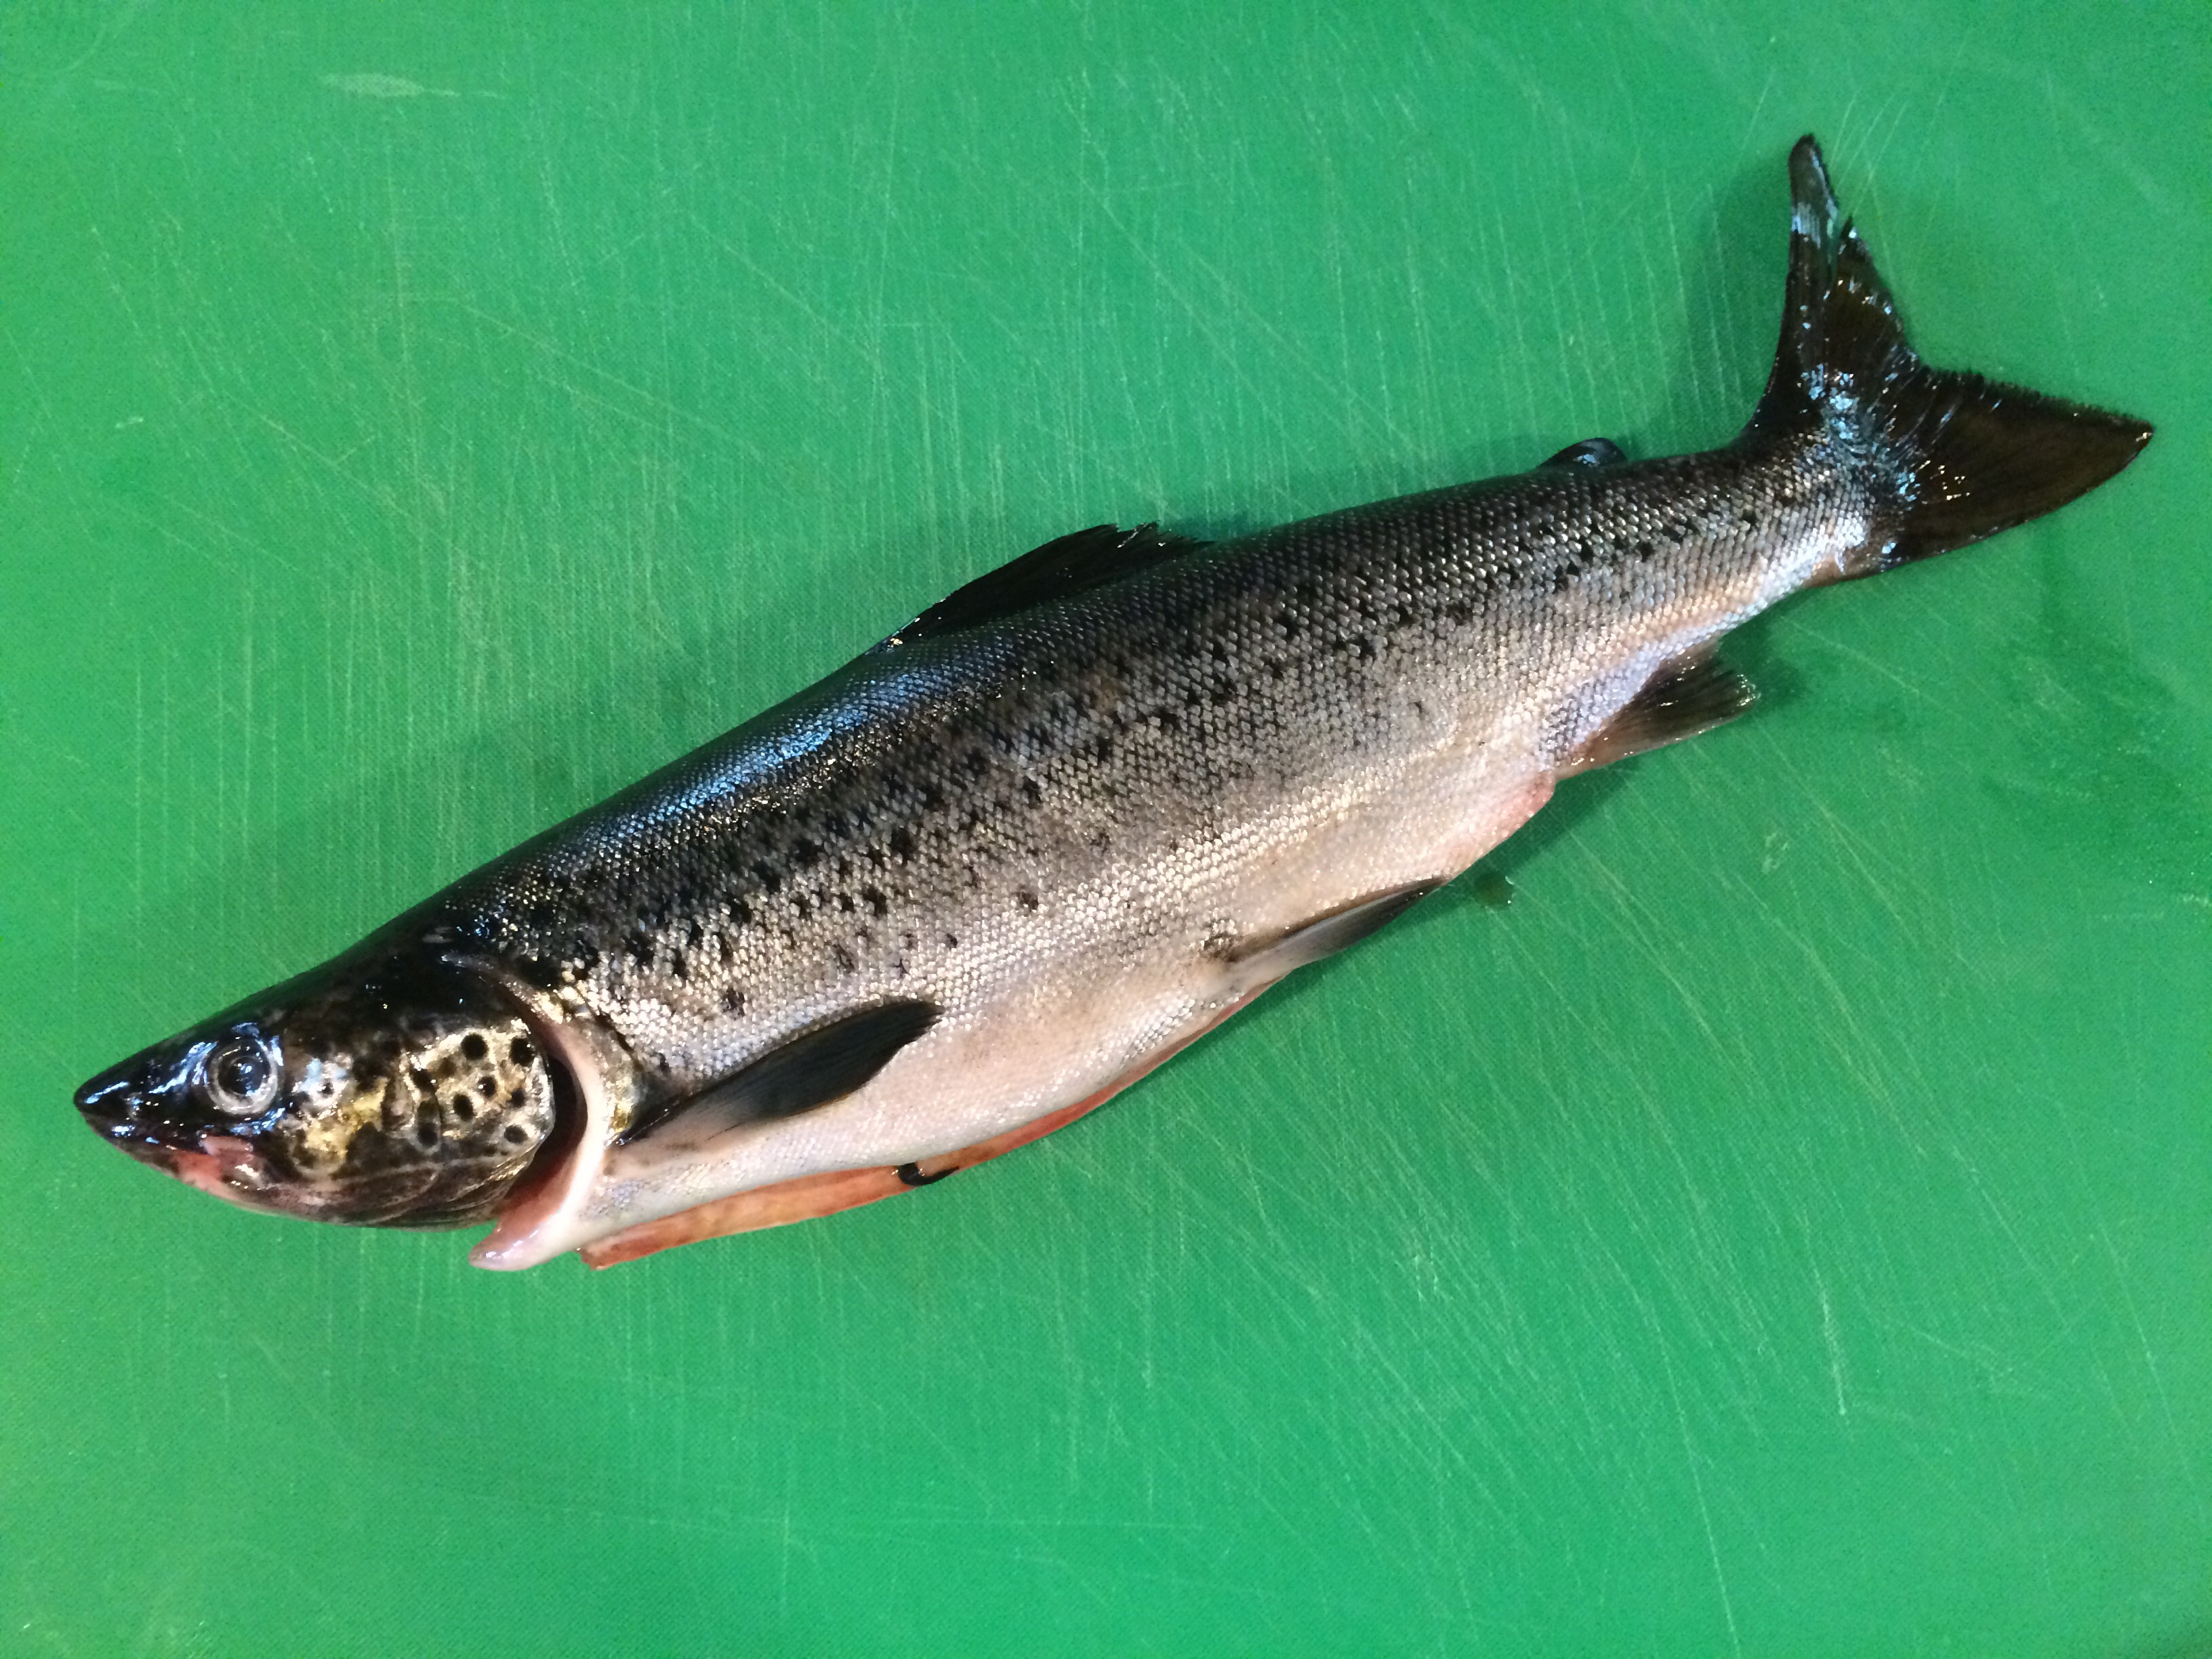
It is important when smoking small to medium fish that the skin be kept on. This will help the fillets keep their shape and insulate them so they do not dry out.

If you are working with fish that still have the head attached, position your fillet knife just behind the gills and the front fin. Cut through the skin and follow the bones to remove the fillet.

If your fish already have the head removed, I find it is easier to remove the fillet from the tail end.

Simply start at the tail and follow the bones to remove the fillet.

Repeat this process on the opposite side to remove both fillets.
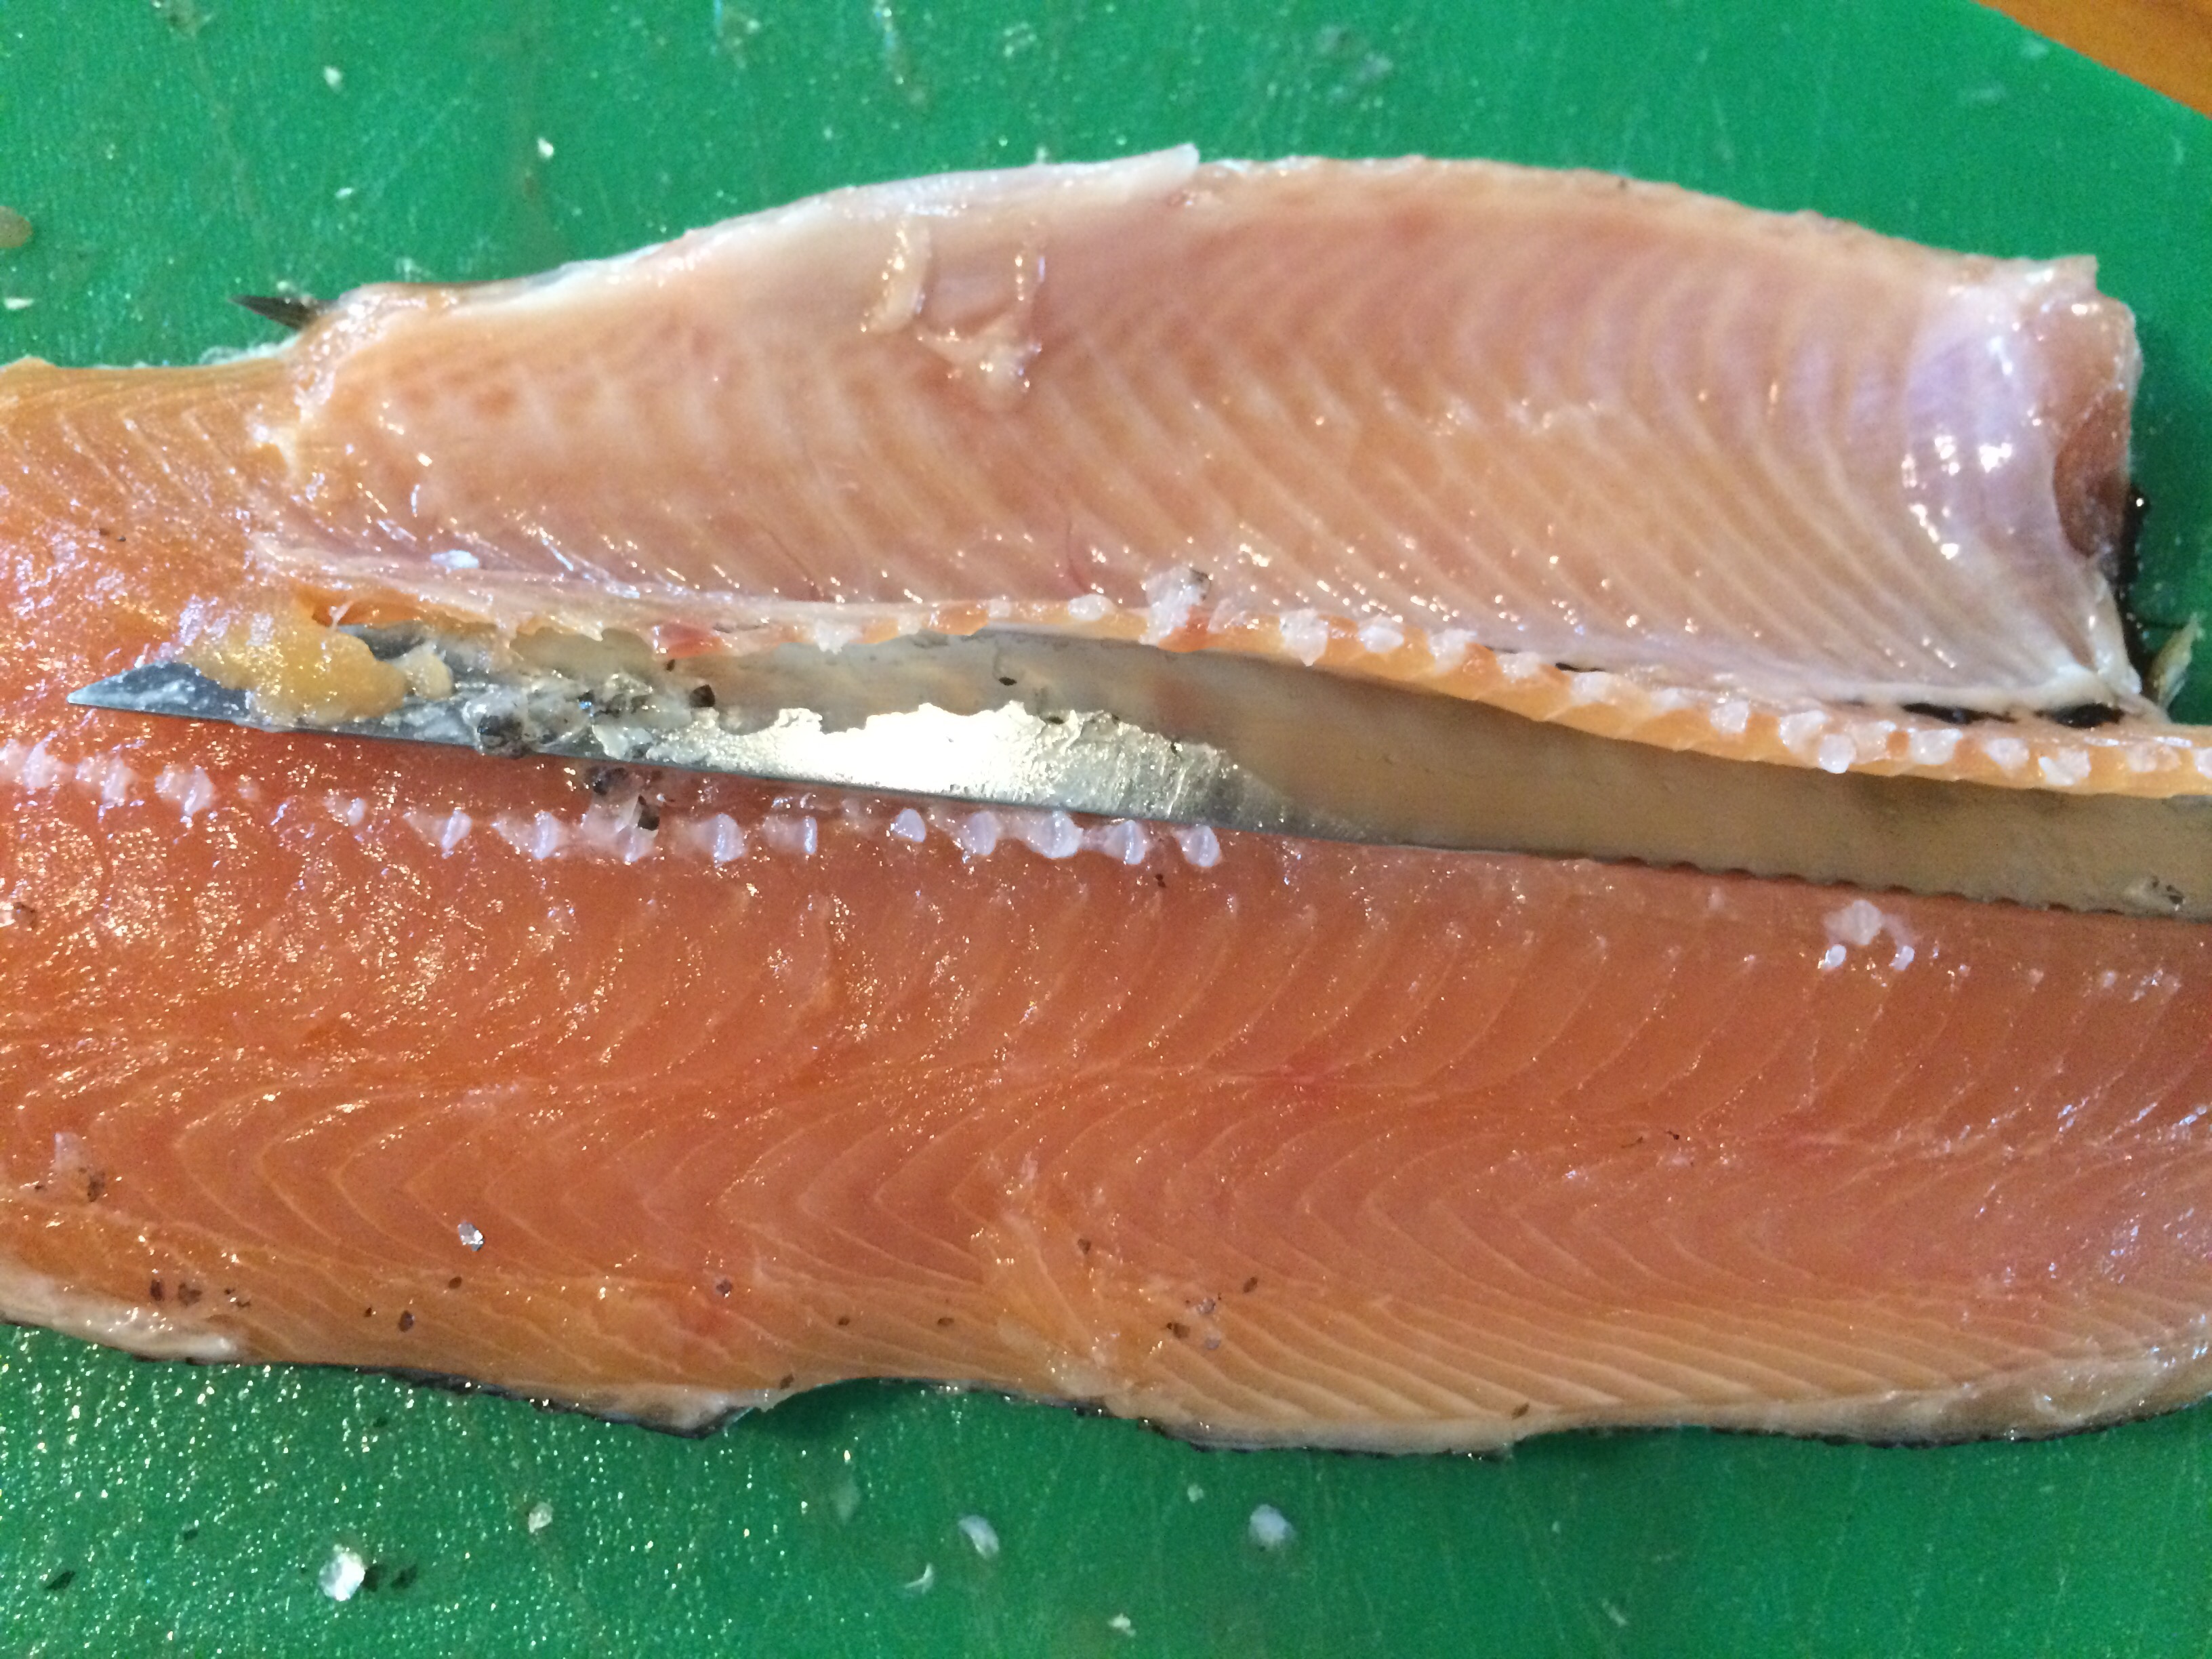
Finally, remove any bones along the belly you may have missed while filleting the fish as well as anything else that looks like it should be removed.

Step 3: Brine the fish
Lay out your fillets side by side in a roasting pan or other shallow container. Completely submerse them in brine and allow to sit for one hour at room temperature, or longer if your fillets are particularly thick.
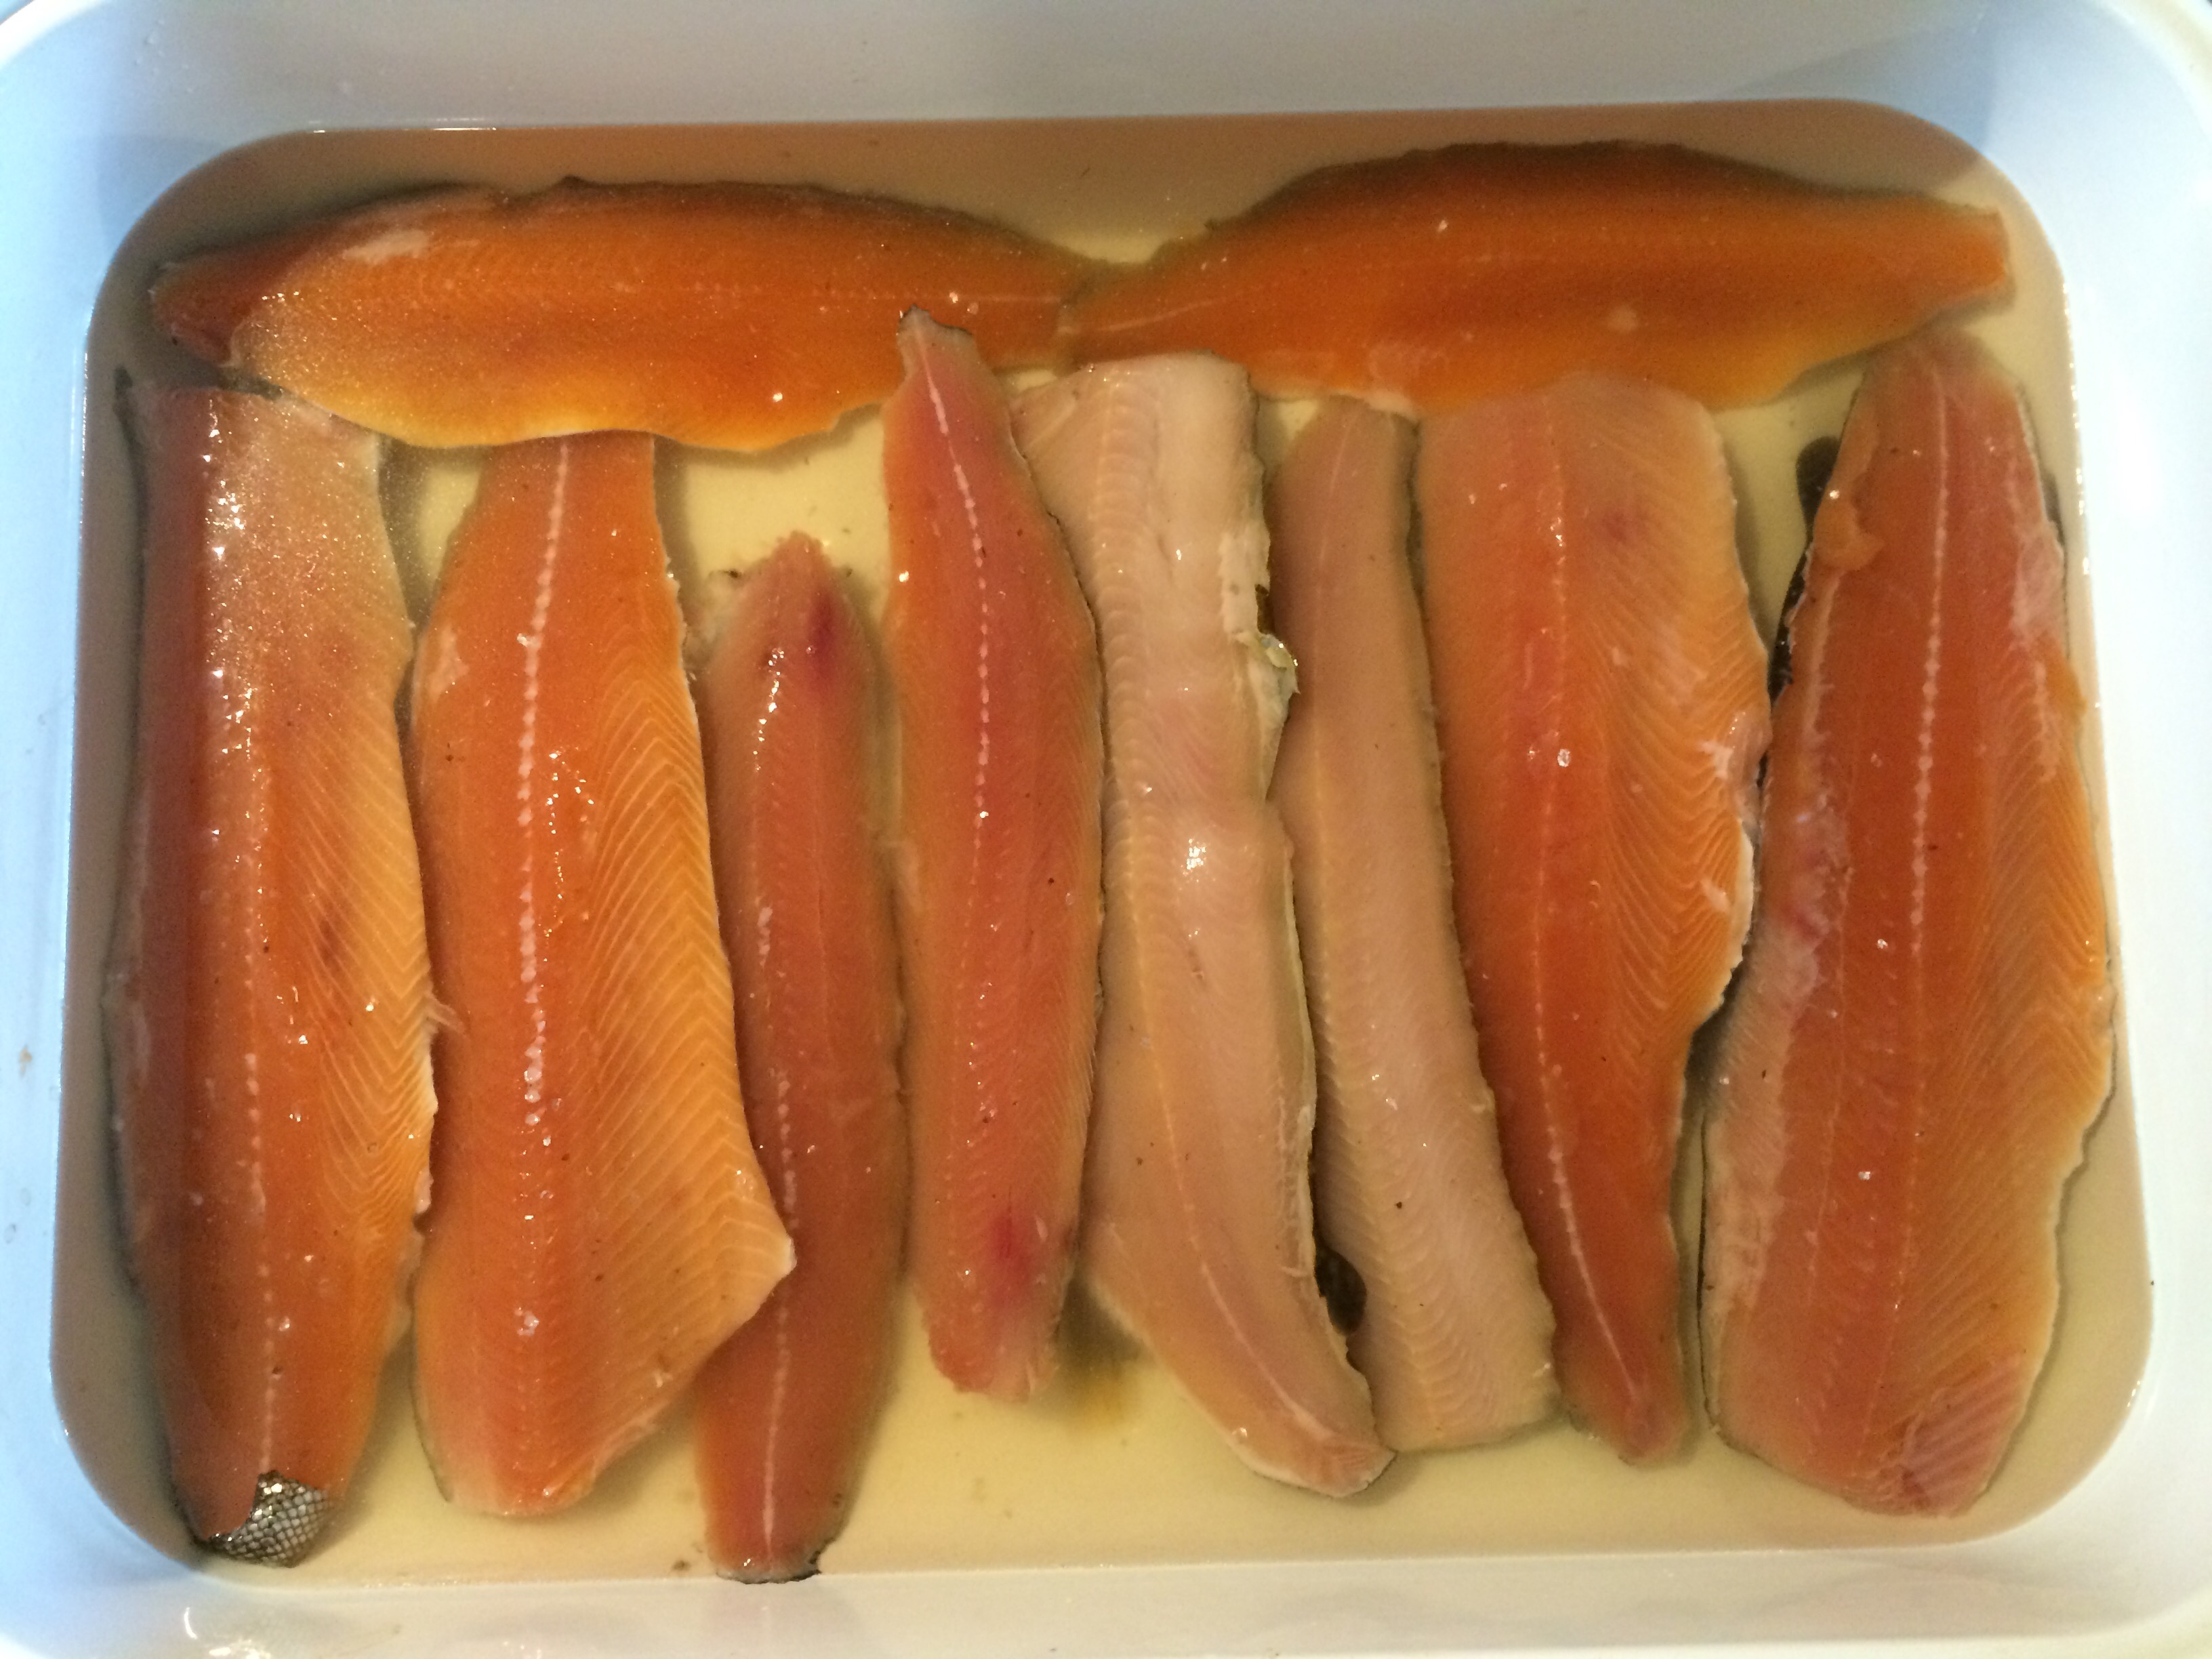
After one hour in the brine, remove the fillets and place them on a rack for another hour. Do not rinse them .
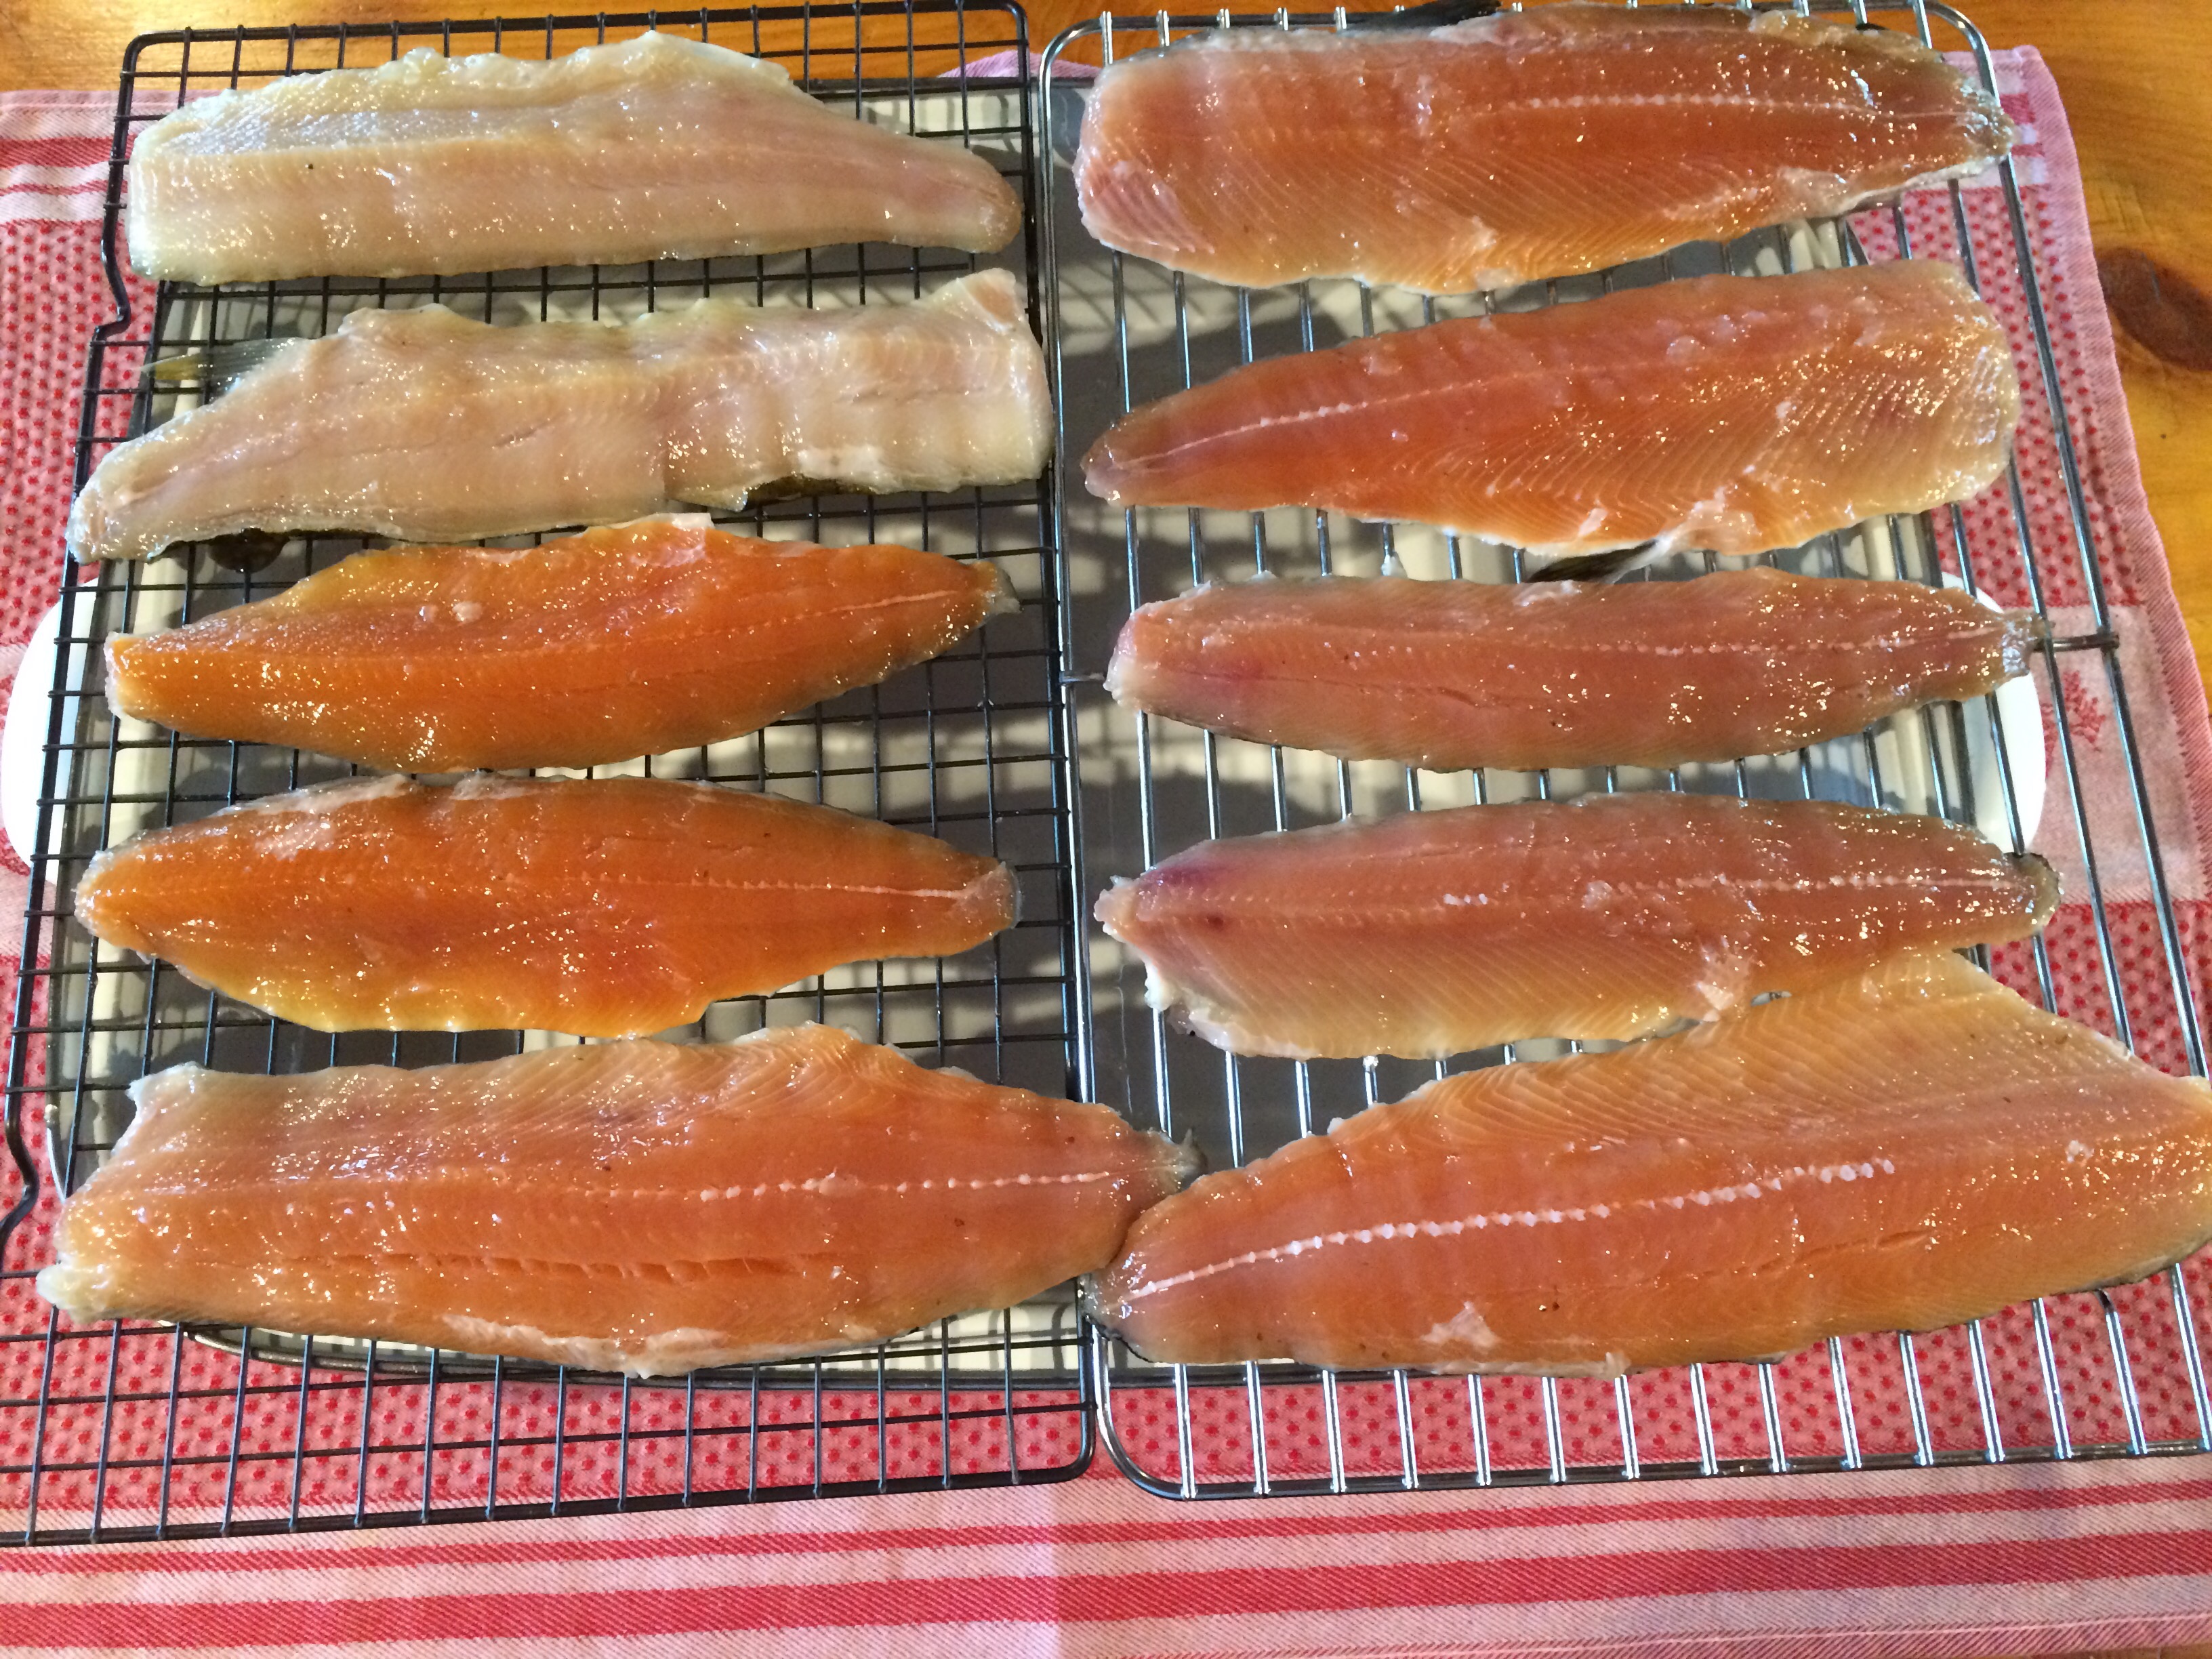
After an hour drying on the rack, the fillets should have a shiny appearance and feel tacky. They are now ready for the smoker.

Step 4: Smoke the fish
I like to use an electric smoker because A: I have one and B: It maintains a constant temperature with minimal effort on my part. If you do not have an electric smoker, there are many alternatives available that are just as good or even better. Feel free to use the resources that are available to you.

I use alder wood because it is a traditional choice for smoking fish. It has a sweet, mellow flavor that does not overpower the fish. Feel free to experiment with whatever hardwood is available to you and decide which one you like best.
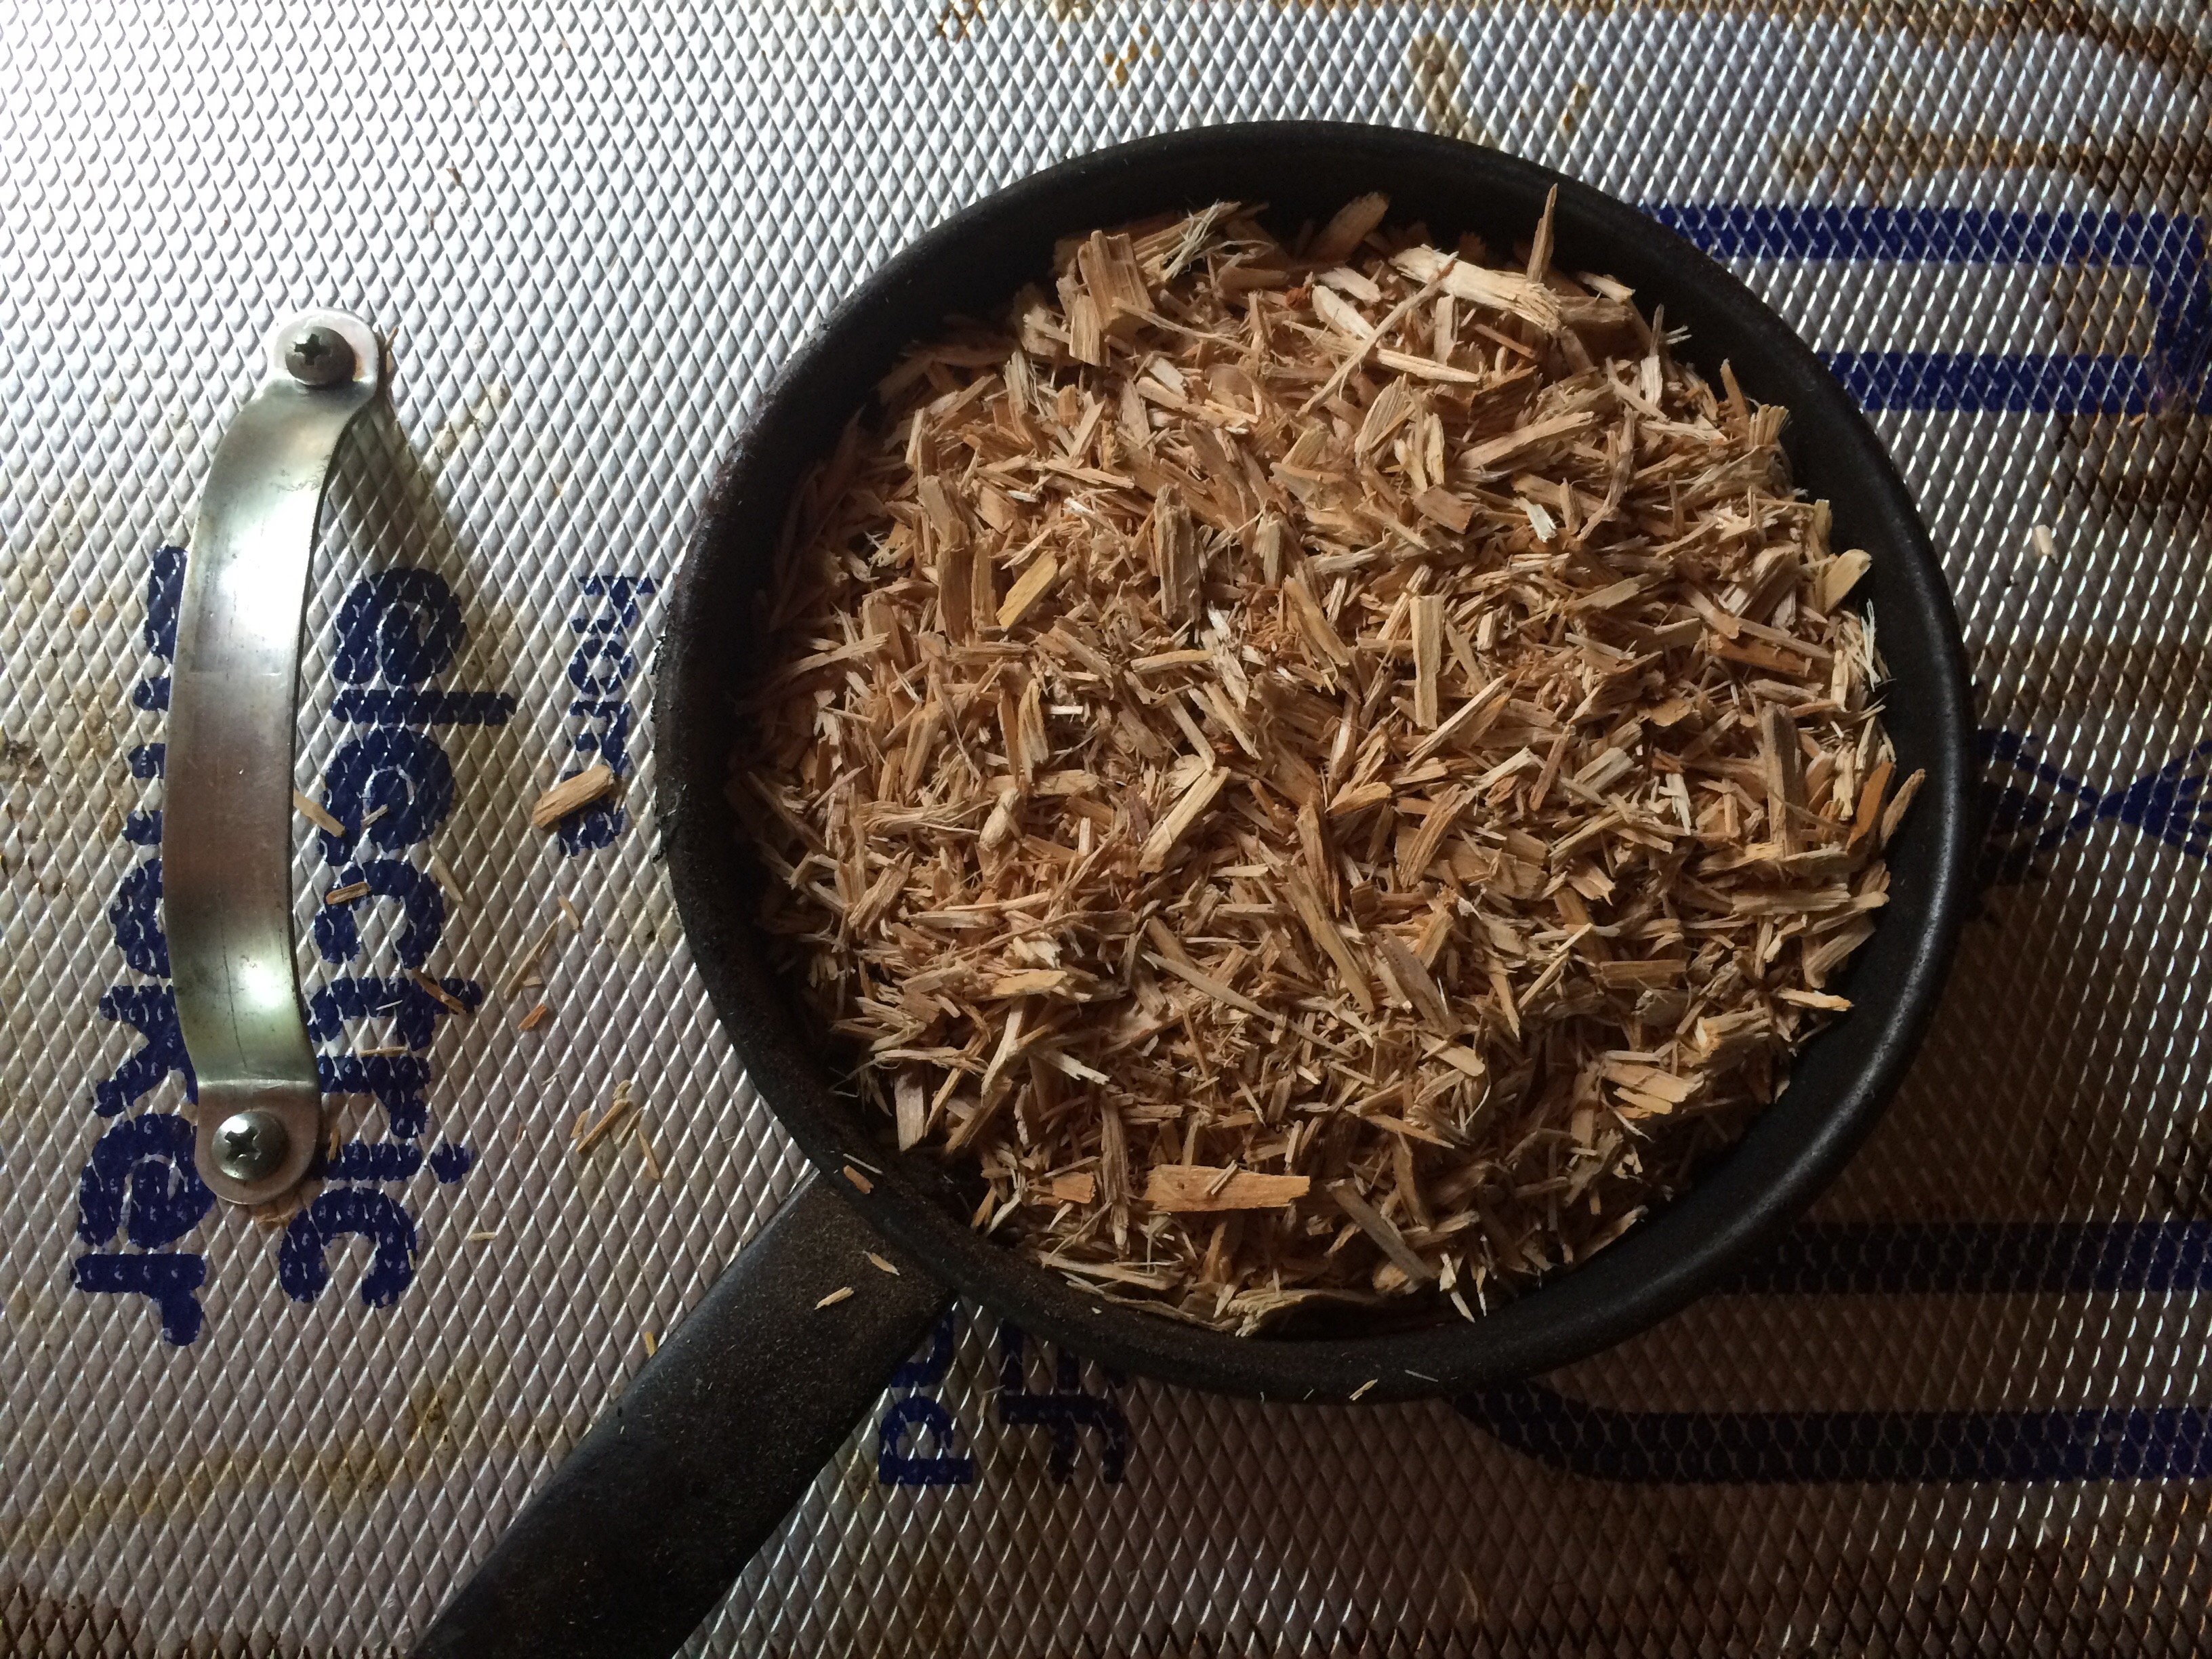
I like to fill my chip pan all the way and get it smoking before I put the fish in. That way I can be confident that the smoker is doing its job.

When the chips are smoking, I open the door and place the racks with the fish already on them in the slots nearest the center of the smoker. I like to keep them away from the relatively higher heat of the top and bottom of the smoker.

After closing the door, I smoke the fish for 3 hours. During this time, I change the chips in the smoker twice, about once per hour. This relatively short smoking time creates a product that is tender and moist but still has great smoke and fish flavor. If your fillets are very thick or you prefer a drier, smokier product, increase the smoking time accordingly.
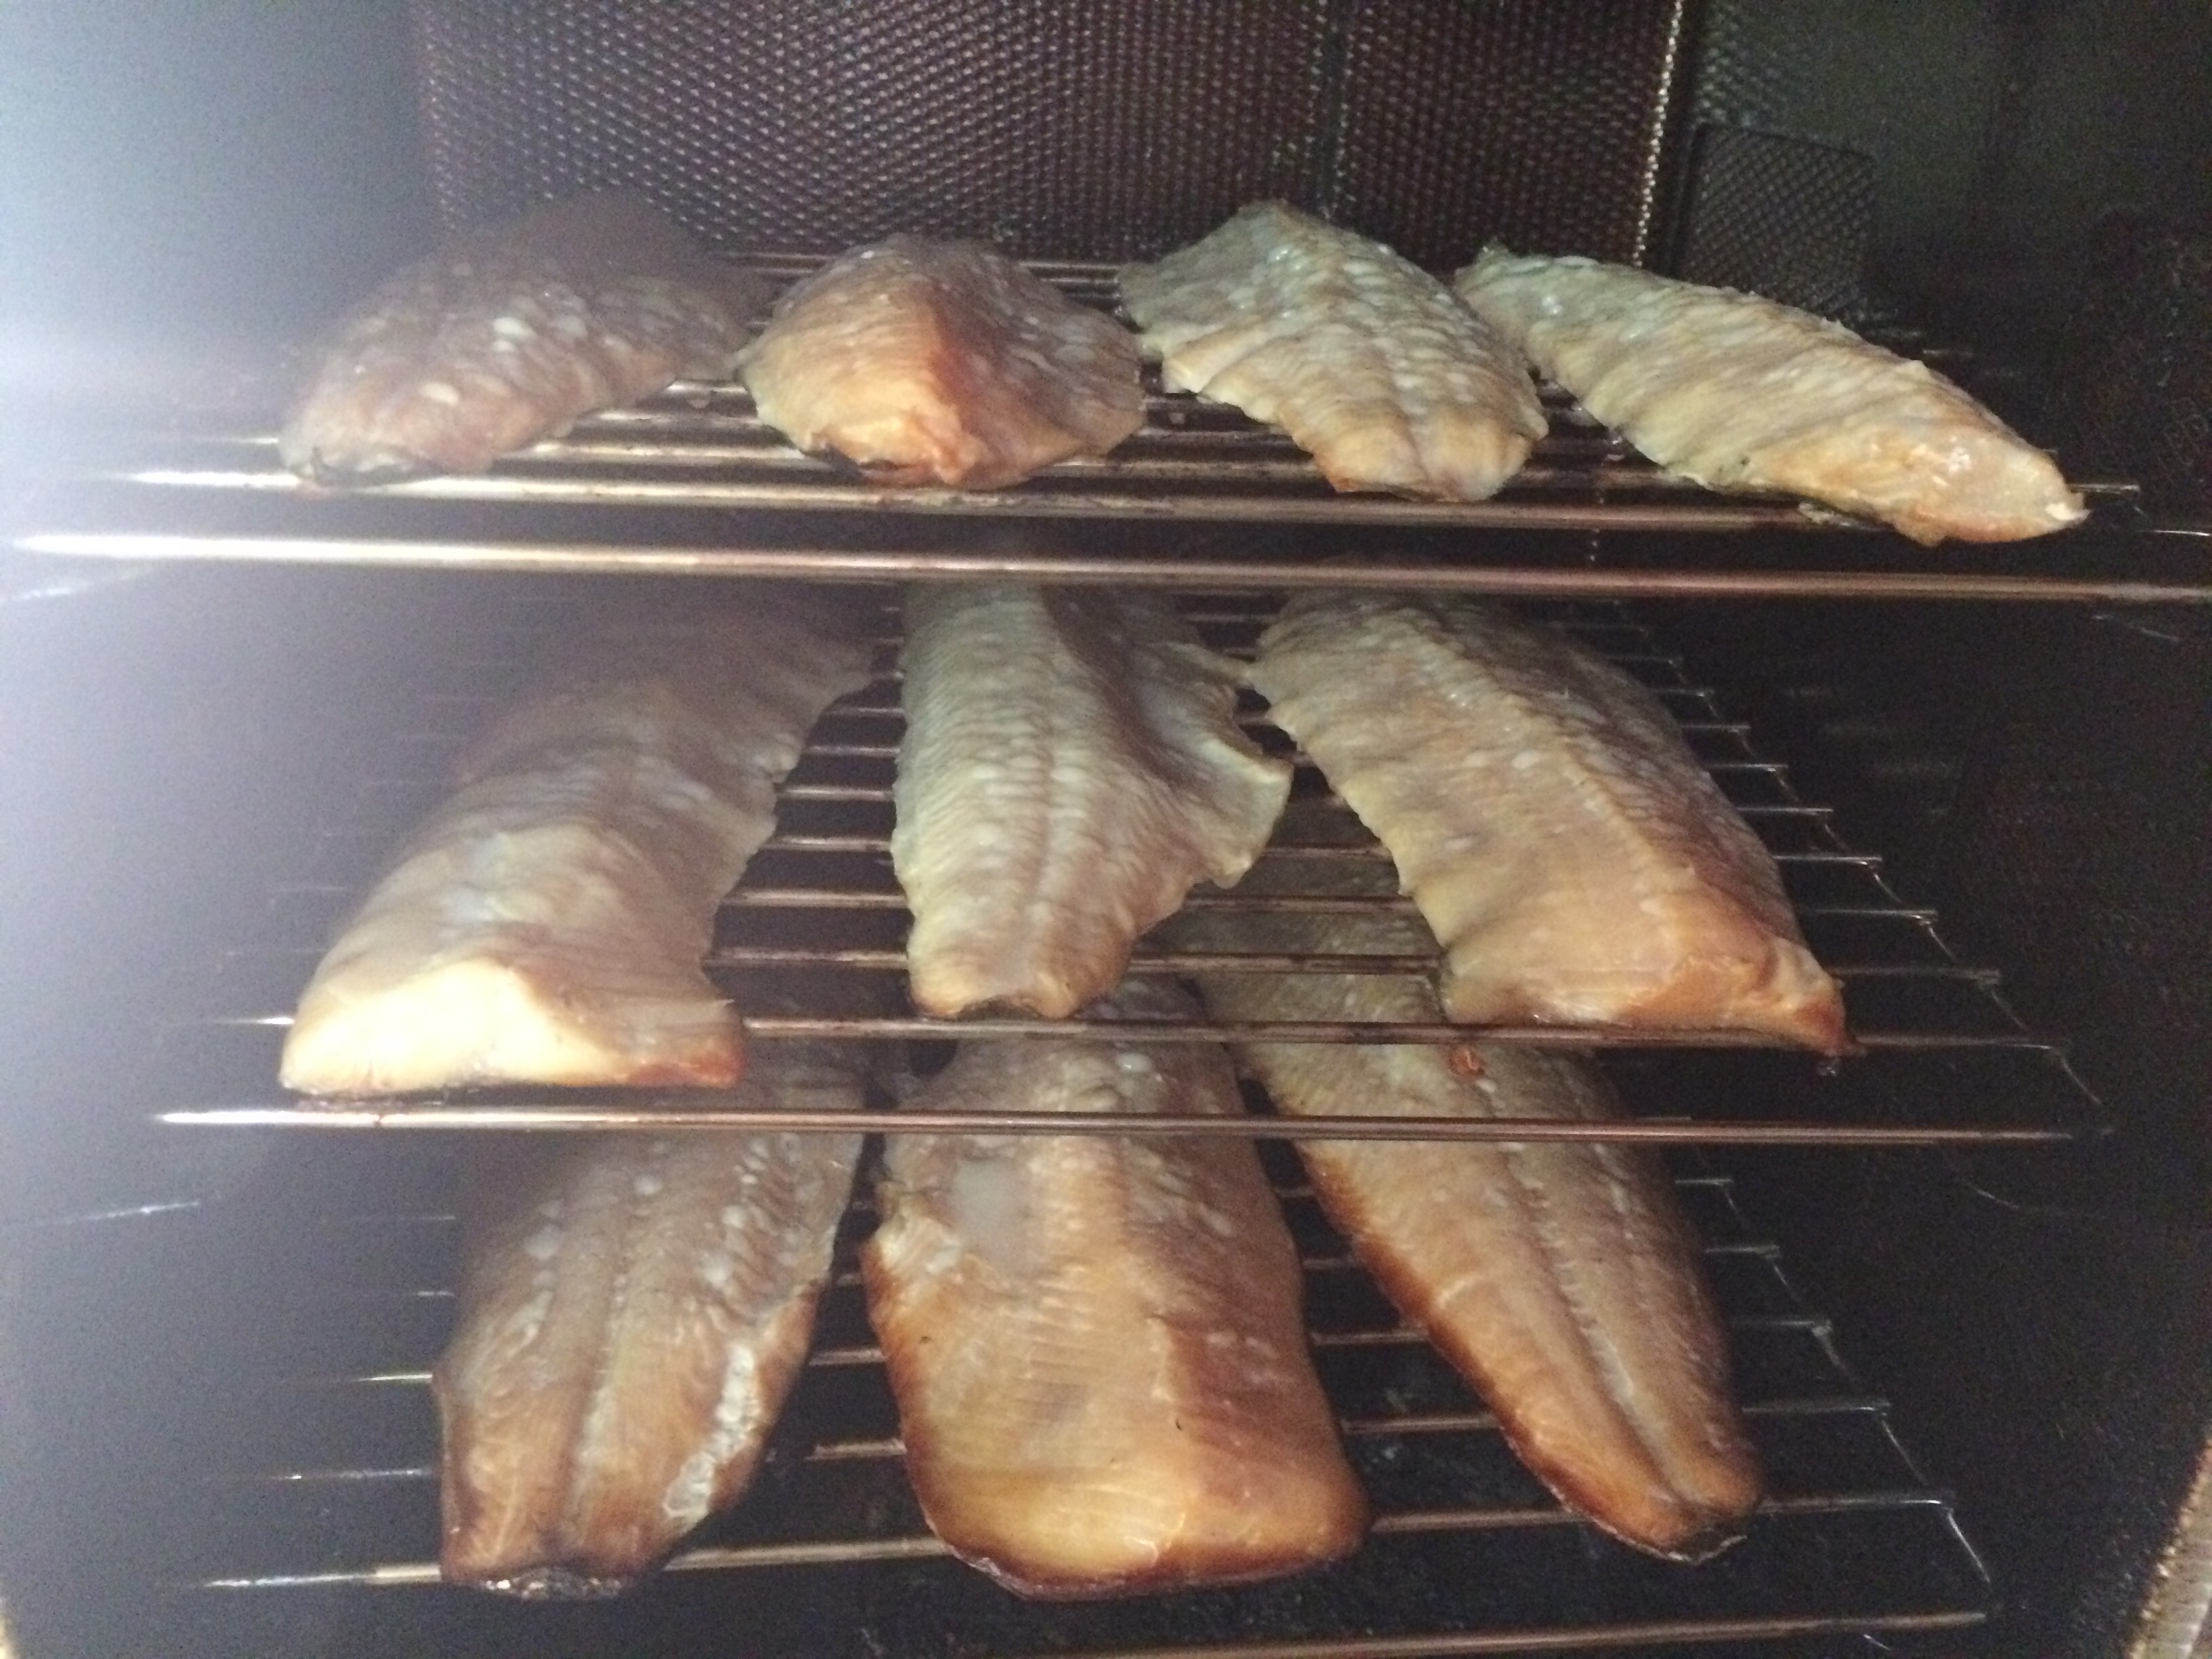
After two hours, the fish are ready. Remove them from the smoker and cool on the racks. I find it difficult to keep myself from enjoying them right away but they will keep in the refrigerator at least a week and up to a year in the freezer.

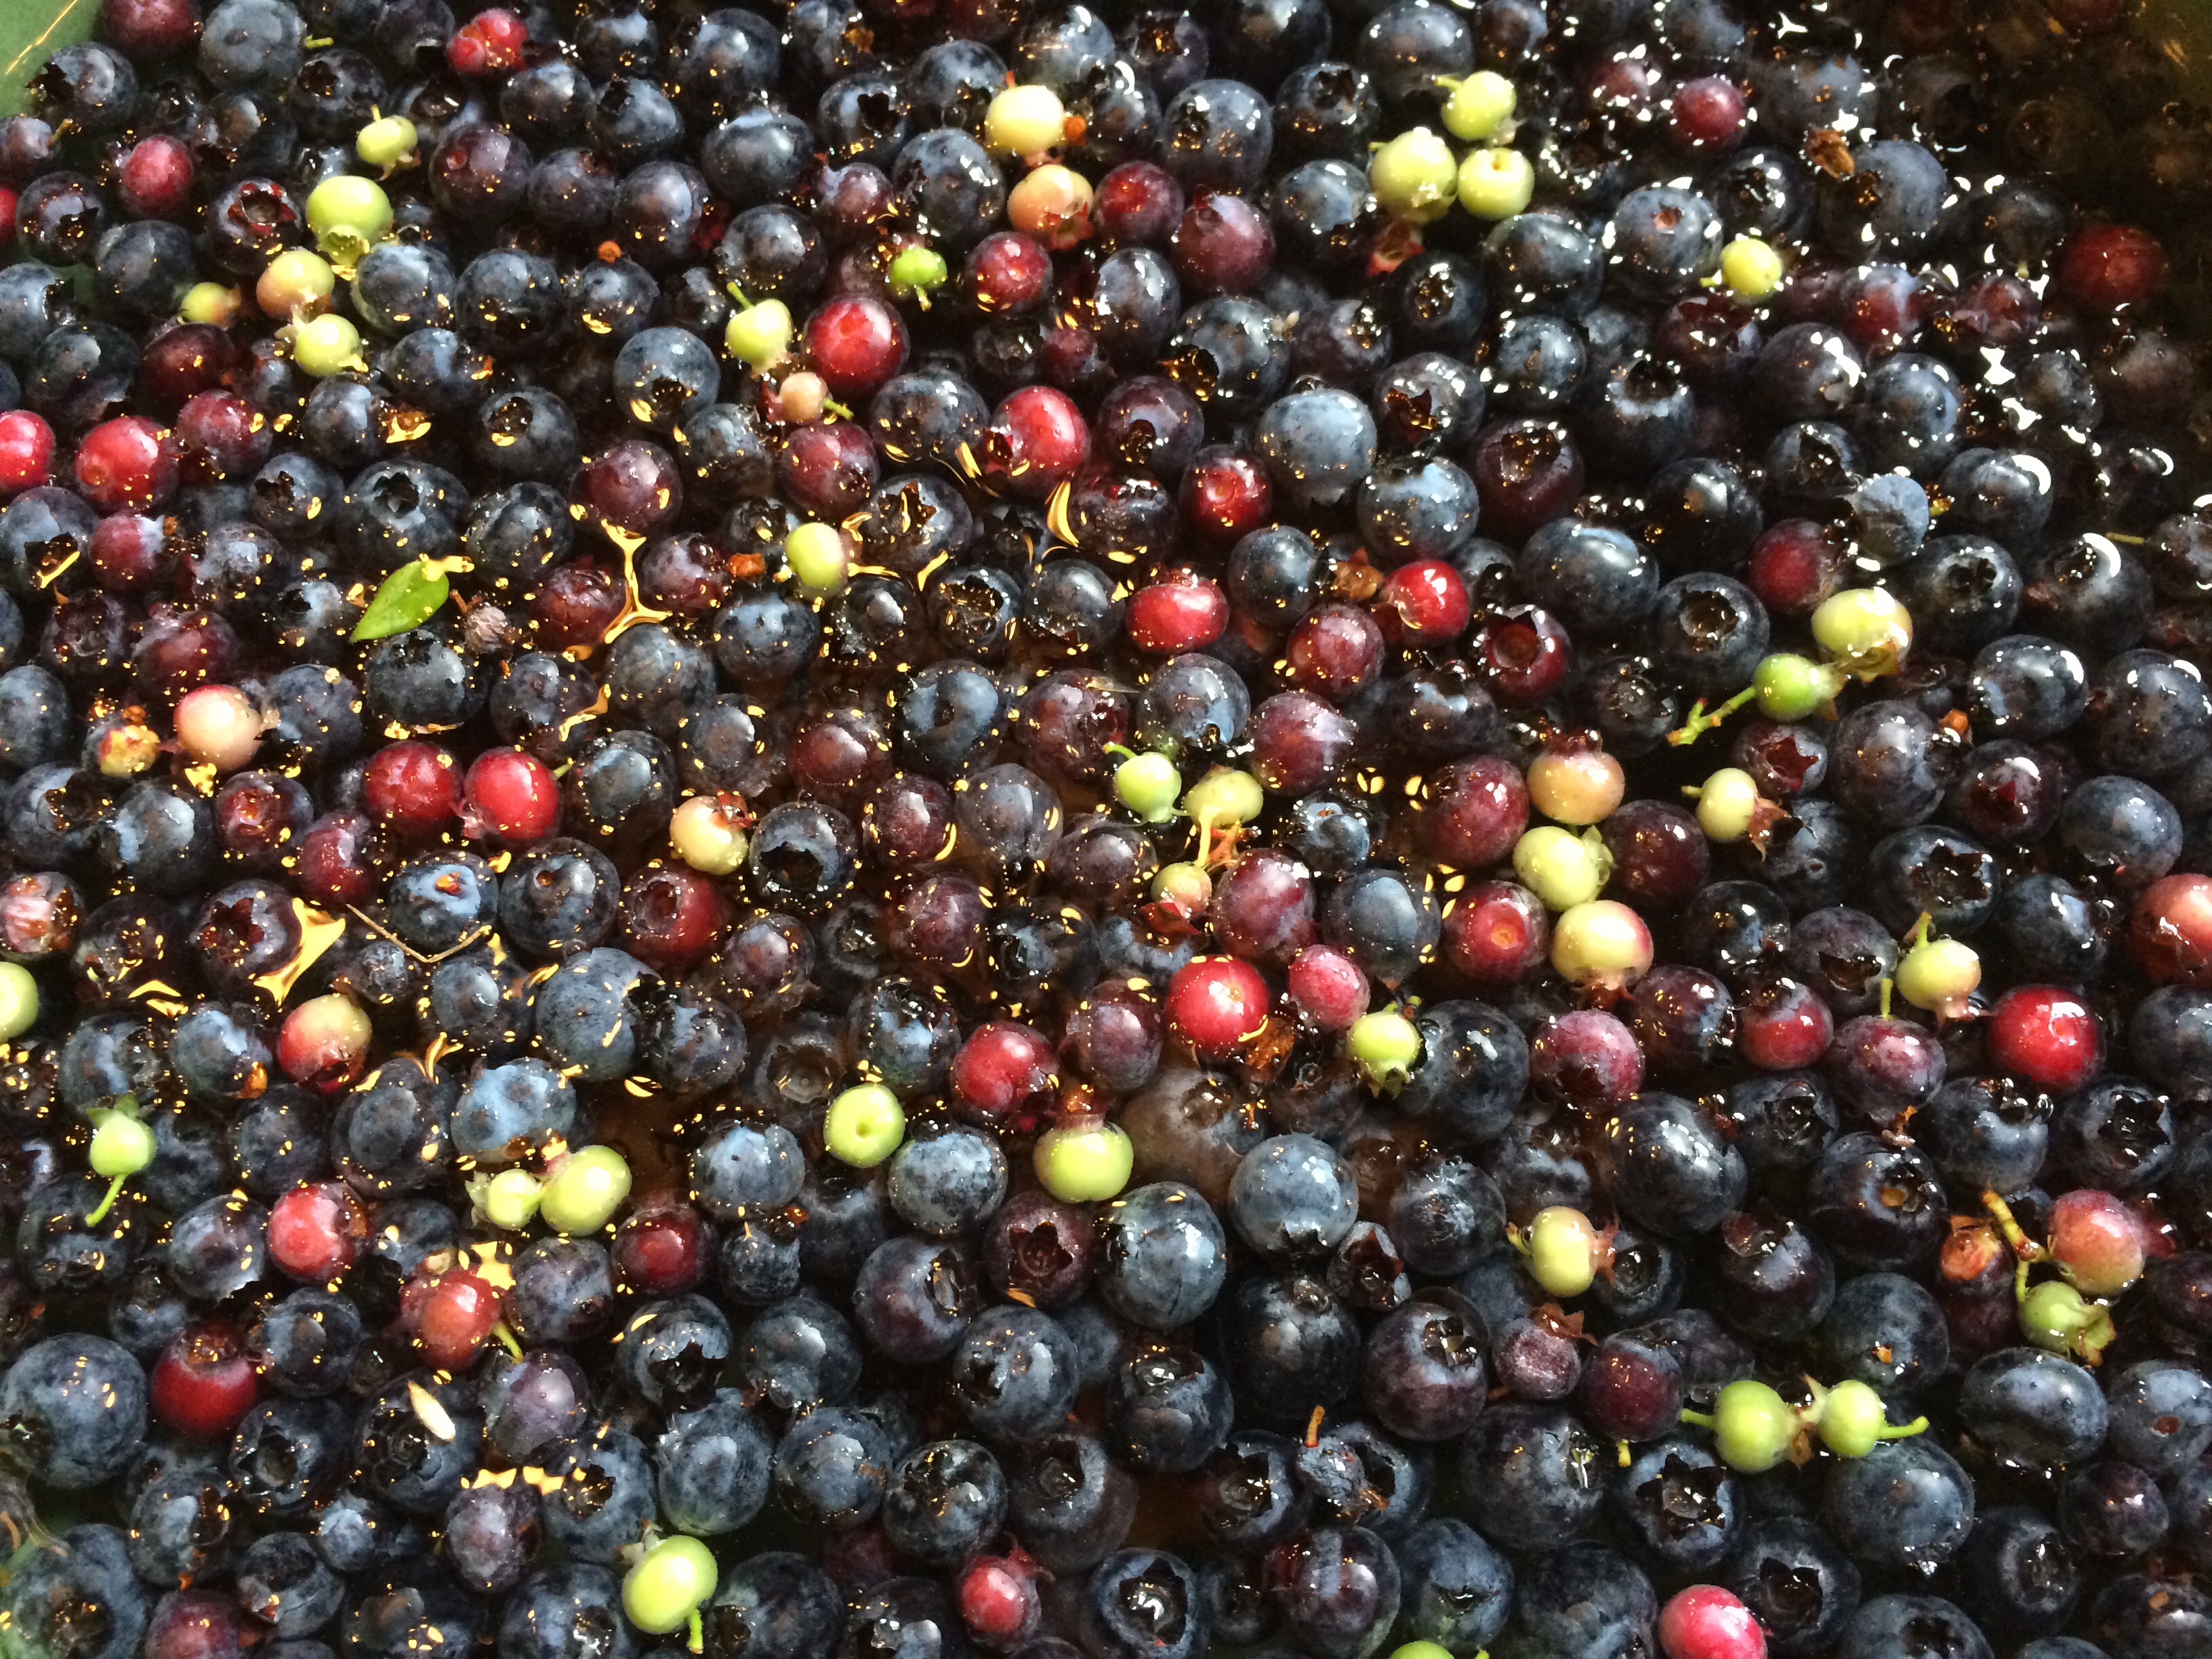
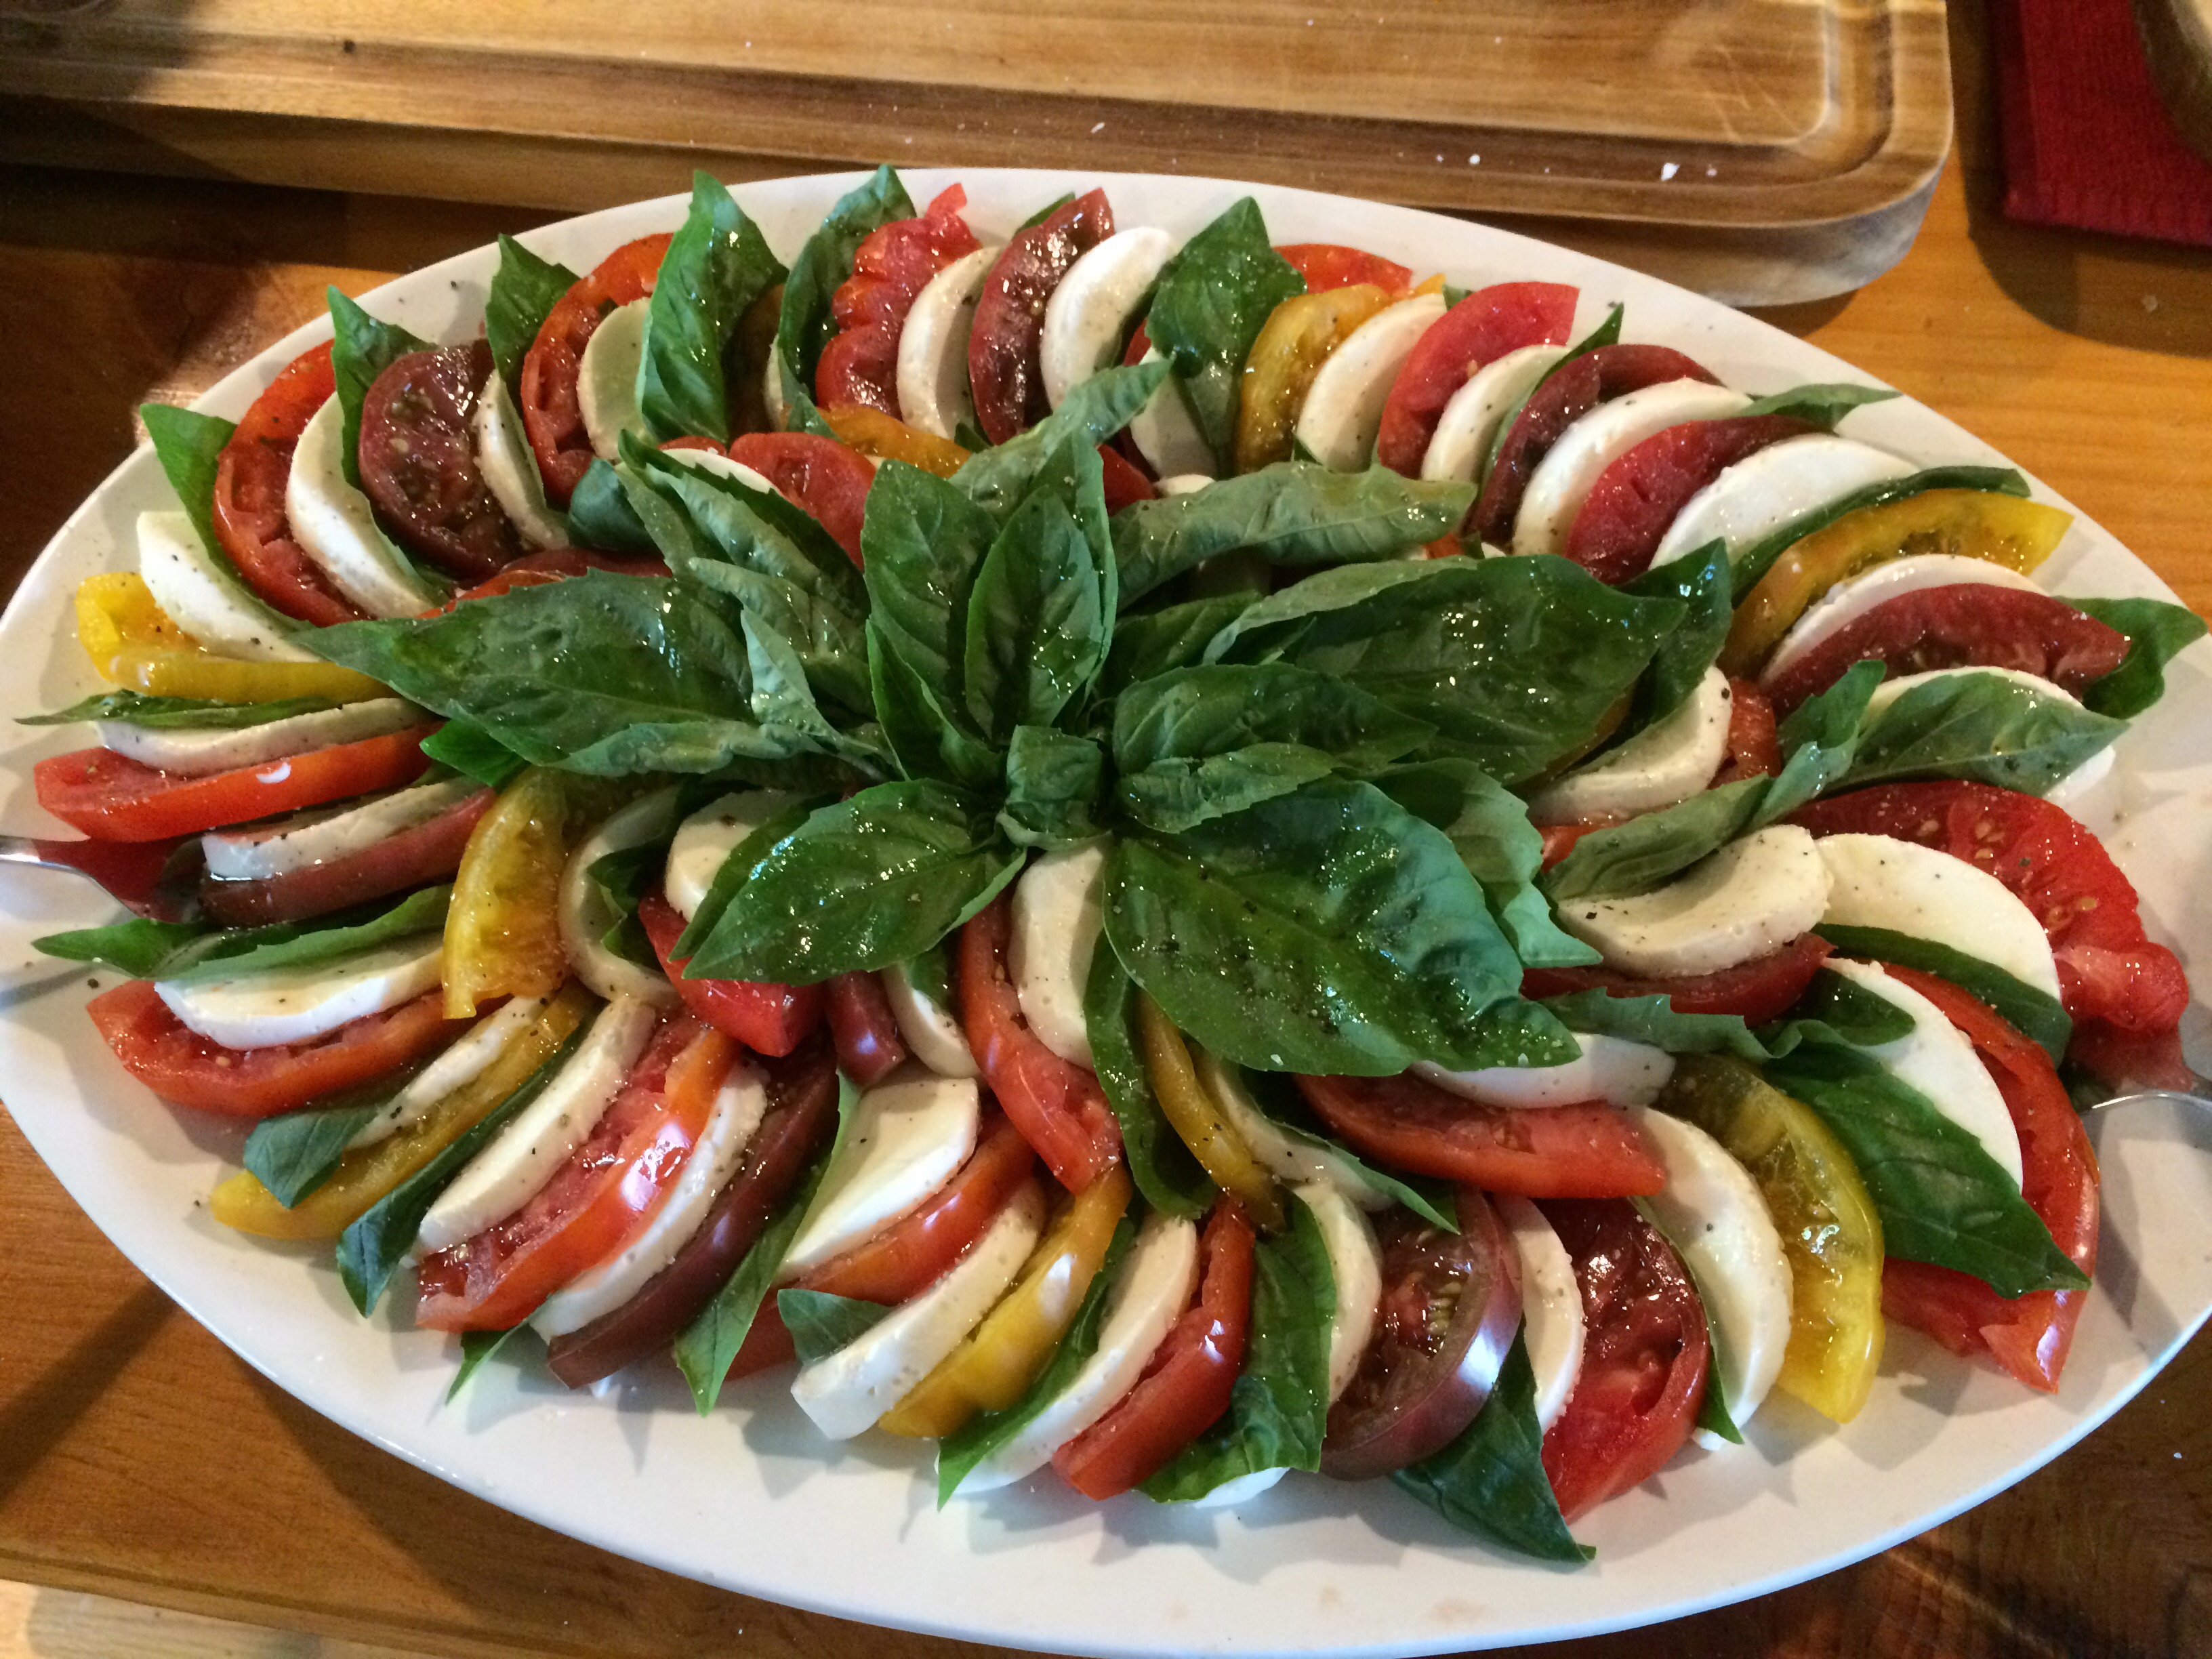
This summer was an exceptional summer in the garden. I ended up with a large harvest of fresh basil. After making caprese salads, marinara sauce and Oven-dried tomato spread, I still had bunches of it left over.
It was time to make pesto. This simple Italian sauce is the perfect way to take a large amount of fresh herbs and consolidate them into a small container that can be stored in the freezer until you are ready to use it.

Basil Pesto
Makes: 2 1/2 Cups
Ingredients:
3 Large Cloves Garlic
1 tsp Kosher Salt
1/2 Cup Pine Nuts
2 Cups Shredded Parmesan Cheese
4 Cups Packed Fresh Basil
1 Cup Olive Oil
Directions:
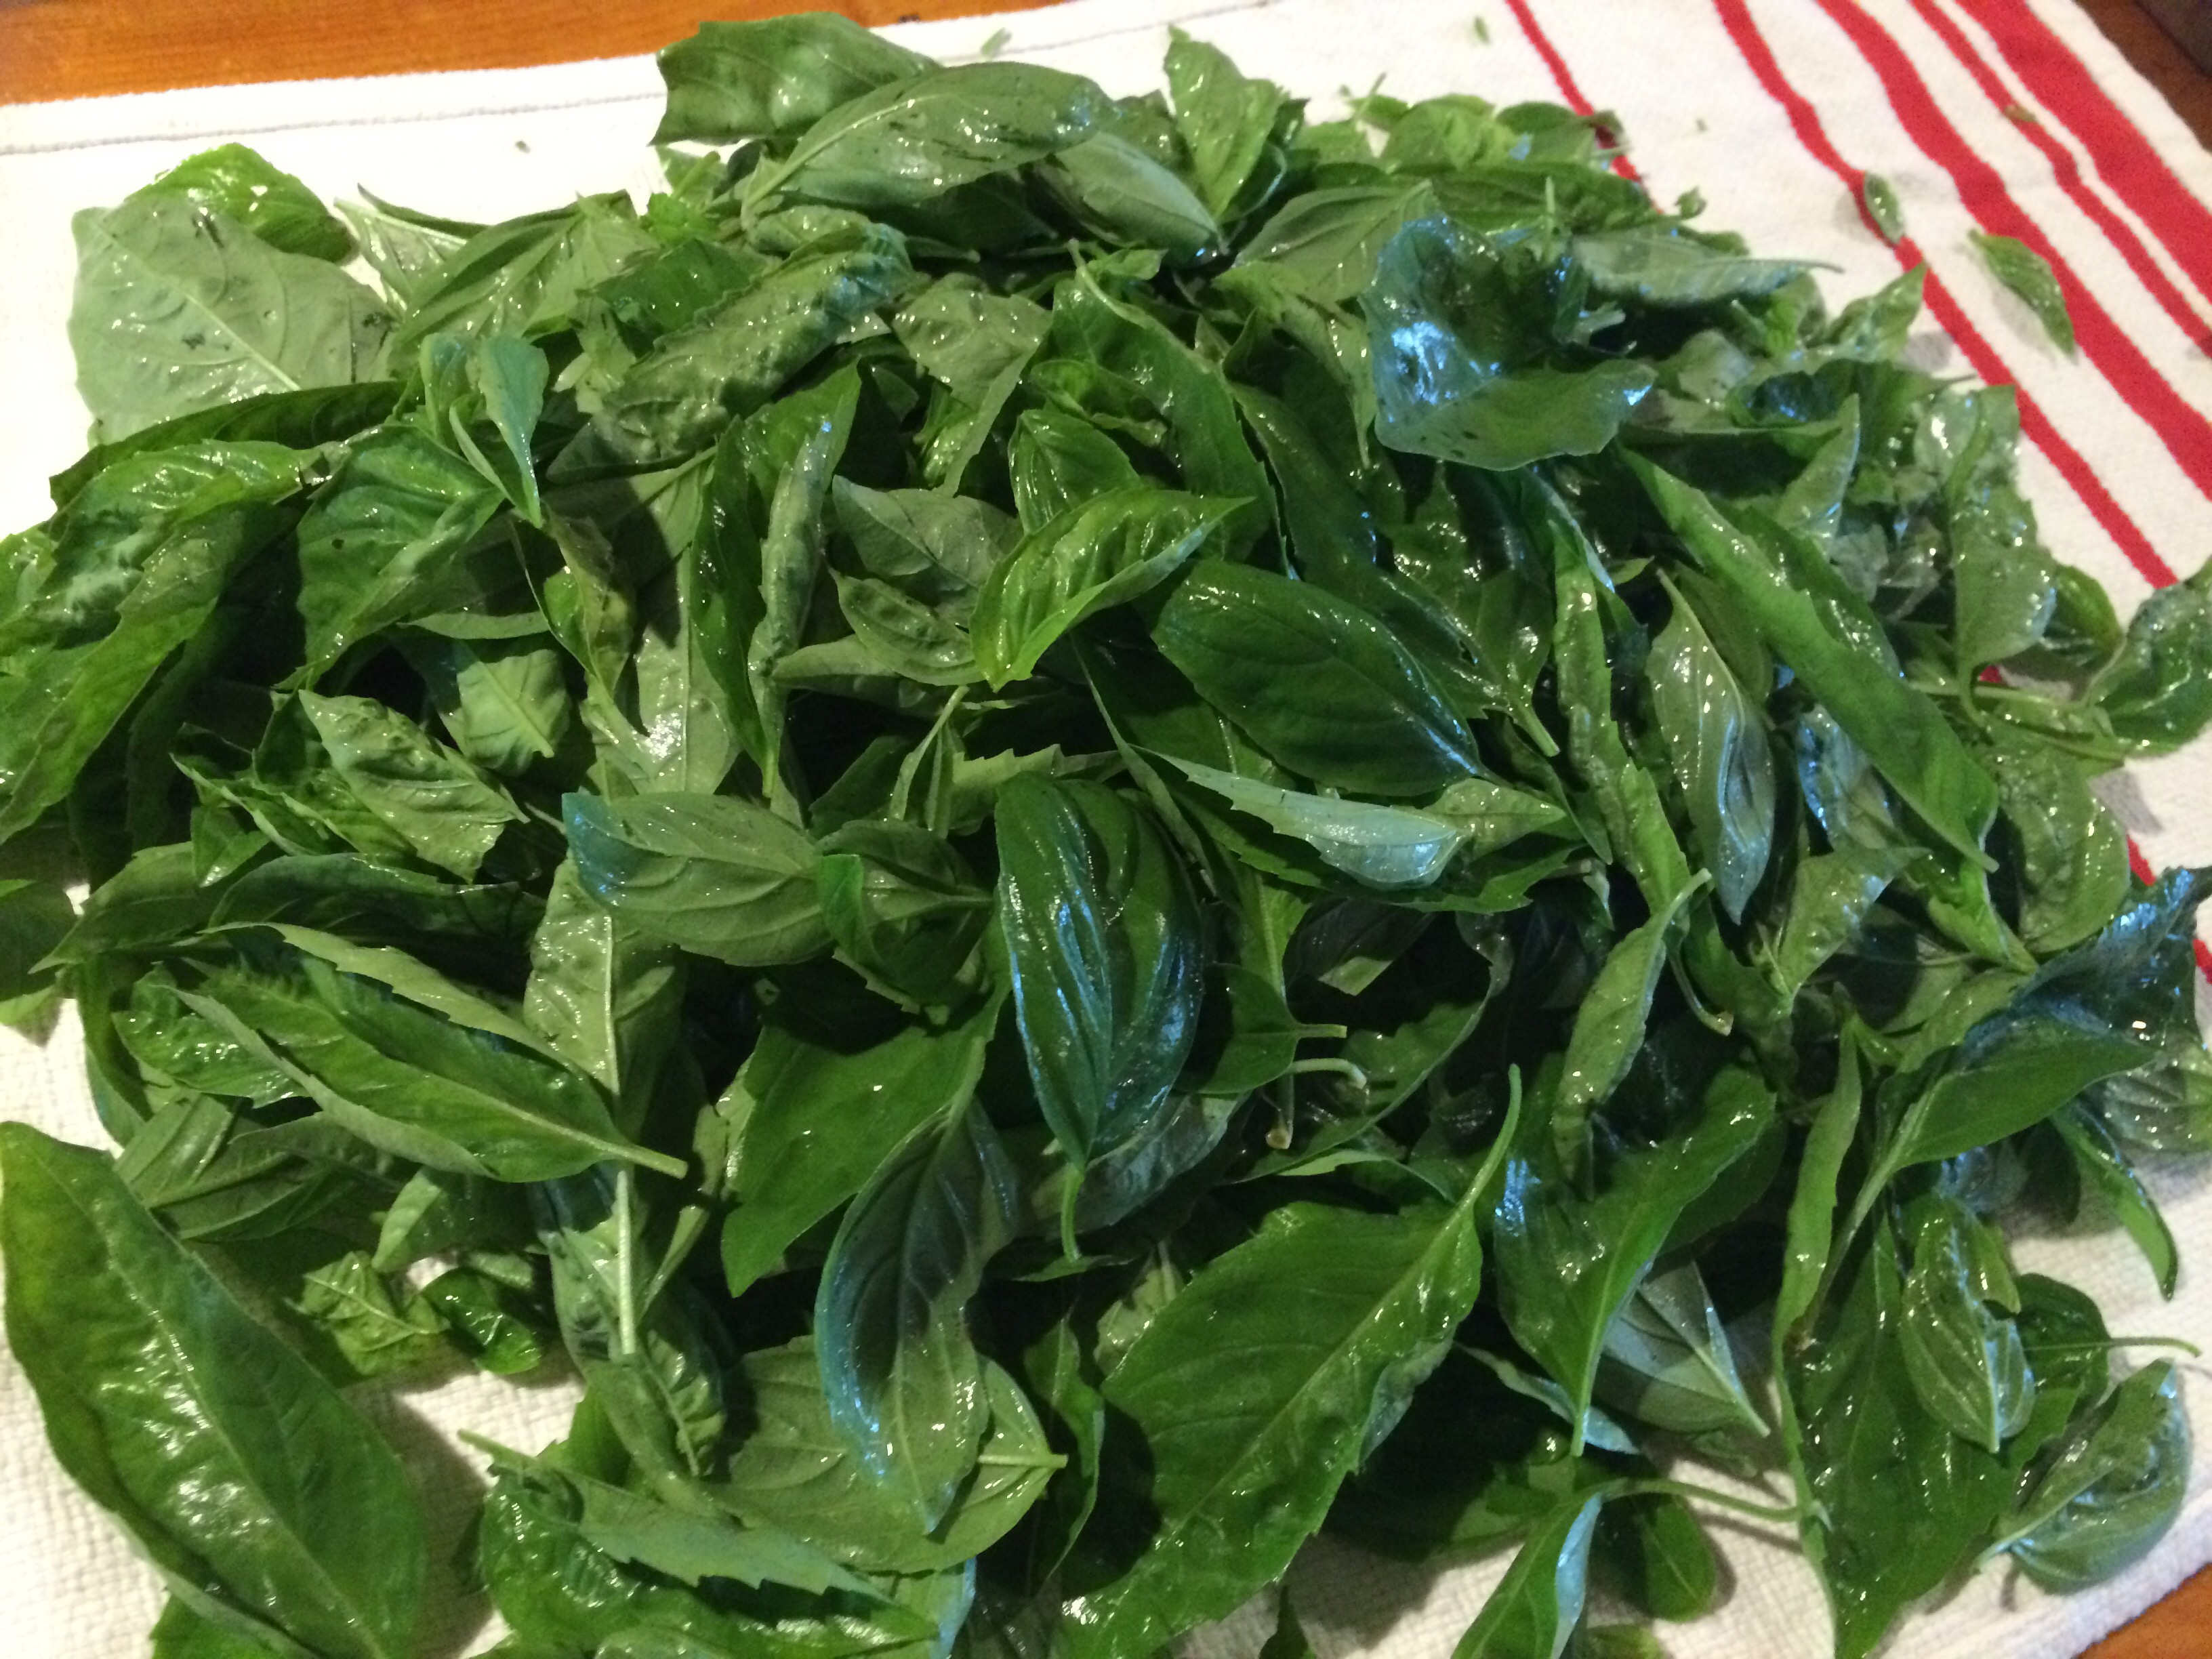
Wash basil thoroughly in cold water and place on a towel to dry.

Pick leaves from stems and discard all stems and flowers. Place on a towel until ready to use. Don’t worry if there is still a little water on them. It will help to emulsify the sauce.
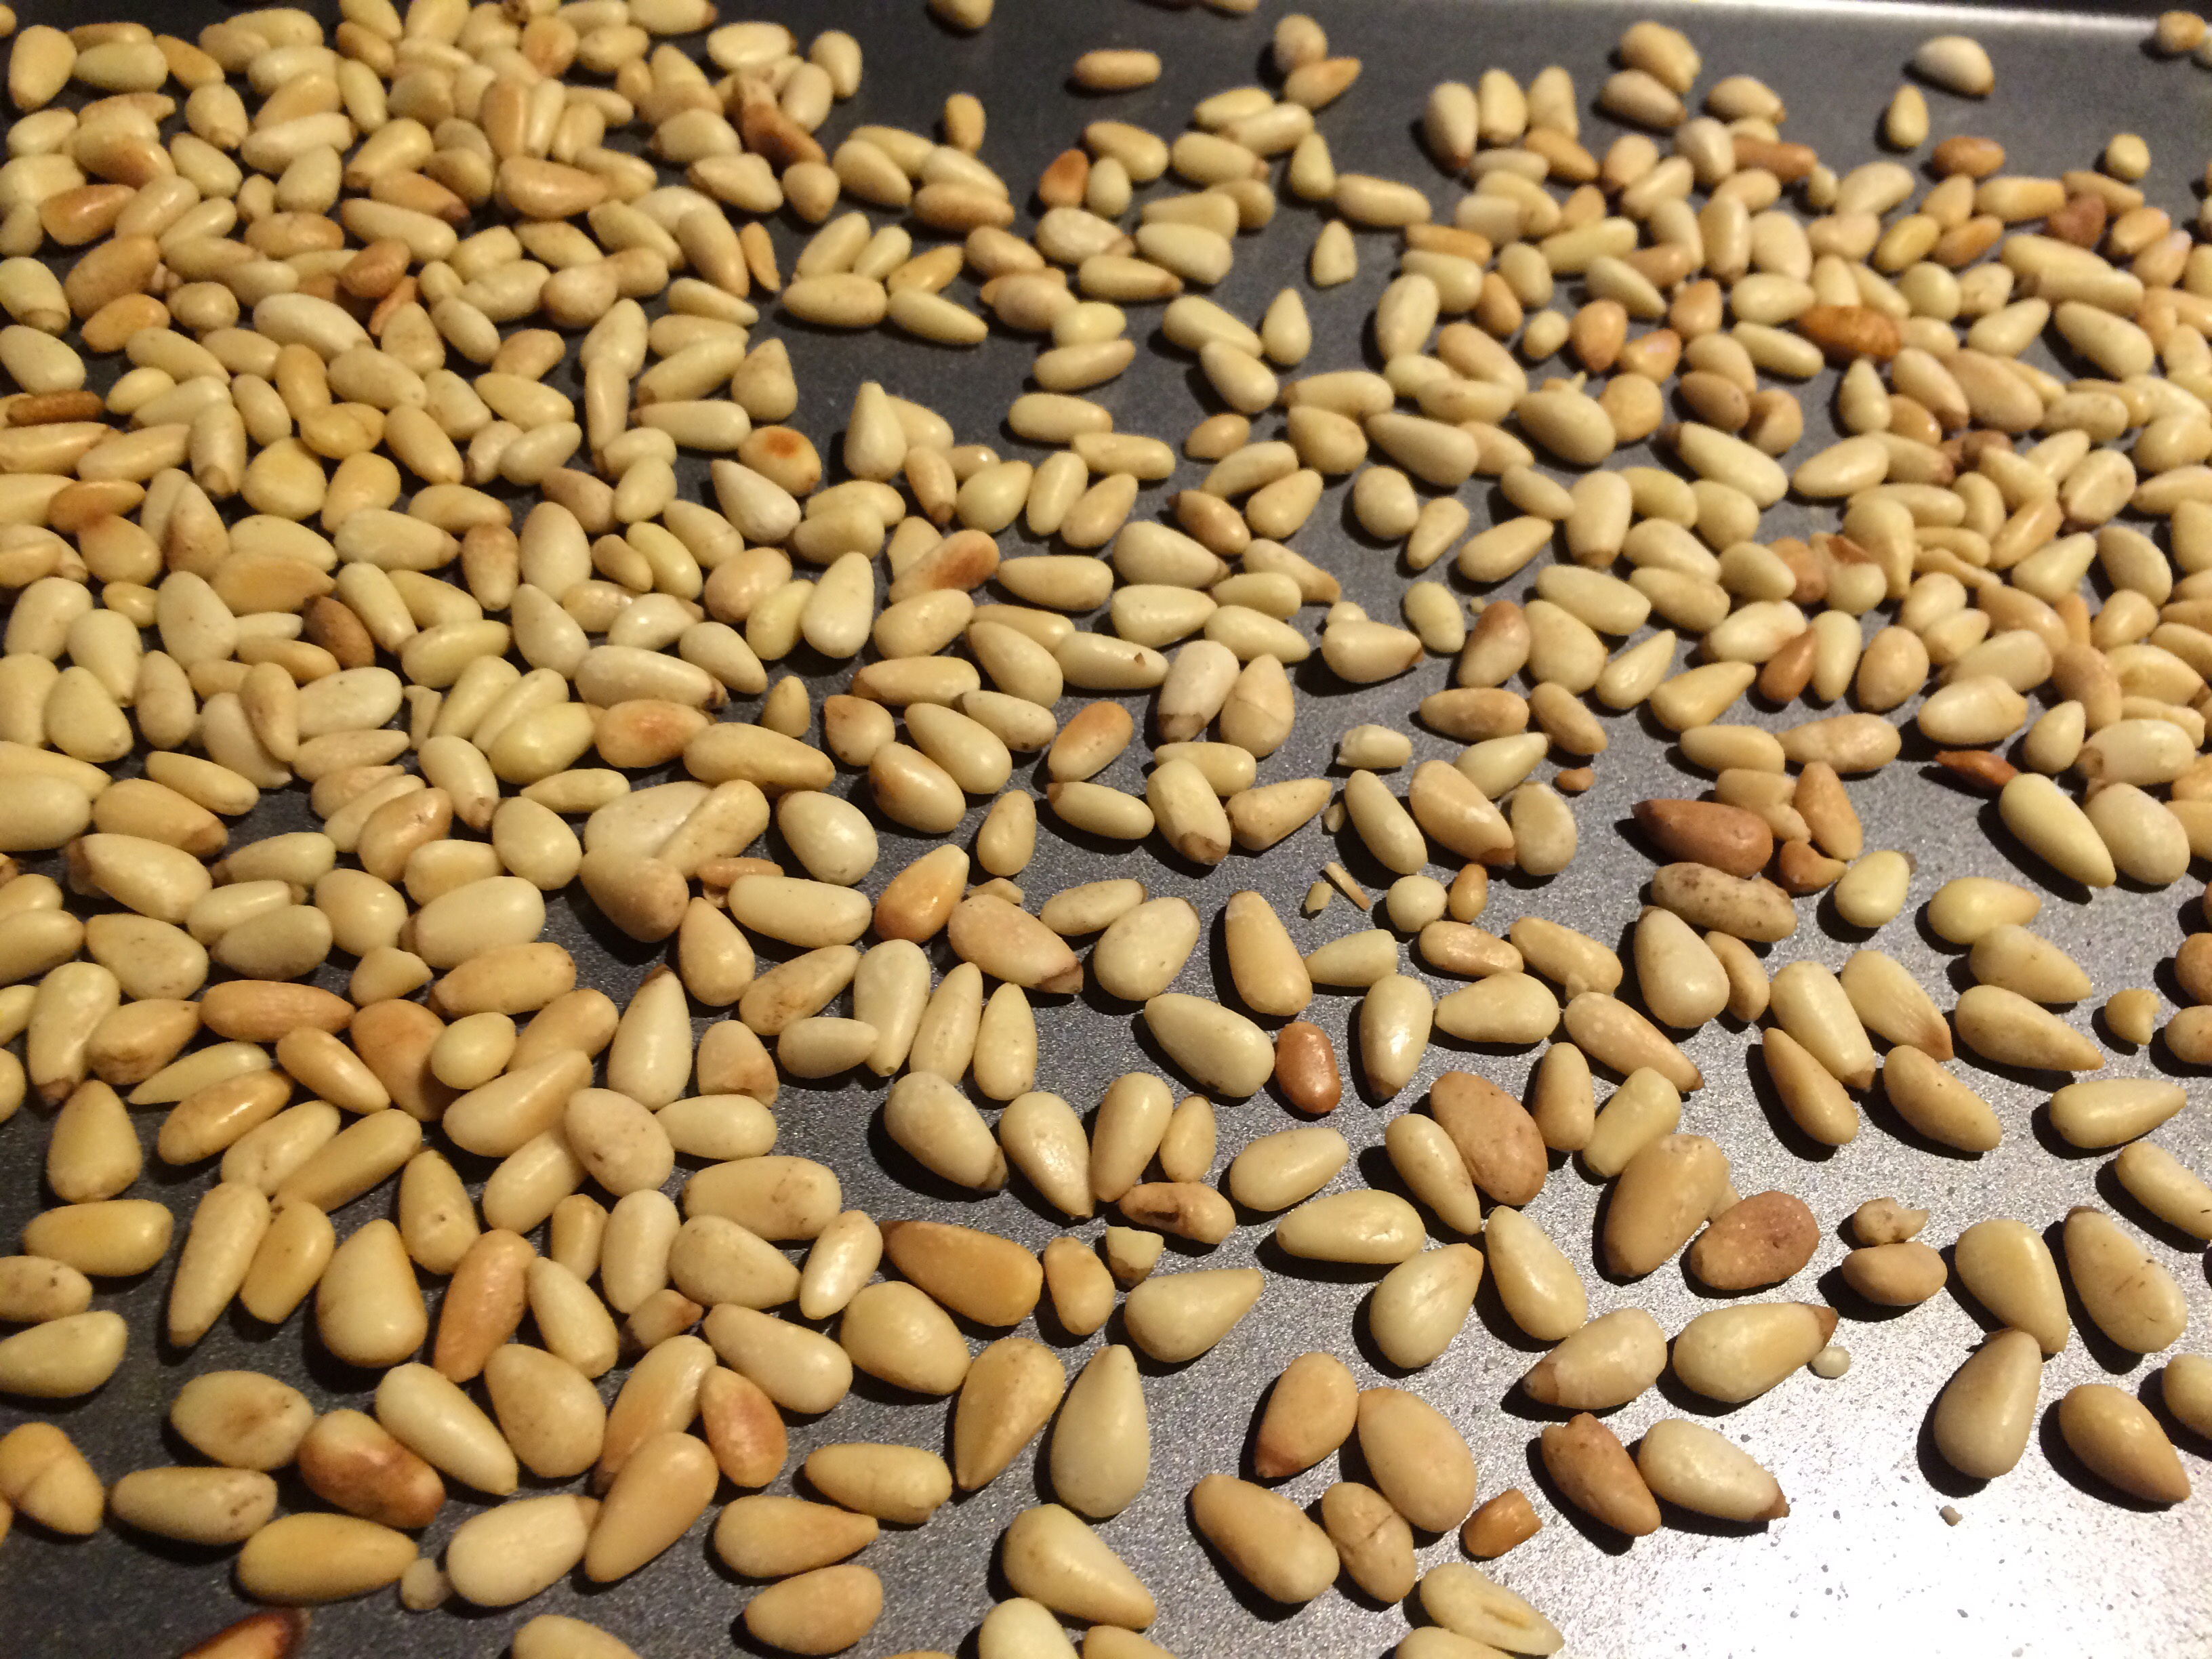
Toast pine nuts in a 350 F oven for 4-5 minutes. Cool on pan until ready to use.
In a food processor, combine garlic cloves and salt. Pulse until chopped.
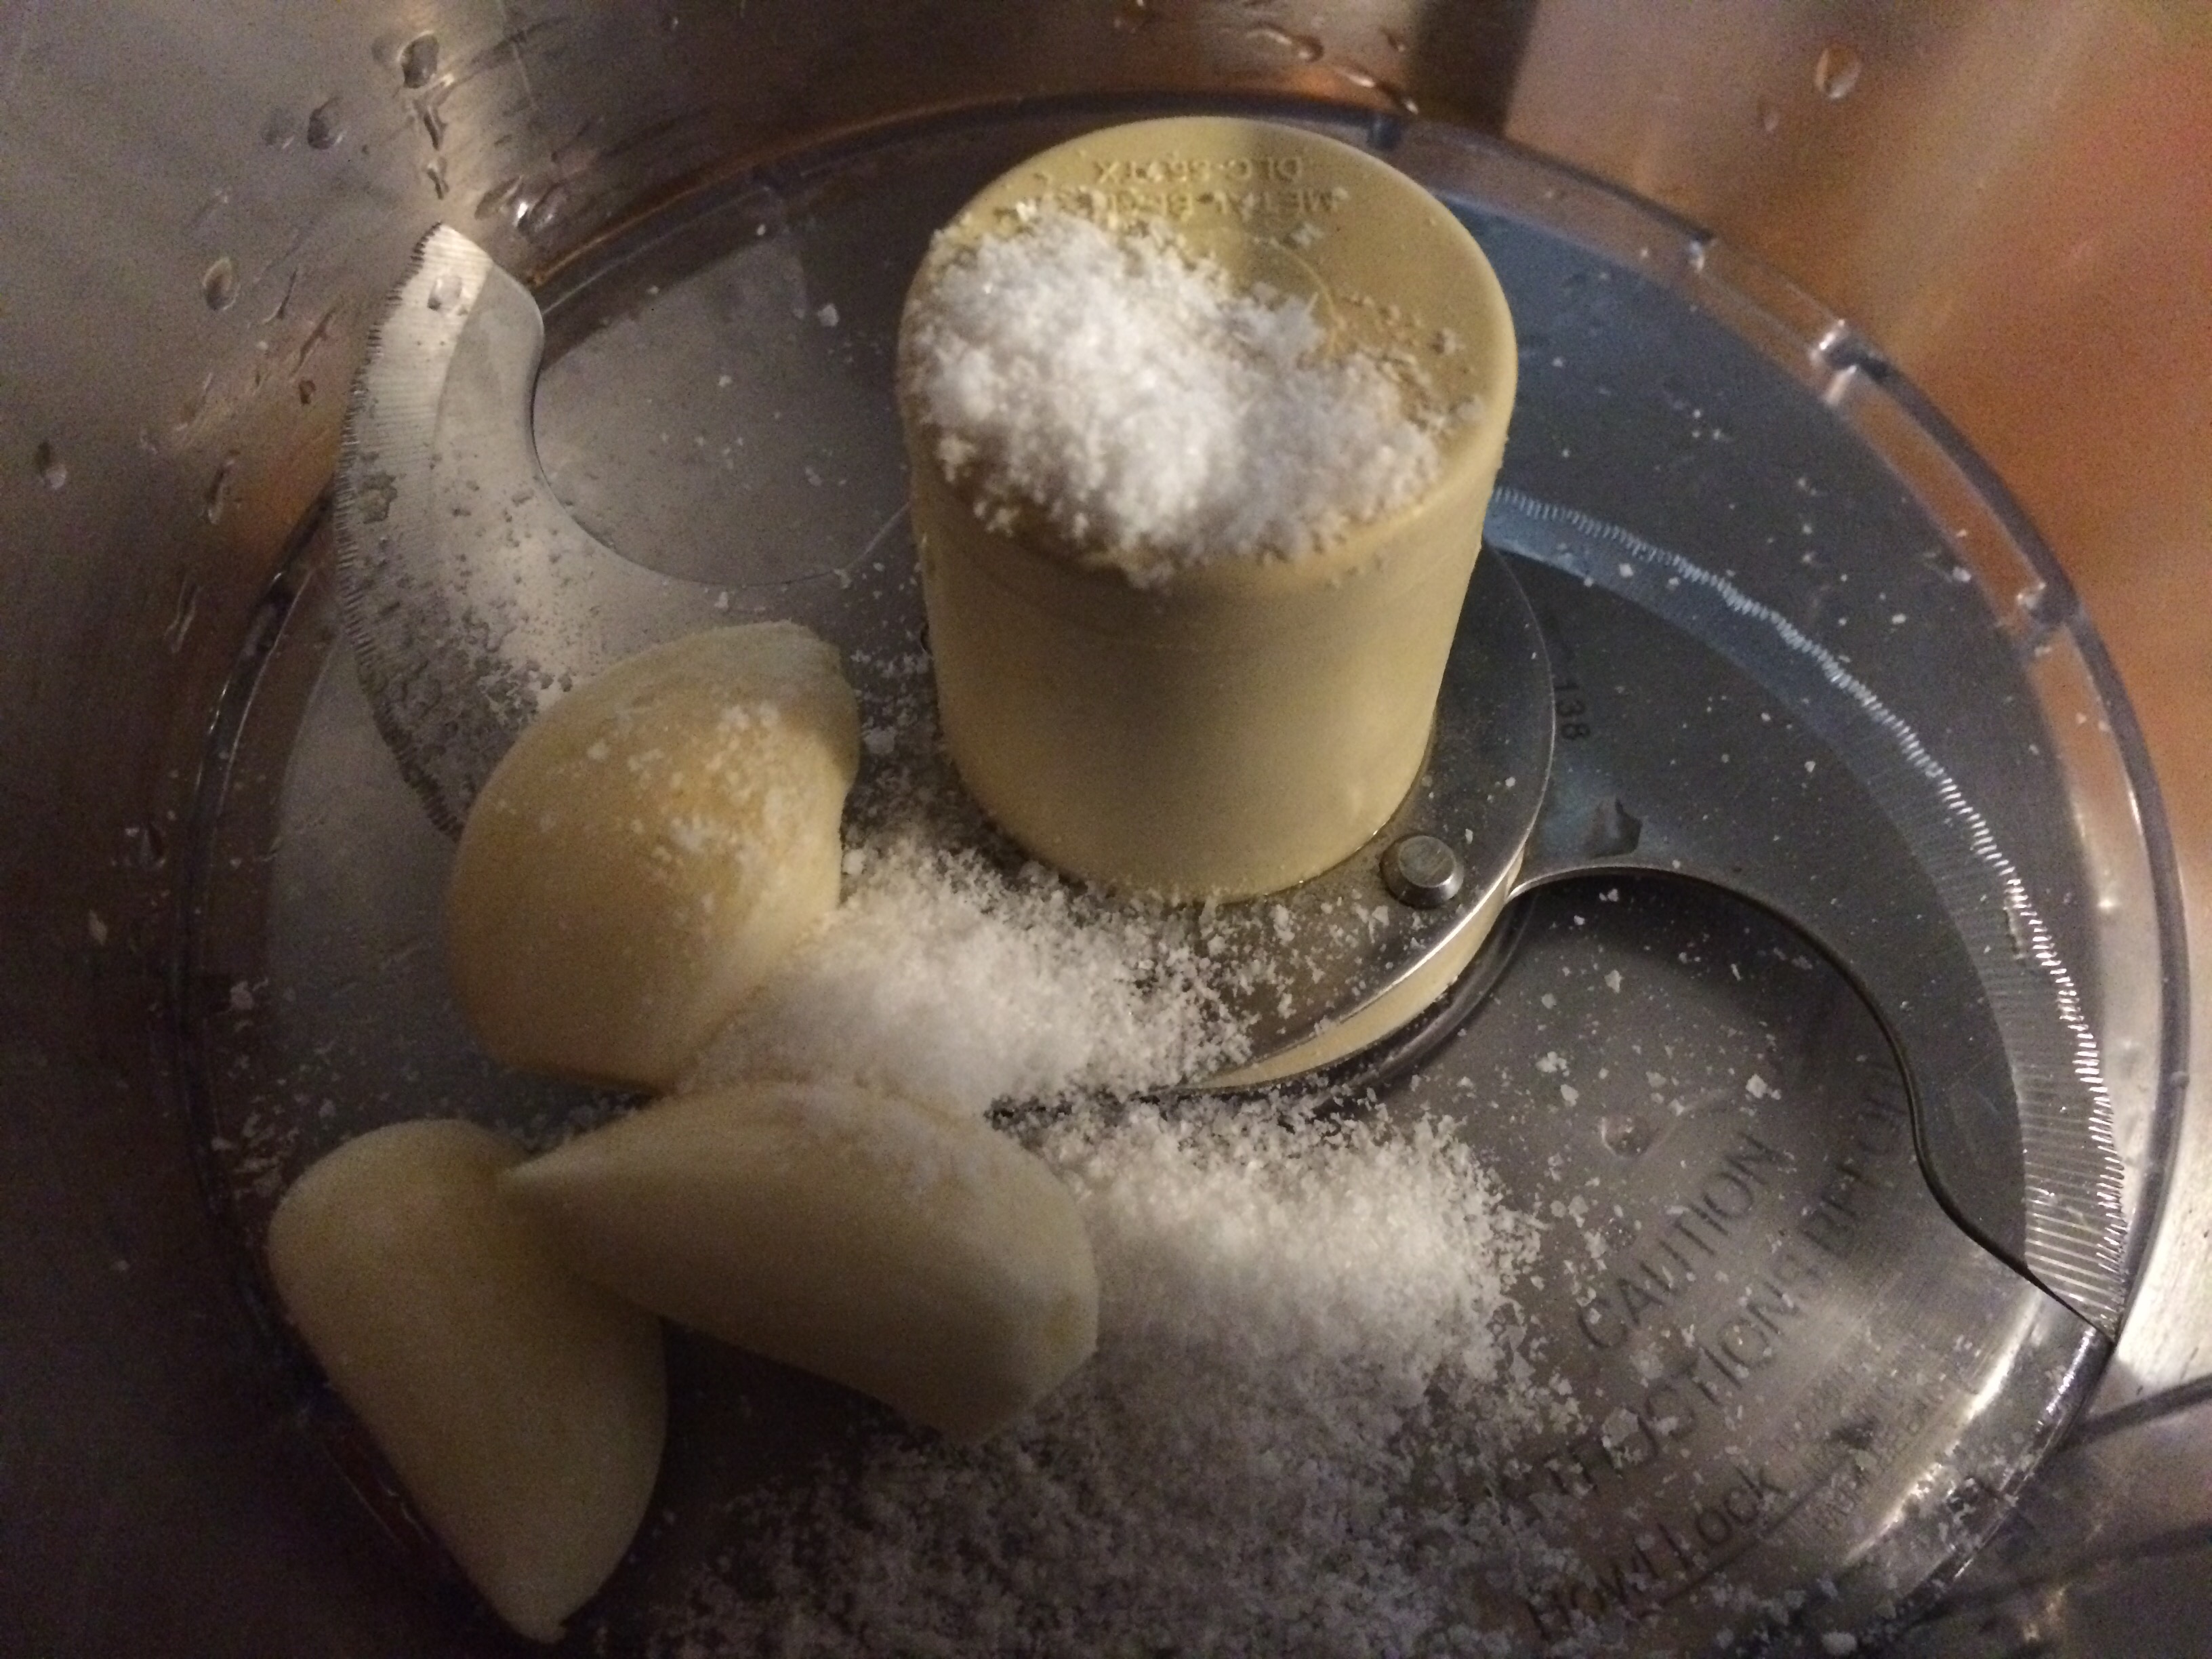
Add toasted pine nuts and Parmesan cheese and process until you have a thick paste.

Add the basil all at once. If your food processor is not large enough to do this, add it in 2 batches.

Secure the lid and run the food processor until the basil is about half chopped. At this point start adding the olive oil in a thin stream until all the basil is chopped finely and sauce is emulsified.

Use immediately or store in the freezer until needed.
Year after year, there are certain dishes that I just can’t seem to get away from, dishes that people remember and repeatedly request. One of those dishes is Beer Can Chicken. I can see why so many people like it. The beer keeps the chicken from drying out, ensuring a juicy, tender bird all the way through. The sweet and savory rub complements the flavor of the hardwood smoke and cooking the chicken whole on the bone ensures maximum flavor. This dish does not require any special ingredients or expensive equipment. I like to use hardwood to cook over but you can do the same thing with charcoal and achieve delicious results. I have scaled the recipe for one 5 pound chicken, but you can cook as many as you can fit in your grill. I regularly cook five or six at a time when I have a big crowd.

Beer Can Chicken
Ingredients:
1 Five Pound Chicken
Kosher Salt
1 Can Beer
1 Bay Leaf
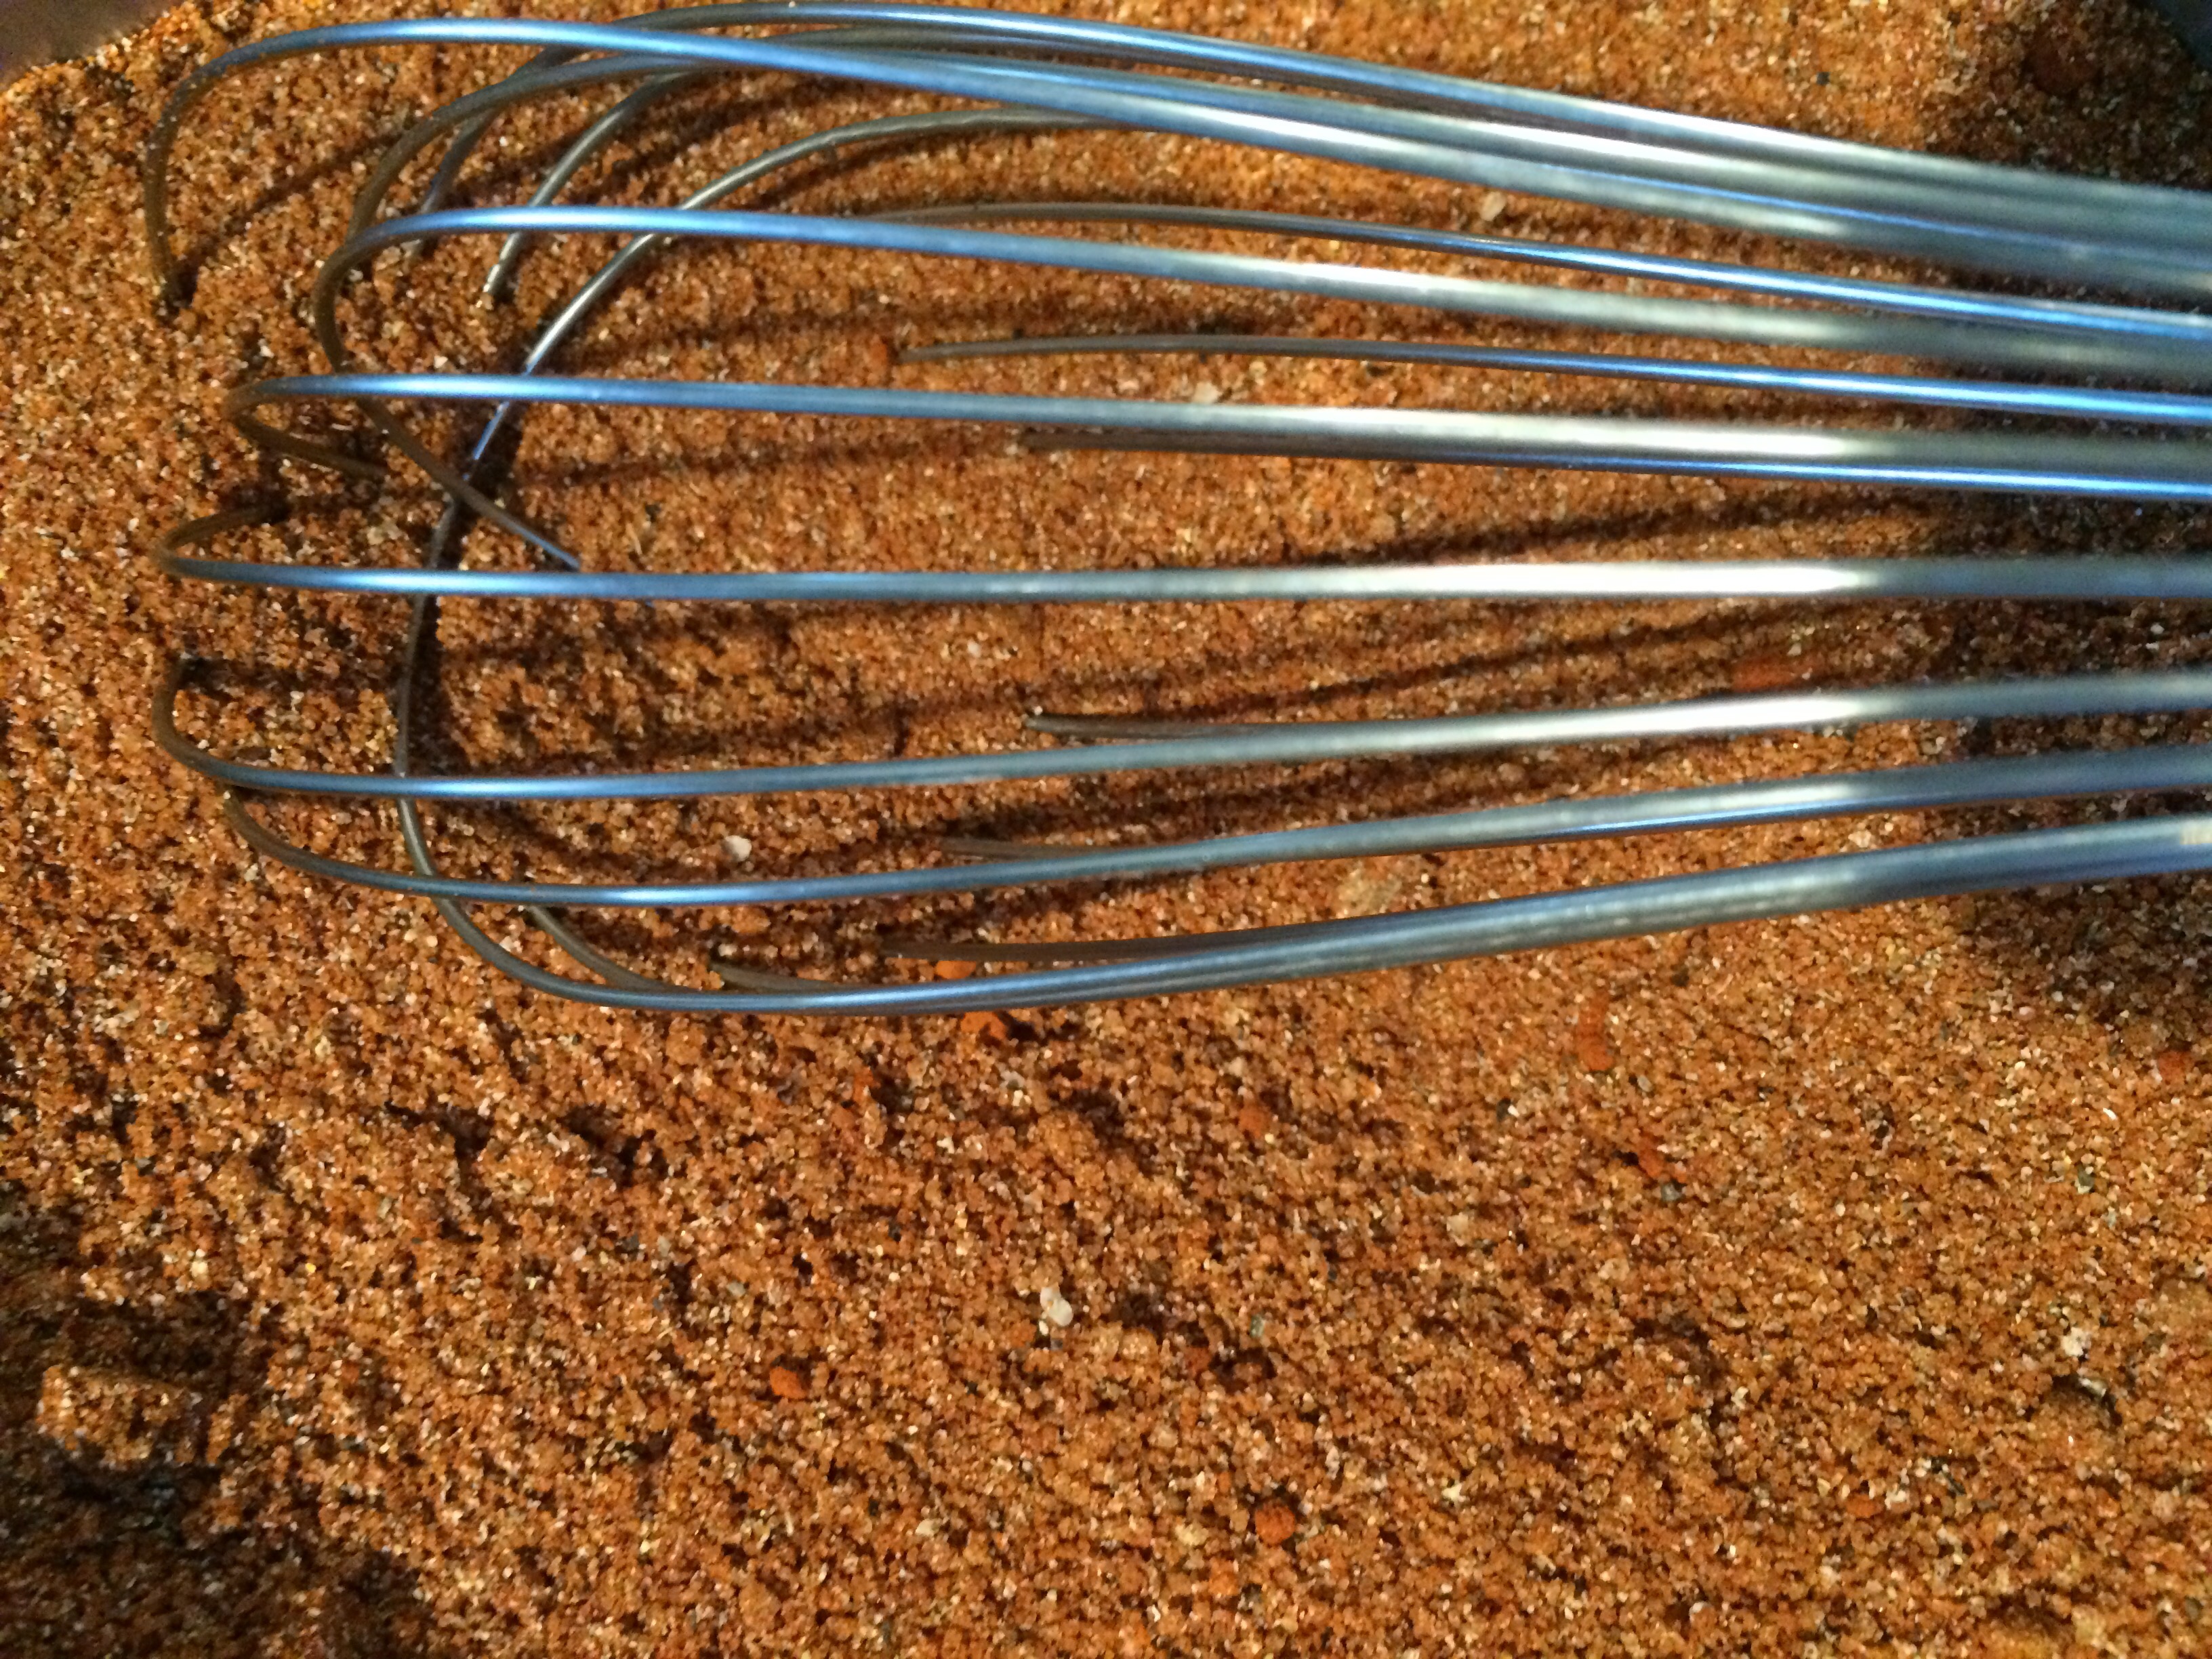
Dry Rub:
1/4 Cup Brown Sugar
1/8 Cup Smoked Paprika
1/2 Tbsp Granulated Garlic
1/2 Tbsp Onion Powder
1/2 Tbsp Black Pepper
1/2 Tbsp Chili Powder
Prep Time:
60-90 minutes
Cooking Time:
60-90 minutes
Directions:
Combine all the ingredients for dry rub in a bowl and whisk to combine. Set aside until ready to use.
Rinse chicken well, dry with paper towels and place on pan with a rack. Make sure the cavity of the chicken is empty.
Liberally salt the chicken, inside and out and let sit for at least an hour. This step is called dry brining and will help the chicken retain its natural juices while cooking.

While the chicken is brining, build a raging fire in a kettle grill and let it burn down to coals or start your charcoal in a chimney smoker (a hardwood fire will take about an hour to burn down, charcoal will be ready in about 15 minutes). When the fire has burned down to coals, bank it to either side of the grill, put the grate on and close the lid, making sure the vents are open and you have good airflow.
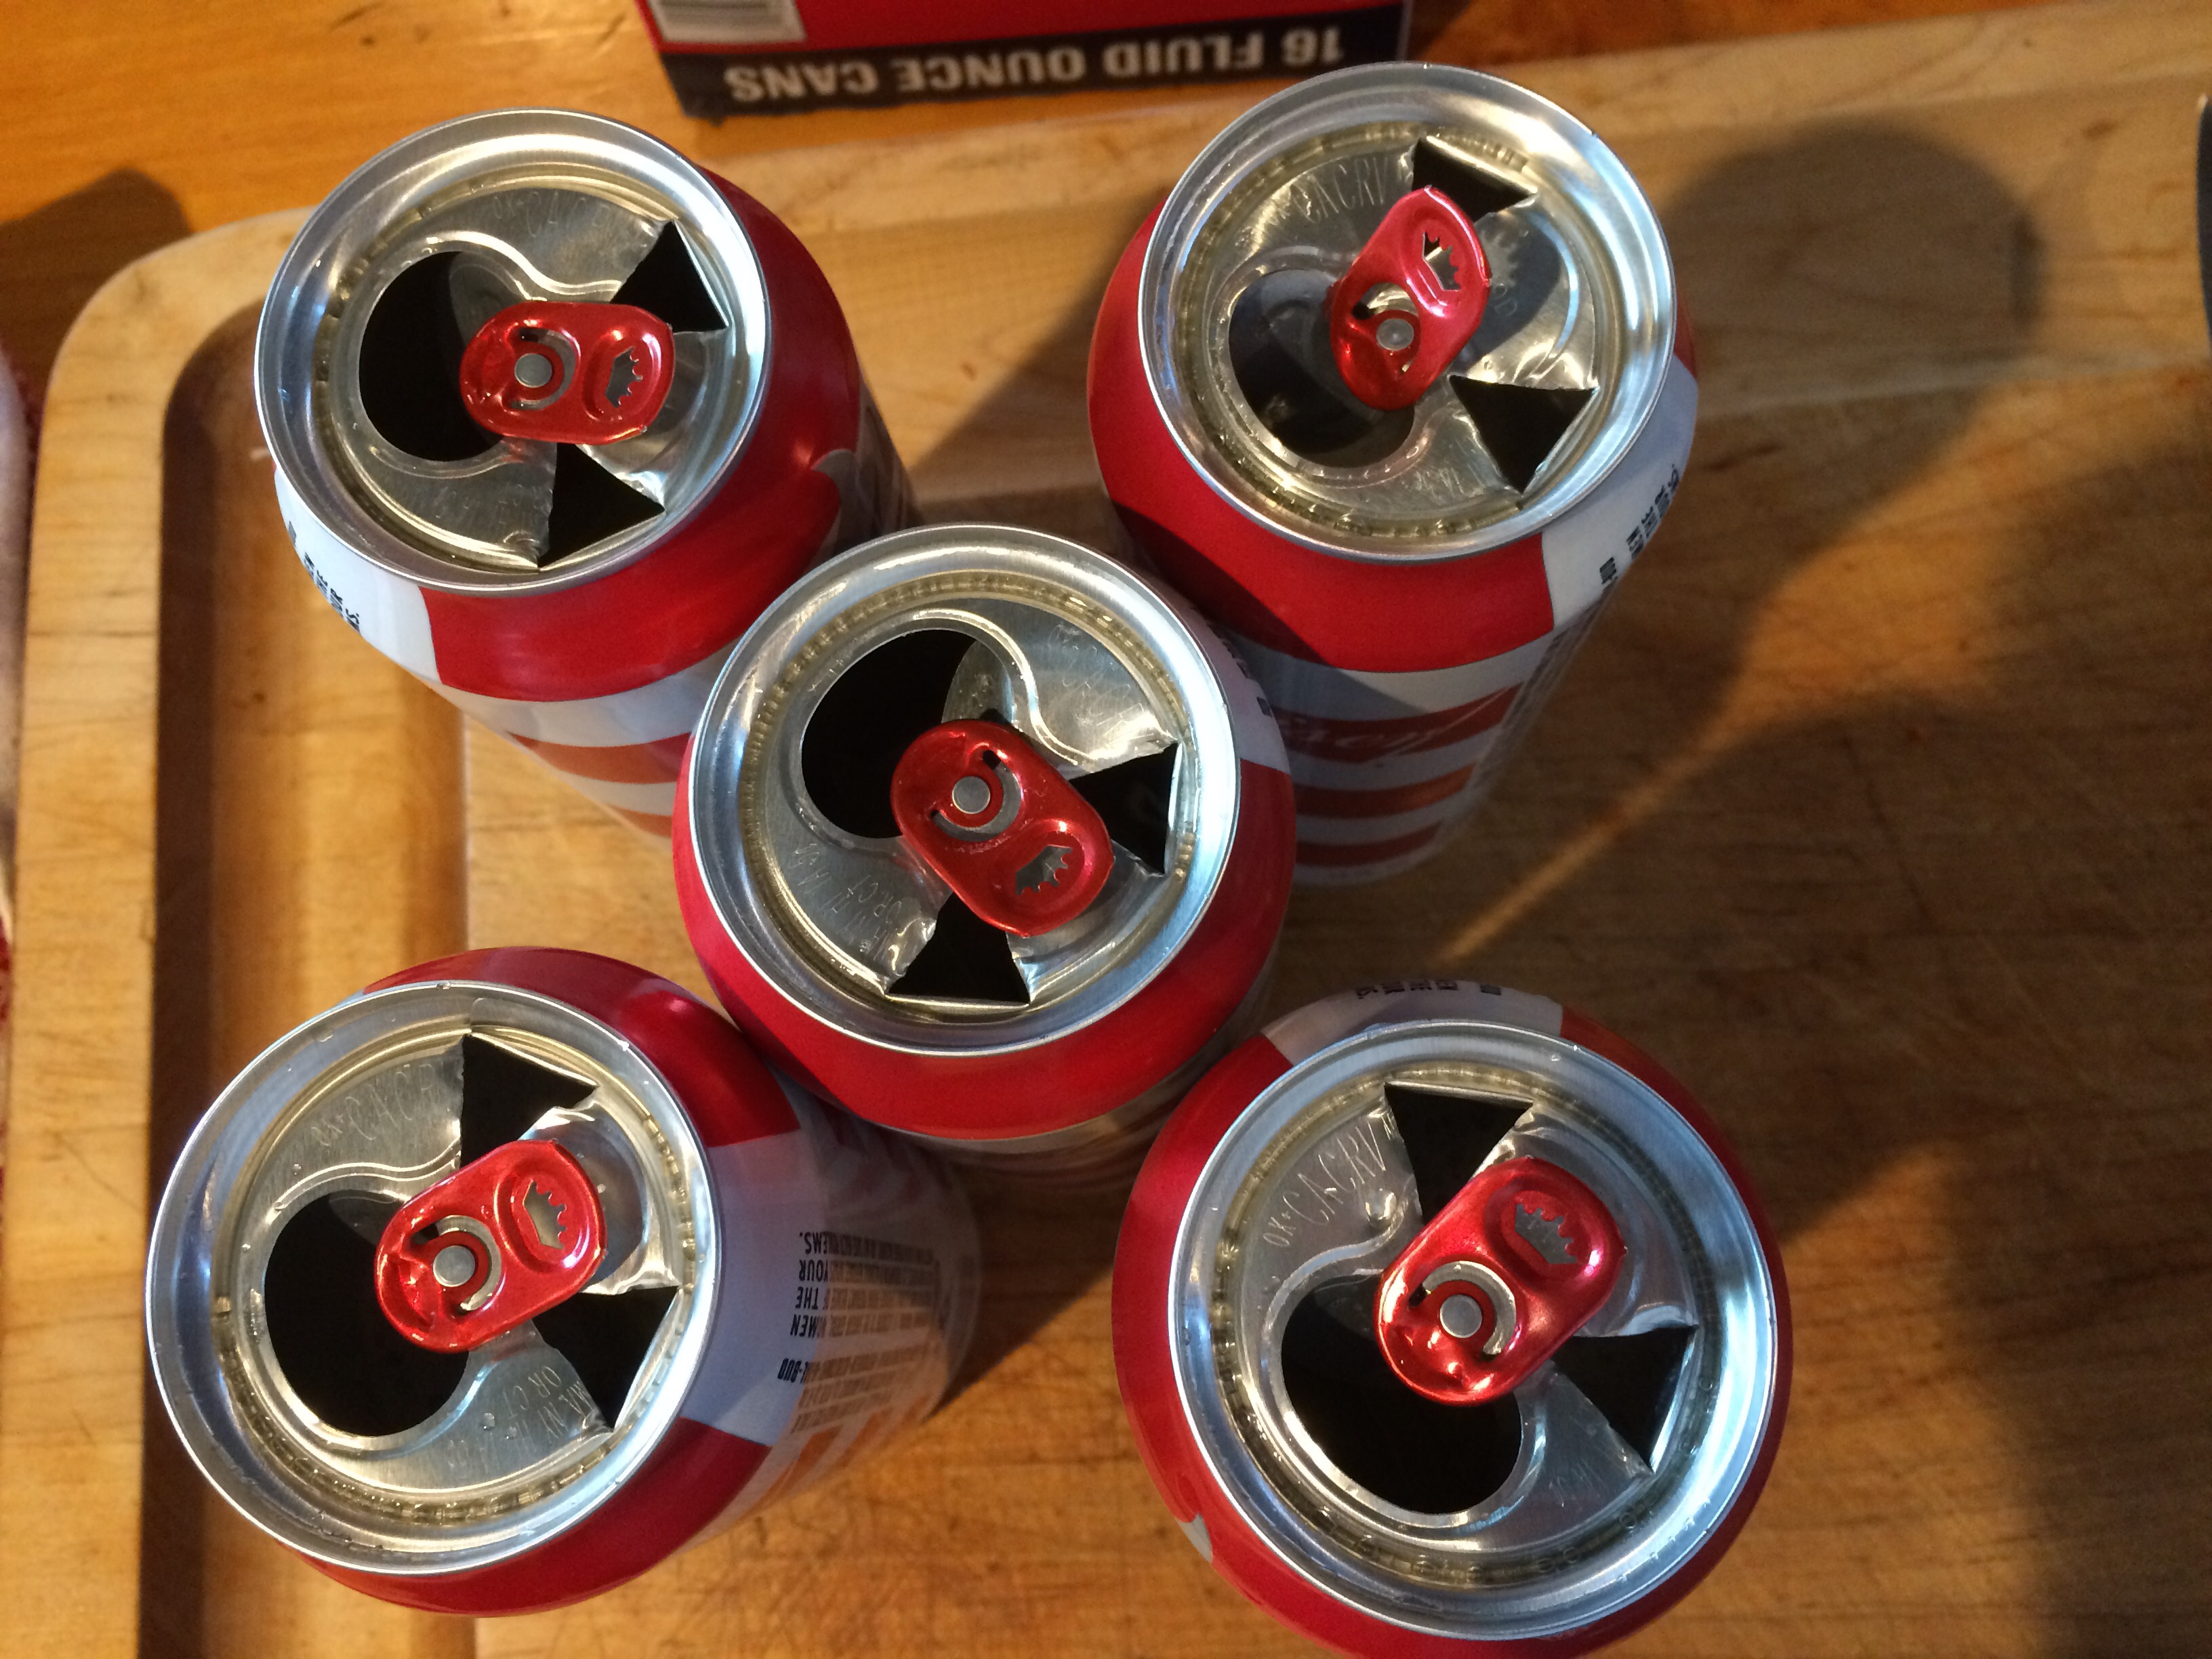
Open the can of beer (I typically use Budweiser) and drink half, after all, you’re the one doing all the work! I have used 12 and 16 ounce cans and they both work well. With a church key style can opener, make two extra holes in the top of the can. This will allow the maximum amount of steam to escape from the can while the chicken is cooking. Crumble the bay leaf and put it in the can with the remaining beer.

Apply dry rub to the chicken liberally, inside and out. You may have some left over. You can store it in a spice jar and it is good on all sorts of stuff, including BBQ Ribs.
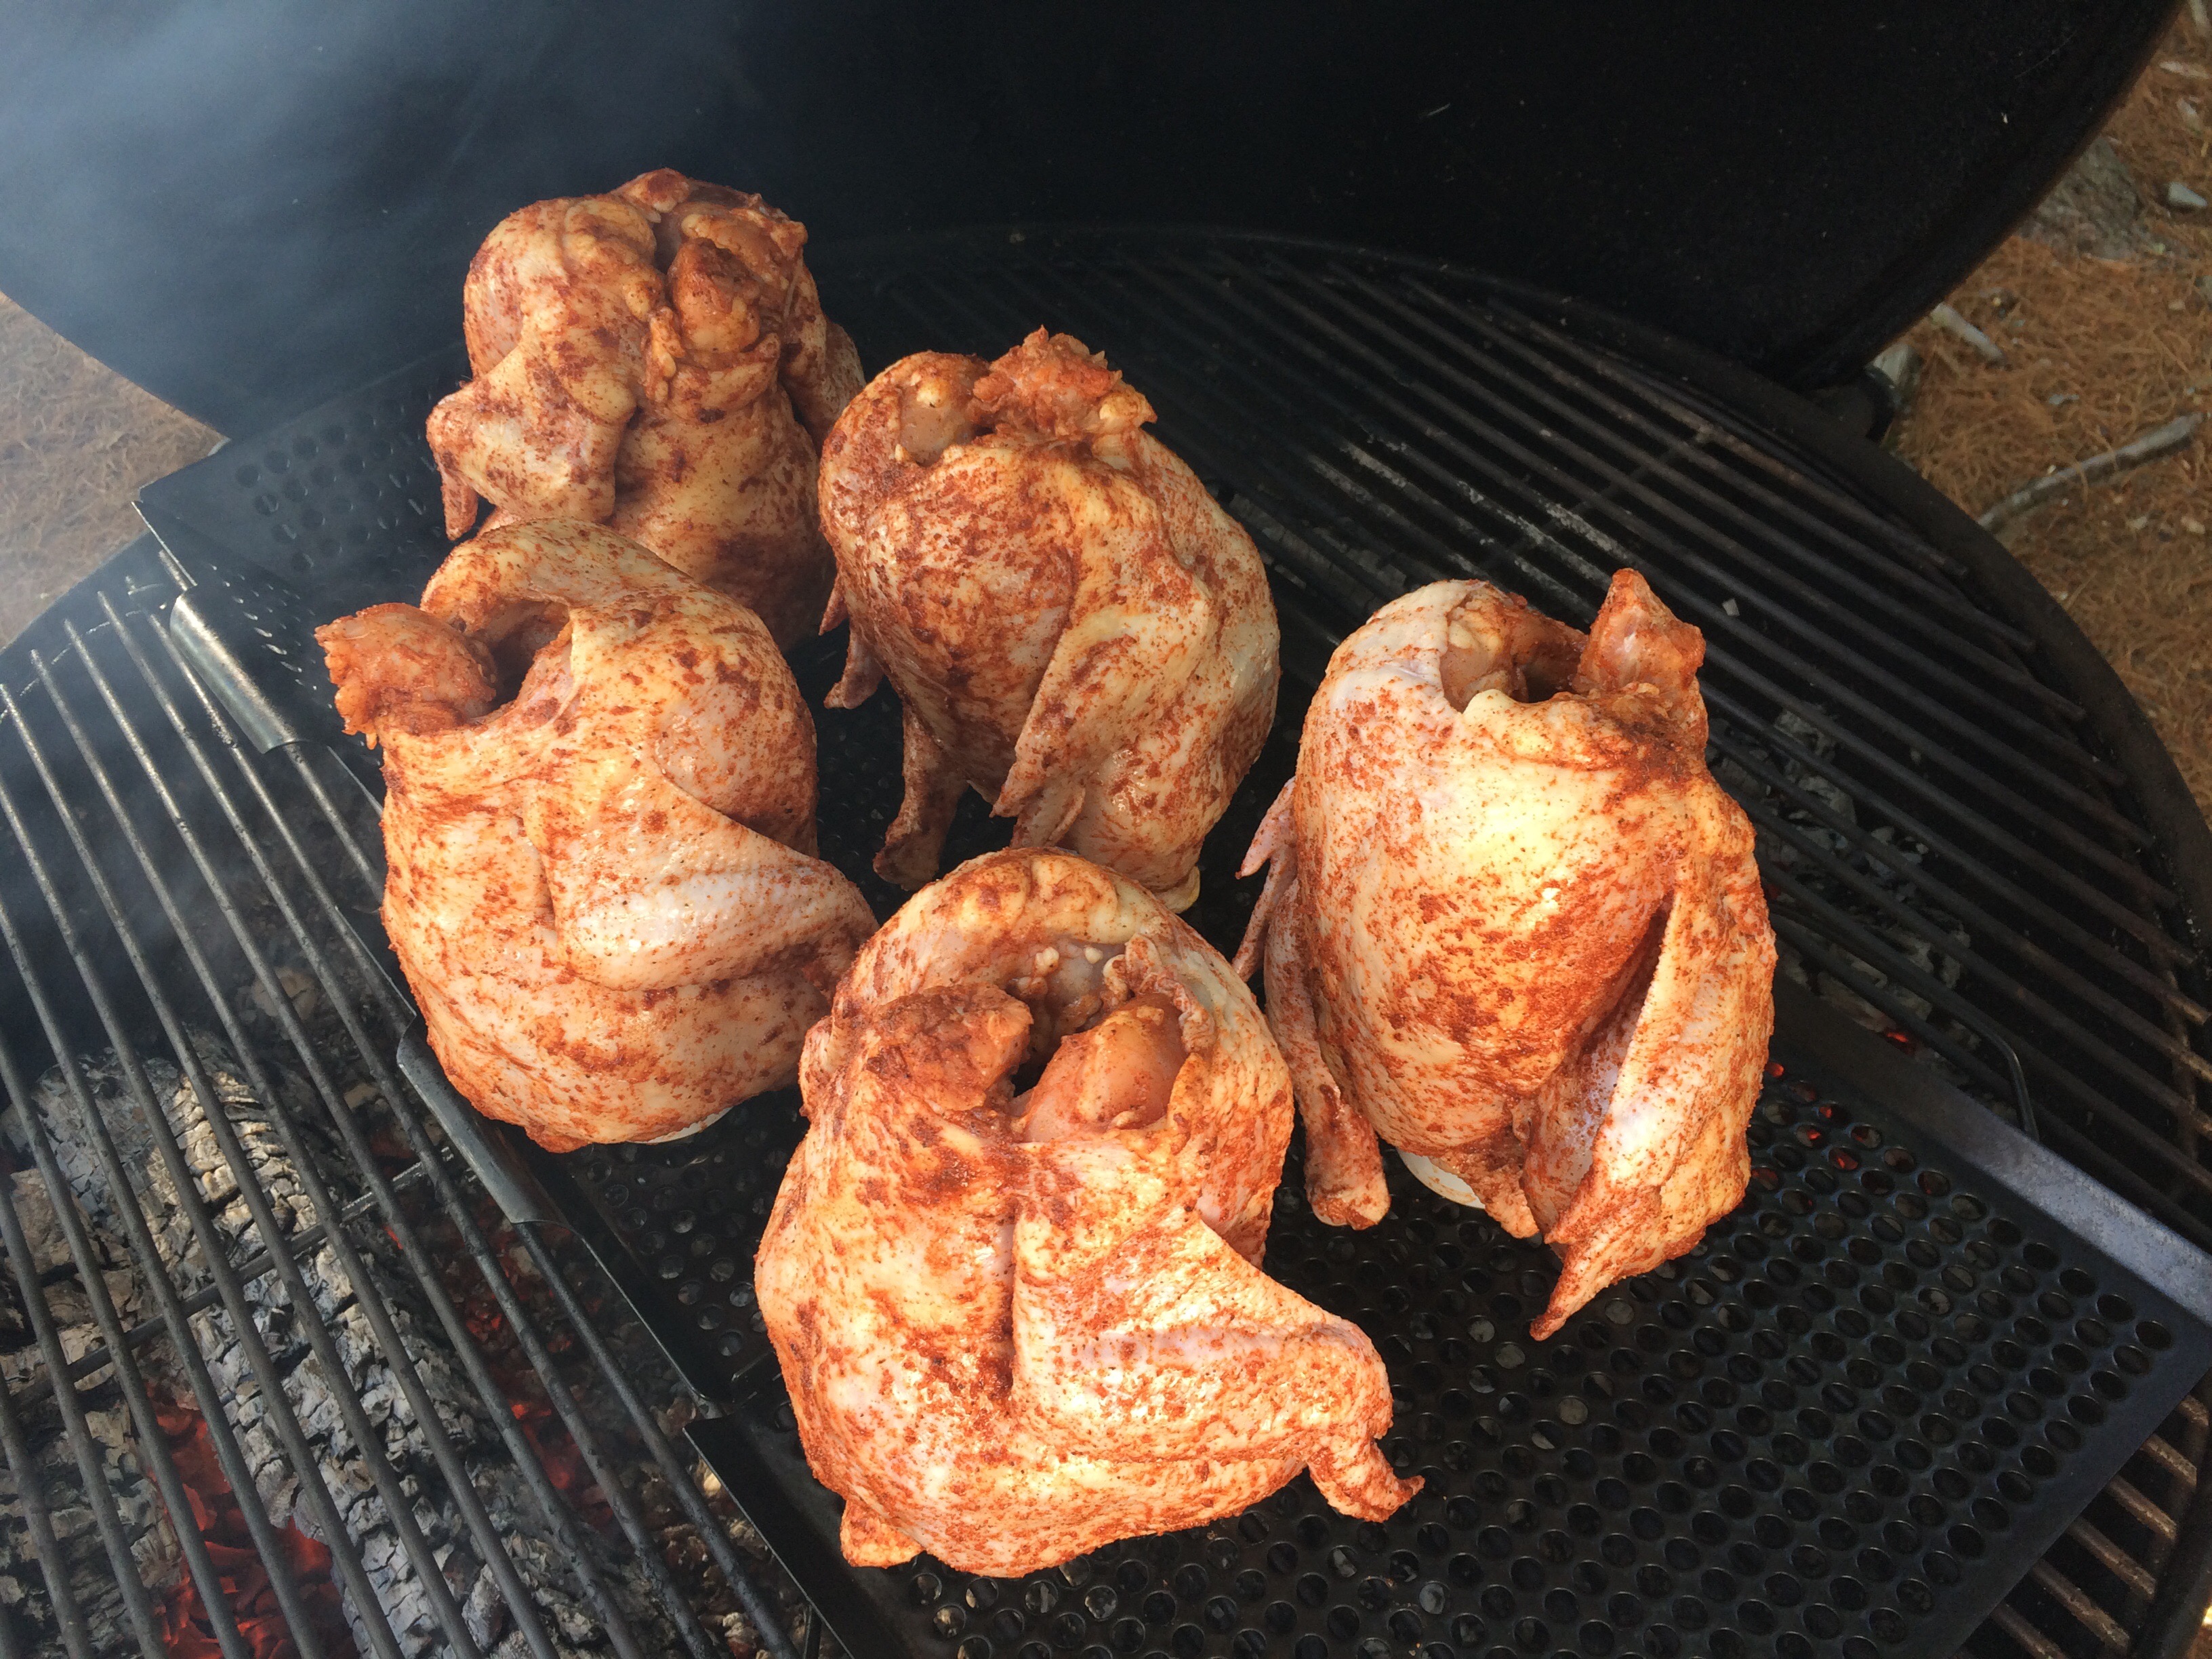
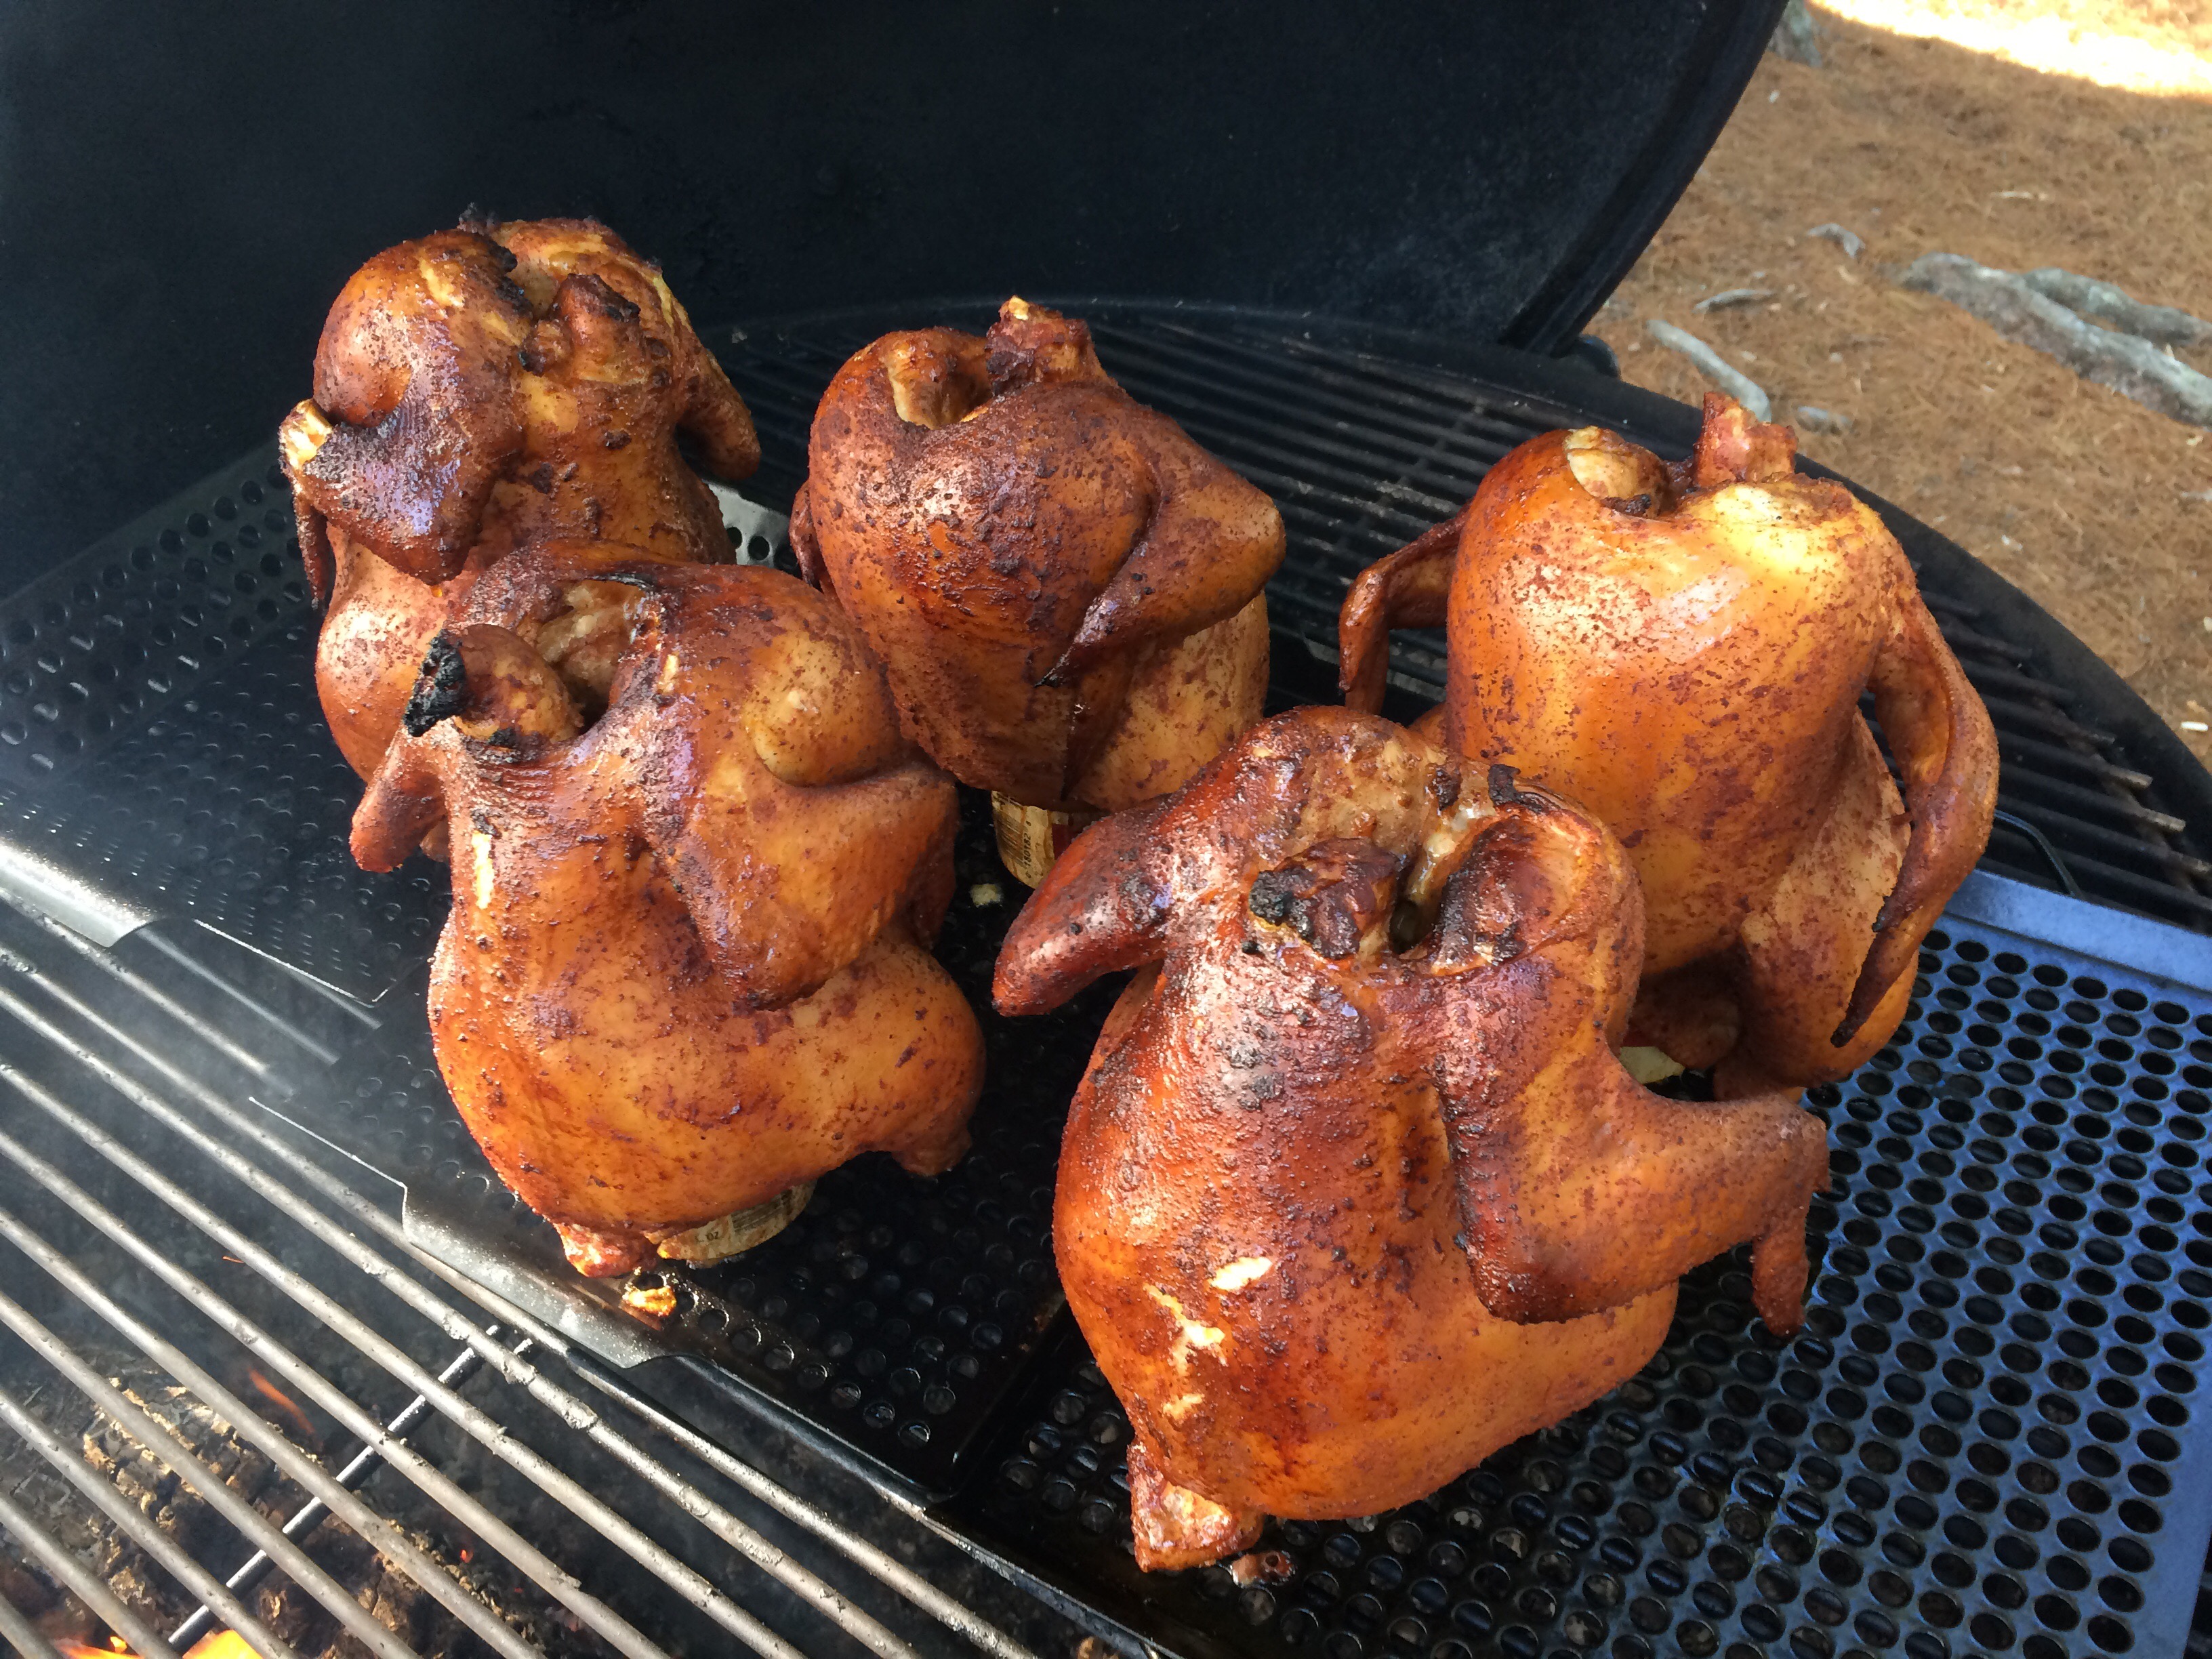
Check the temperature of the grill. The internal temperature should stay around 350 degrees Fahrenheit. If the grill gets too hot, close the vent to kill the fire. If the temperature drops too low, add more fuel and stoke the fire. Once you have the temperature where you want it, Insert the beer can into the chicken cavity and place on the grill grate so the chicken balances on the can. I find it helps to use a metal grill pan to provide more stability but it is not necessary.

Close the lid of the grill, being careful not to accidentally knock over the chicken. Make sure the vents are open and you can see smoke coming out. Resist the temptation to frequently open the lid and check on the chicken. Every time the lid is opened, heat is allowed to escape, making it difficult to maintain a consistent temperature. For the first hour, do not open the lid unless you have to.

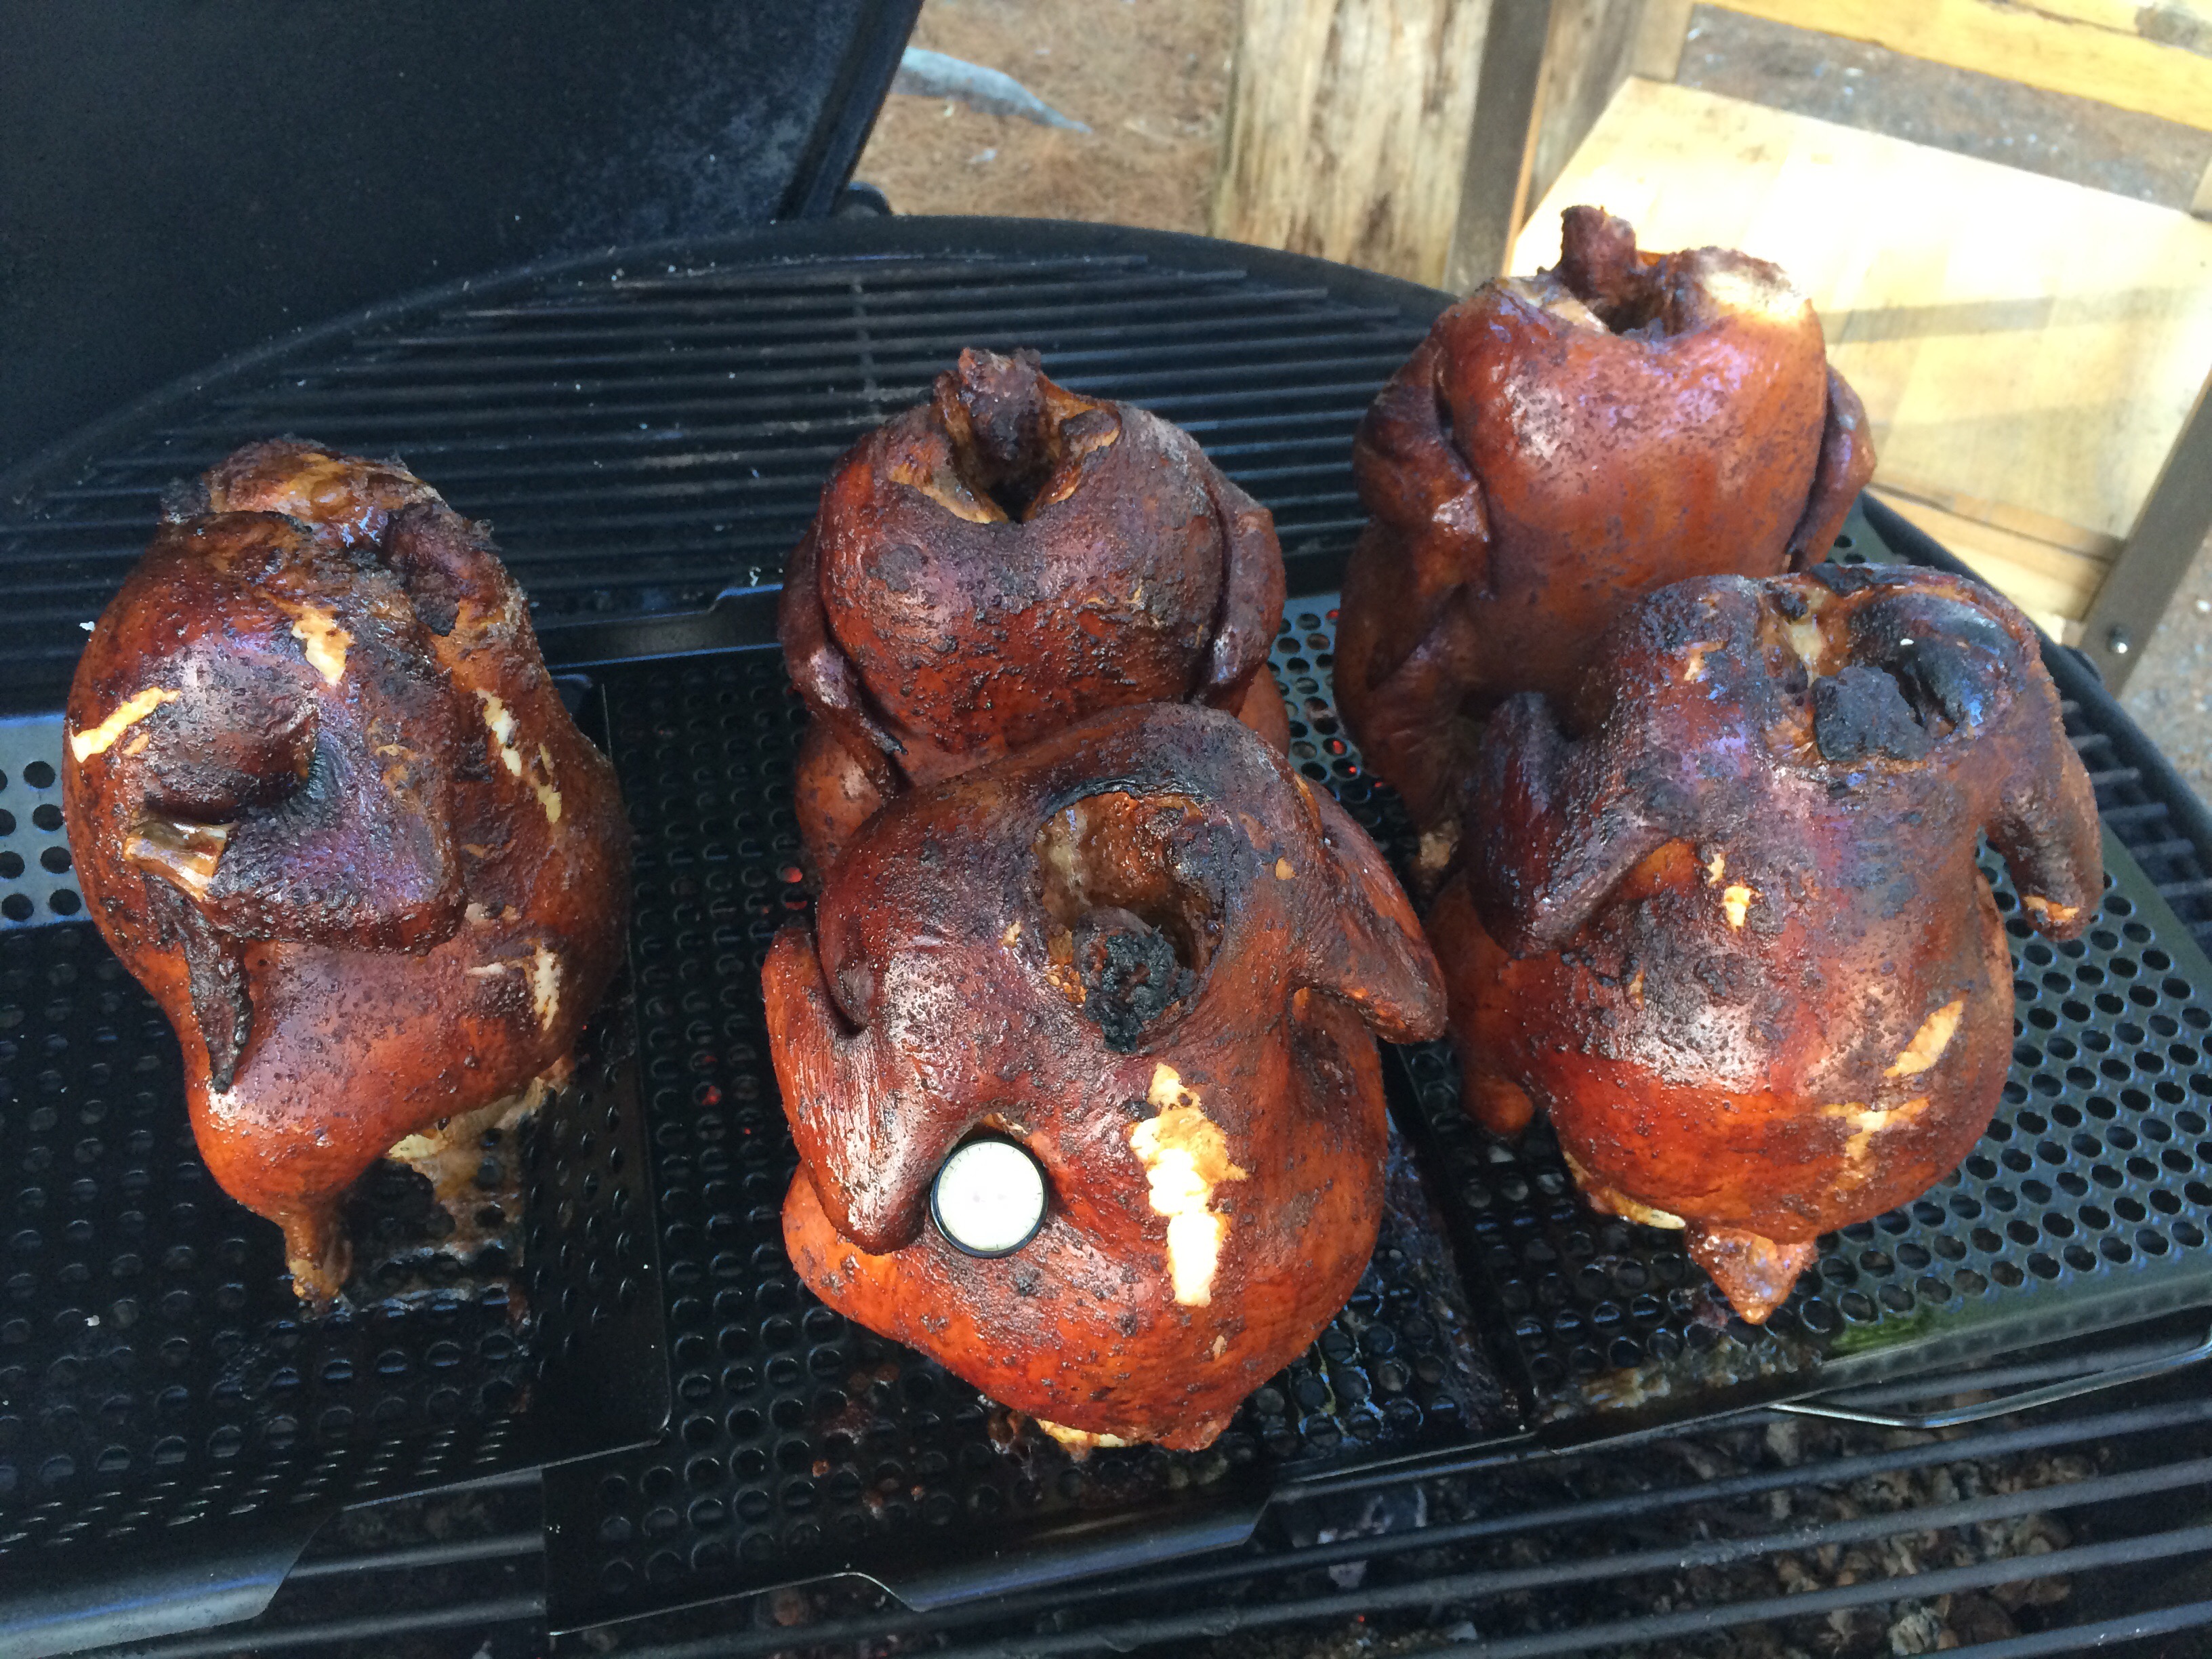
After the first hour, open the lid and take a look. Cooking over a live fire is not an exact science. There are many different variables that can affect cooking time. If all goes well, your chickens should look like this after an hour. A few times I have opened the grill only to be horrified at finding black, carbon-coated chickens inside. Every time I was pleasantly surprised to find that the chicken was still cooked perfectly inside and completely delicious!

Check your chicken’s temperature by inserting a thermometer in the breast and along the thigh bone. Chicken is ready when the breast temperature measures 160 degrees and the thigh measures 175 degrees. If it isn’t ready, don’t rush it. Just close the lid, open another beer and cook a little longer.
When the chicken is ready, carefully remove from the grill and tent with foil. Allow the chicken to rest for 10-20 minutes before carving. Remove the beer can carefully (it will likely still have some hot liquid in it) and cut the chicken into pieces and serve.


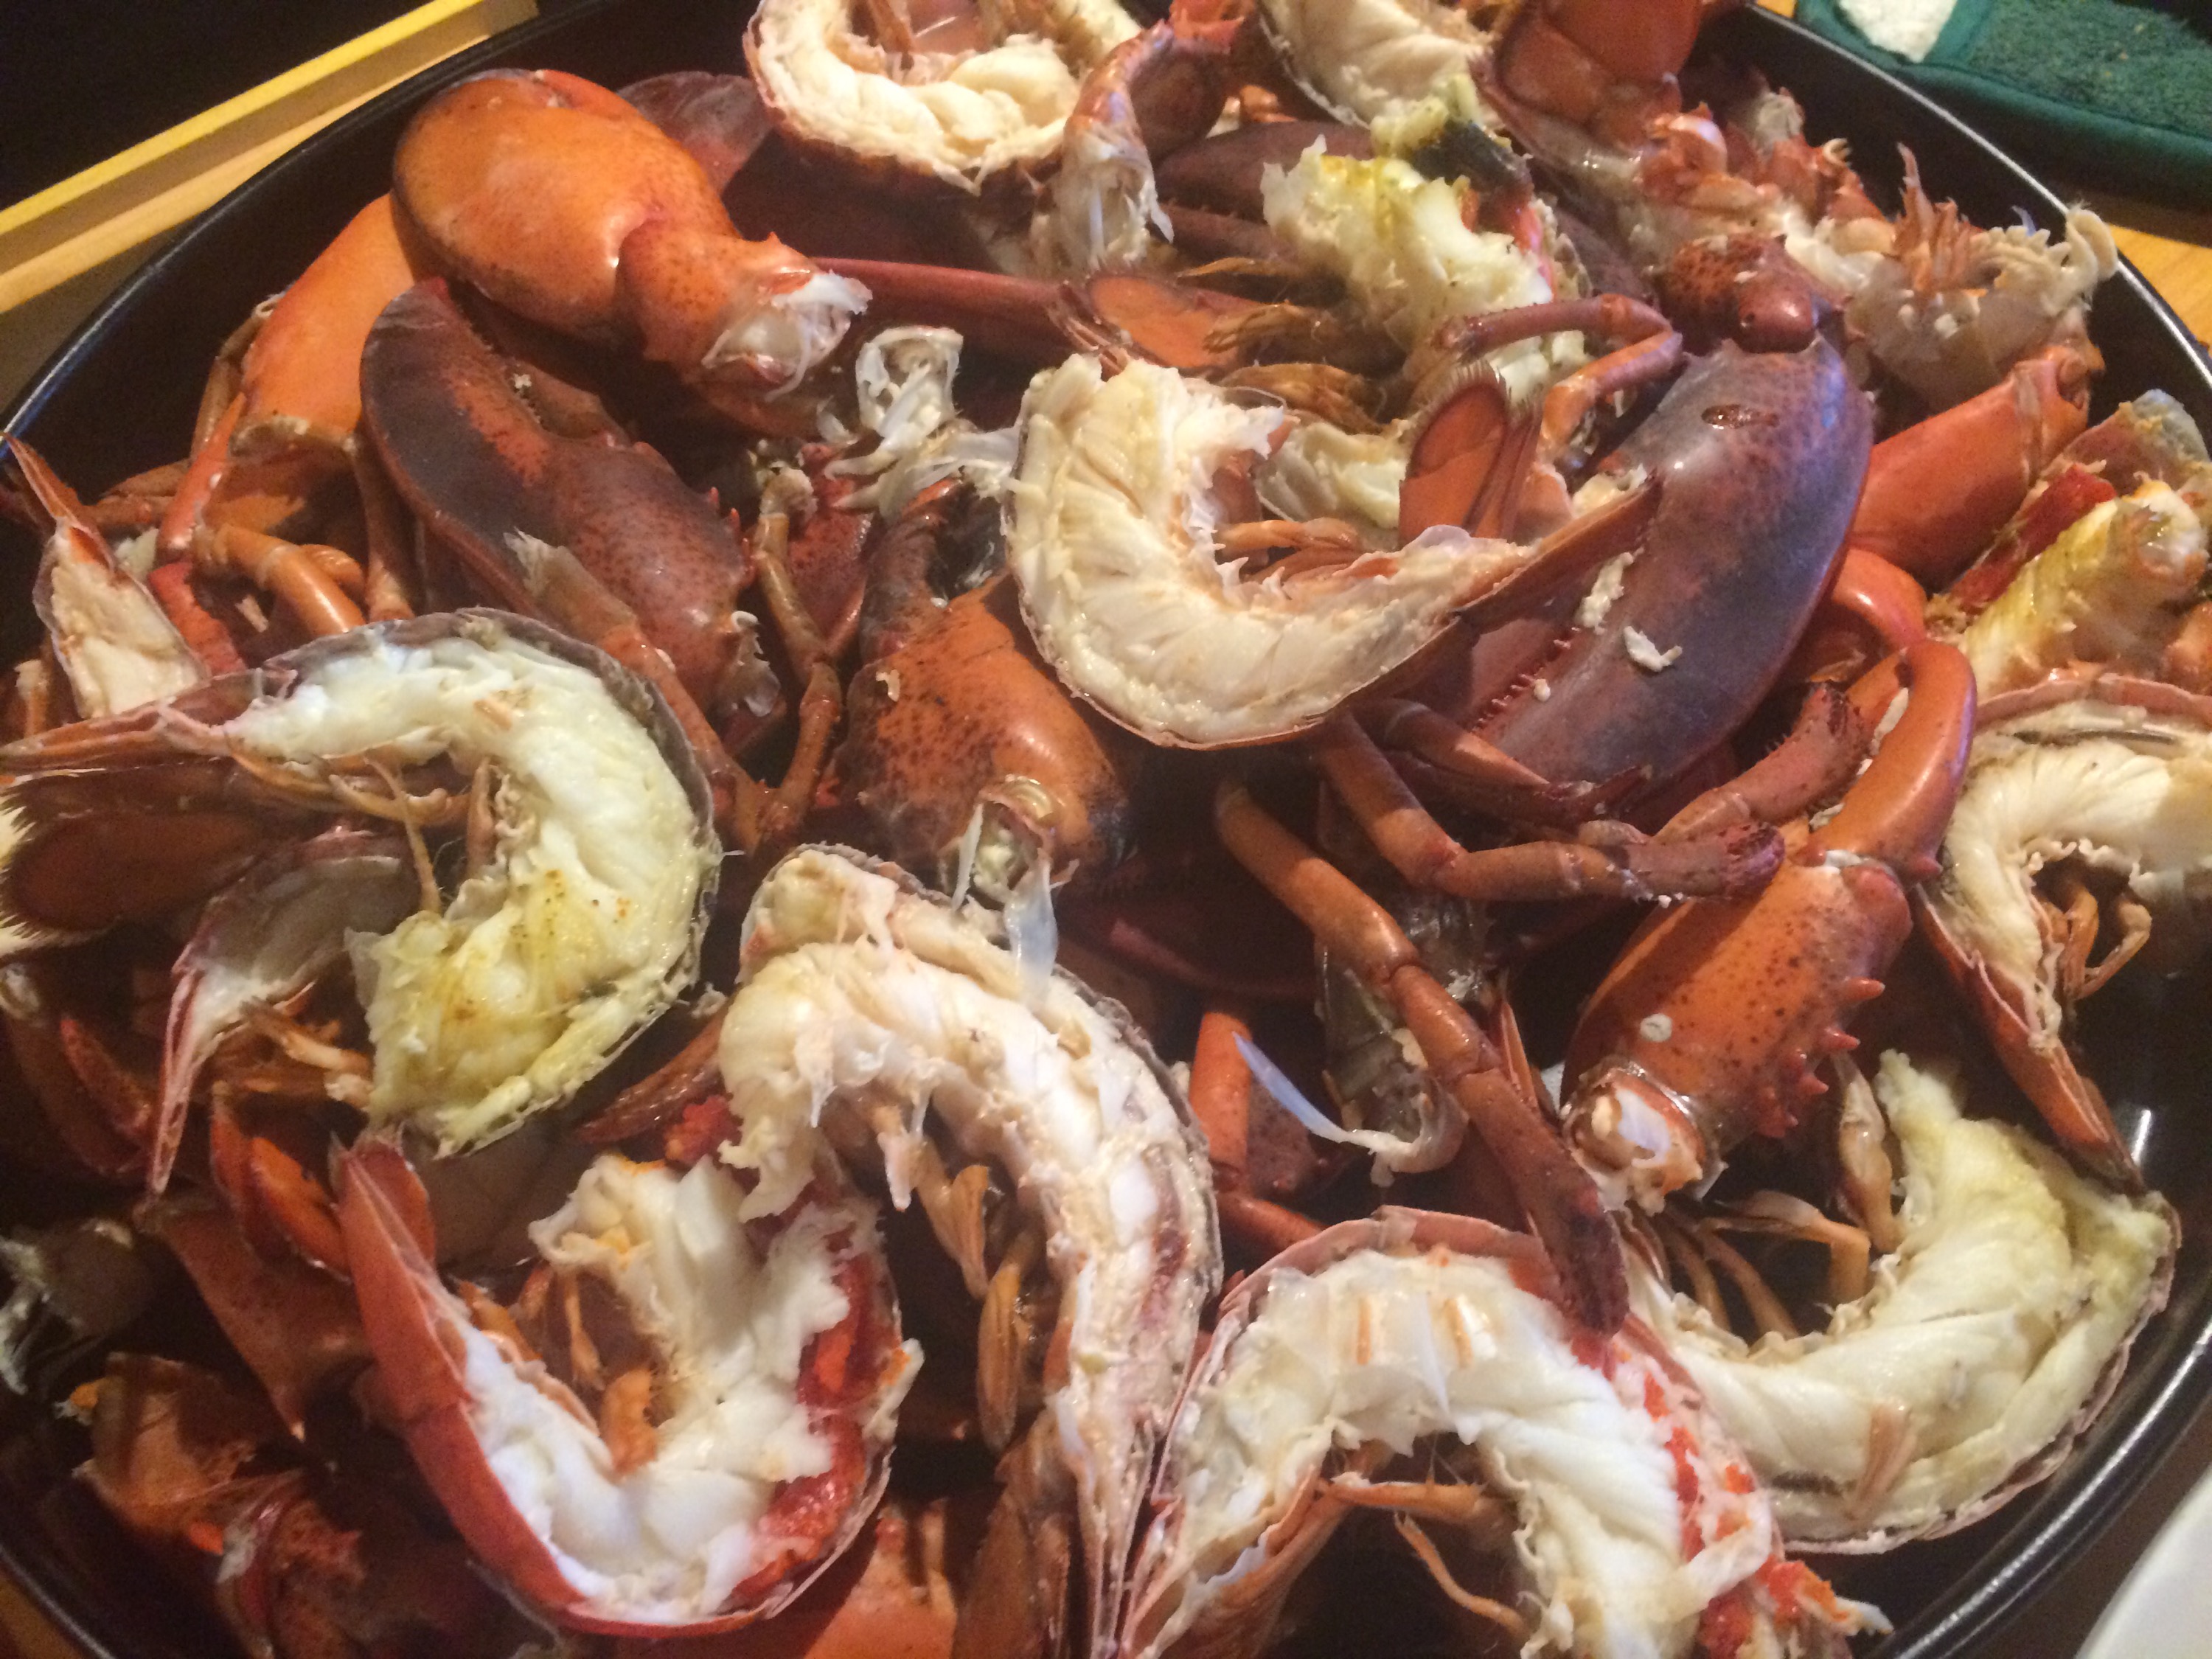
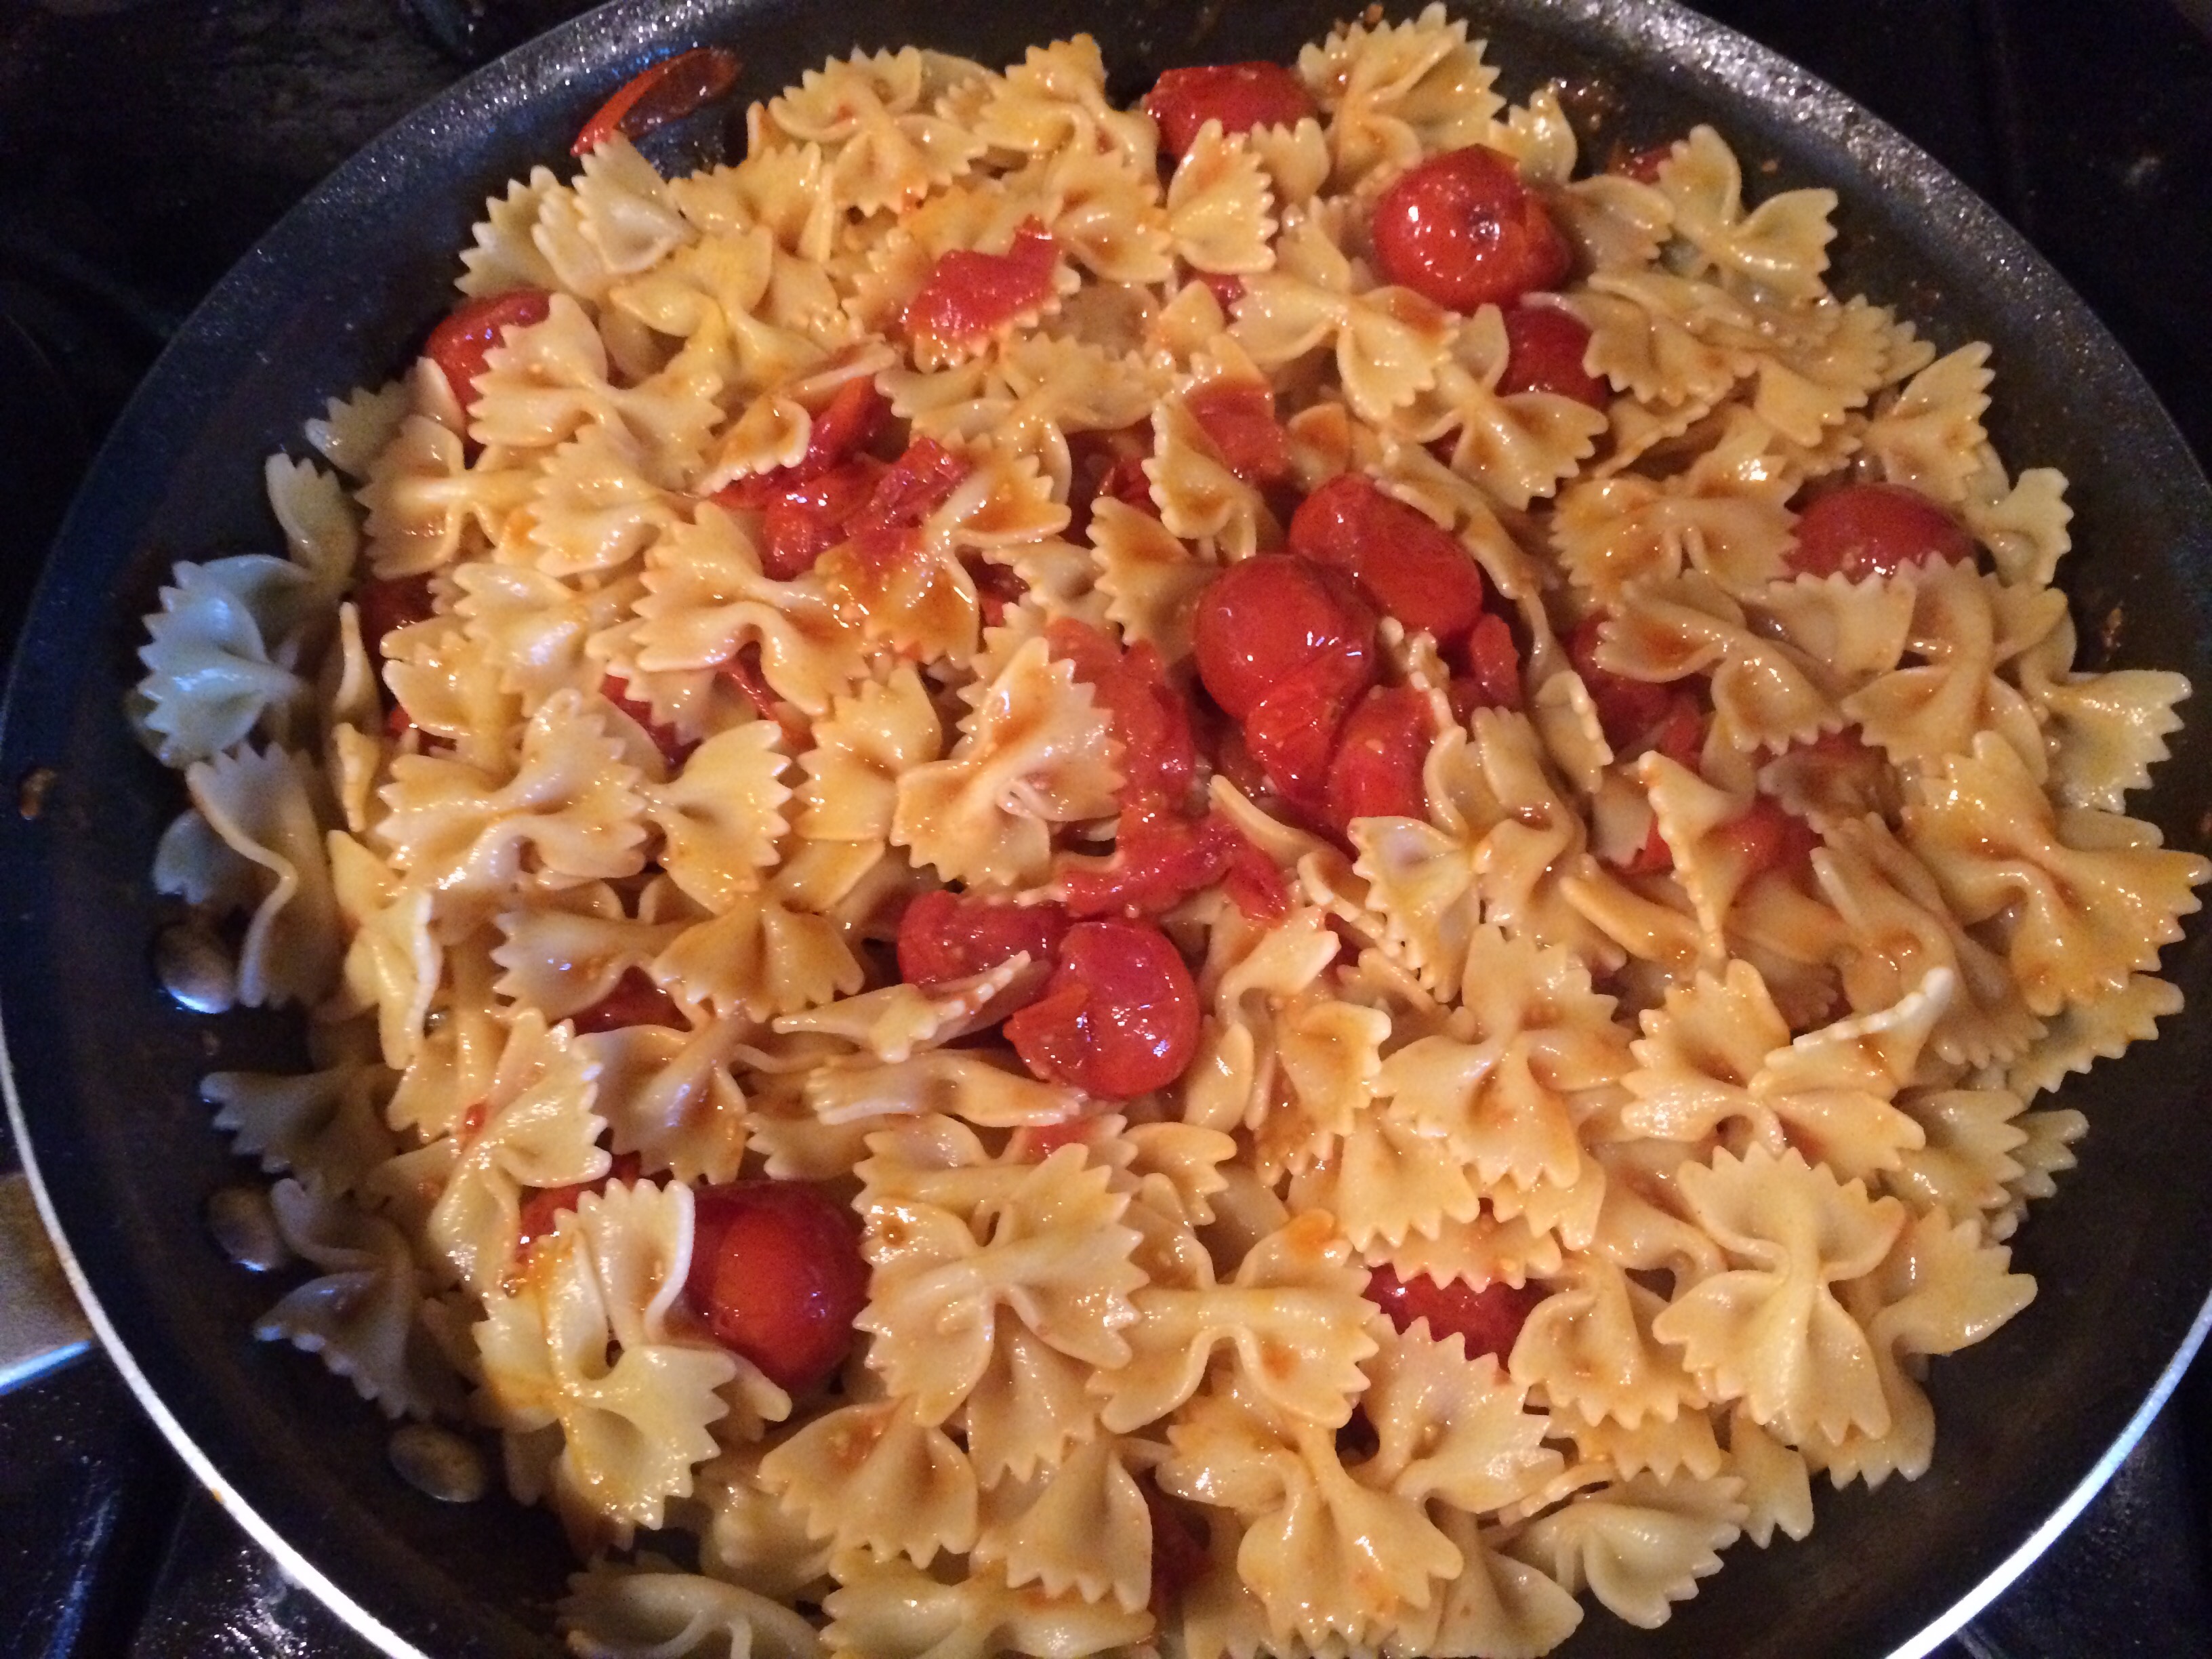
Lemon Tarragon Lobster Pasta Salad
Ingredients:
1/2 Pound Bow Tie Pasta
1 Tbsp Olive Oil
1 Pint Grape or Cherry Tomatoes
1 1/2 Pounds Lobster Meat, fully cooked
1/2 Cup Fresh Tarragon, roughly chopped
1 Shallot, minced
1/2 Cup Diced Celery
1/2 Lemon, juiced
1/4 Cup Olive Oil
Salt and pepper to taste

Directions:
Bring a large pot of salted water to a boil. Add pasta and cook according to package directions. Meanwhile, heat a sauté pan on high. When pan is hot, add 1 Tbsp olive oil and tomatoes.
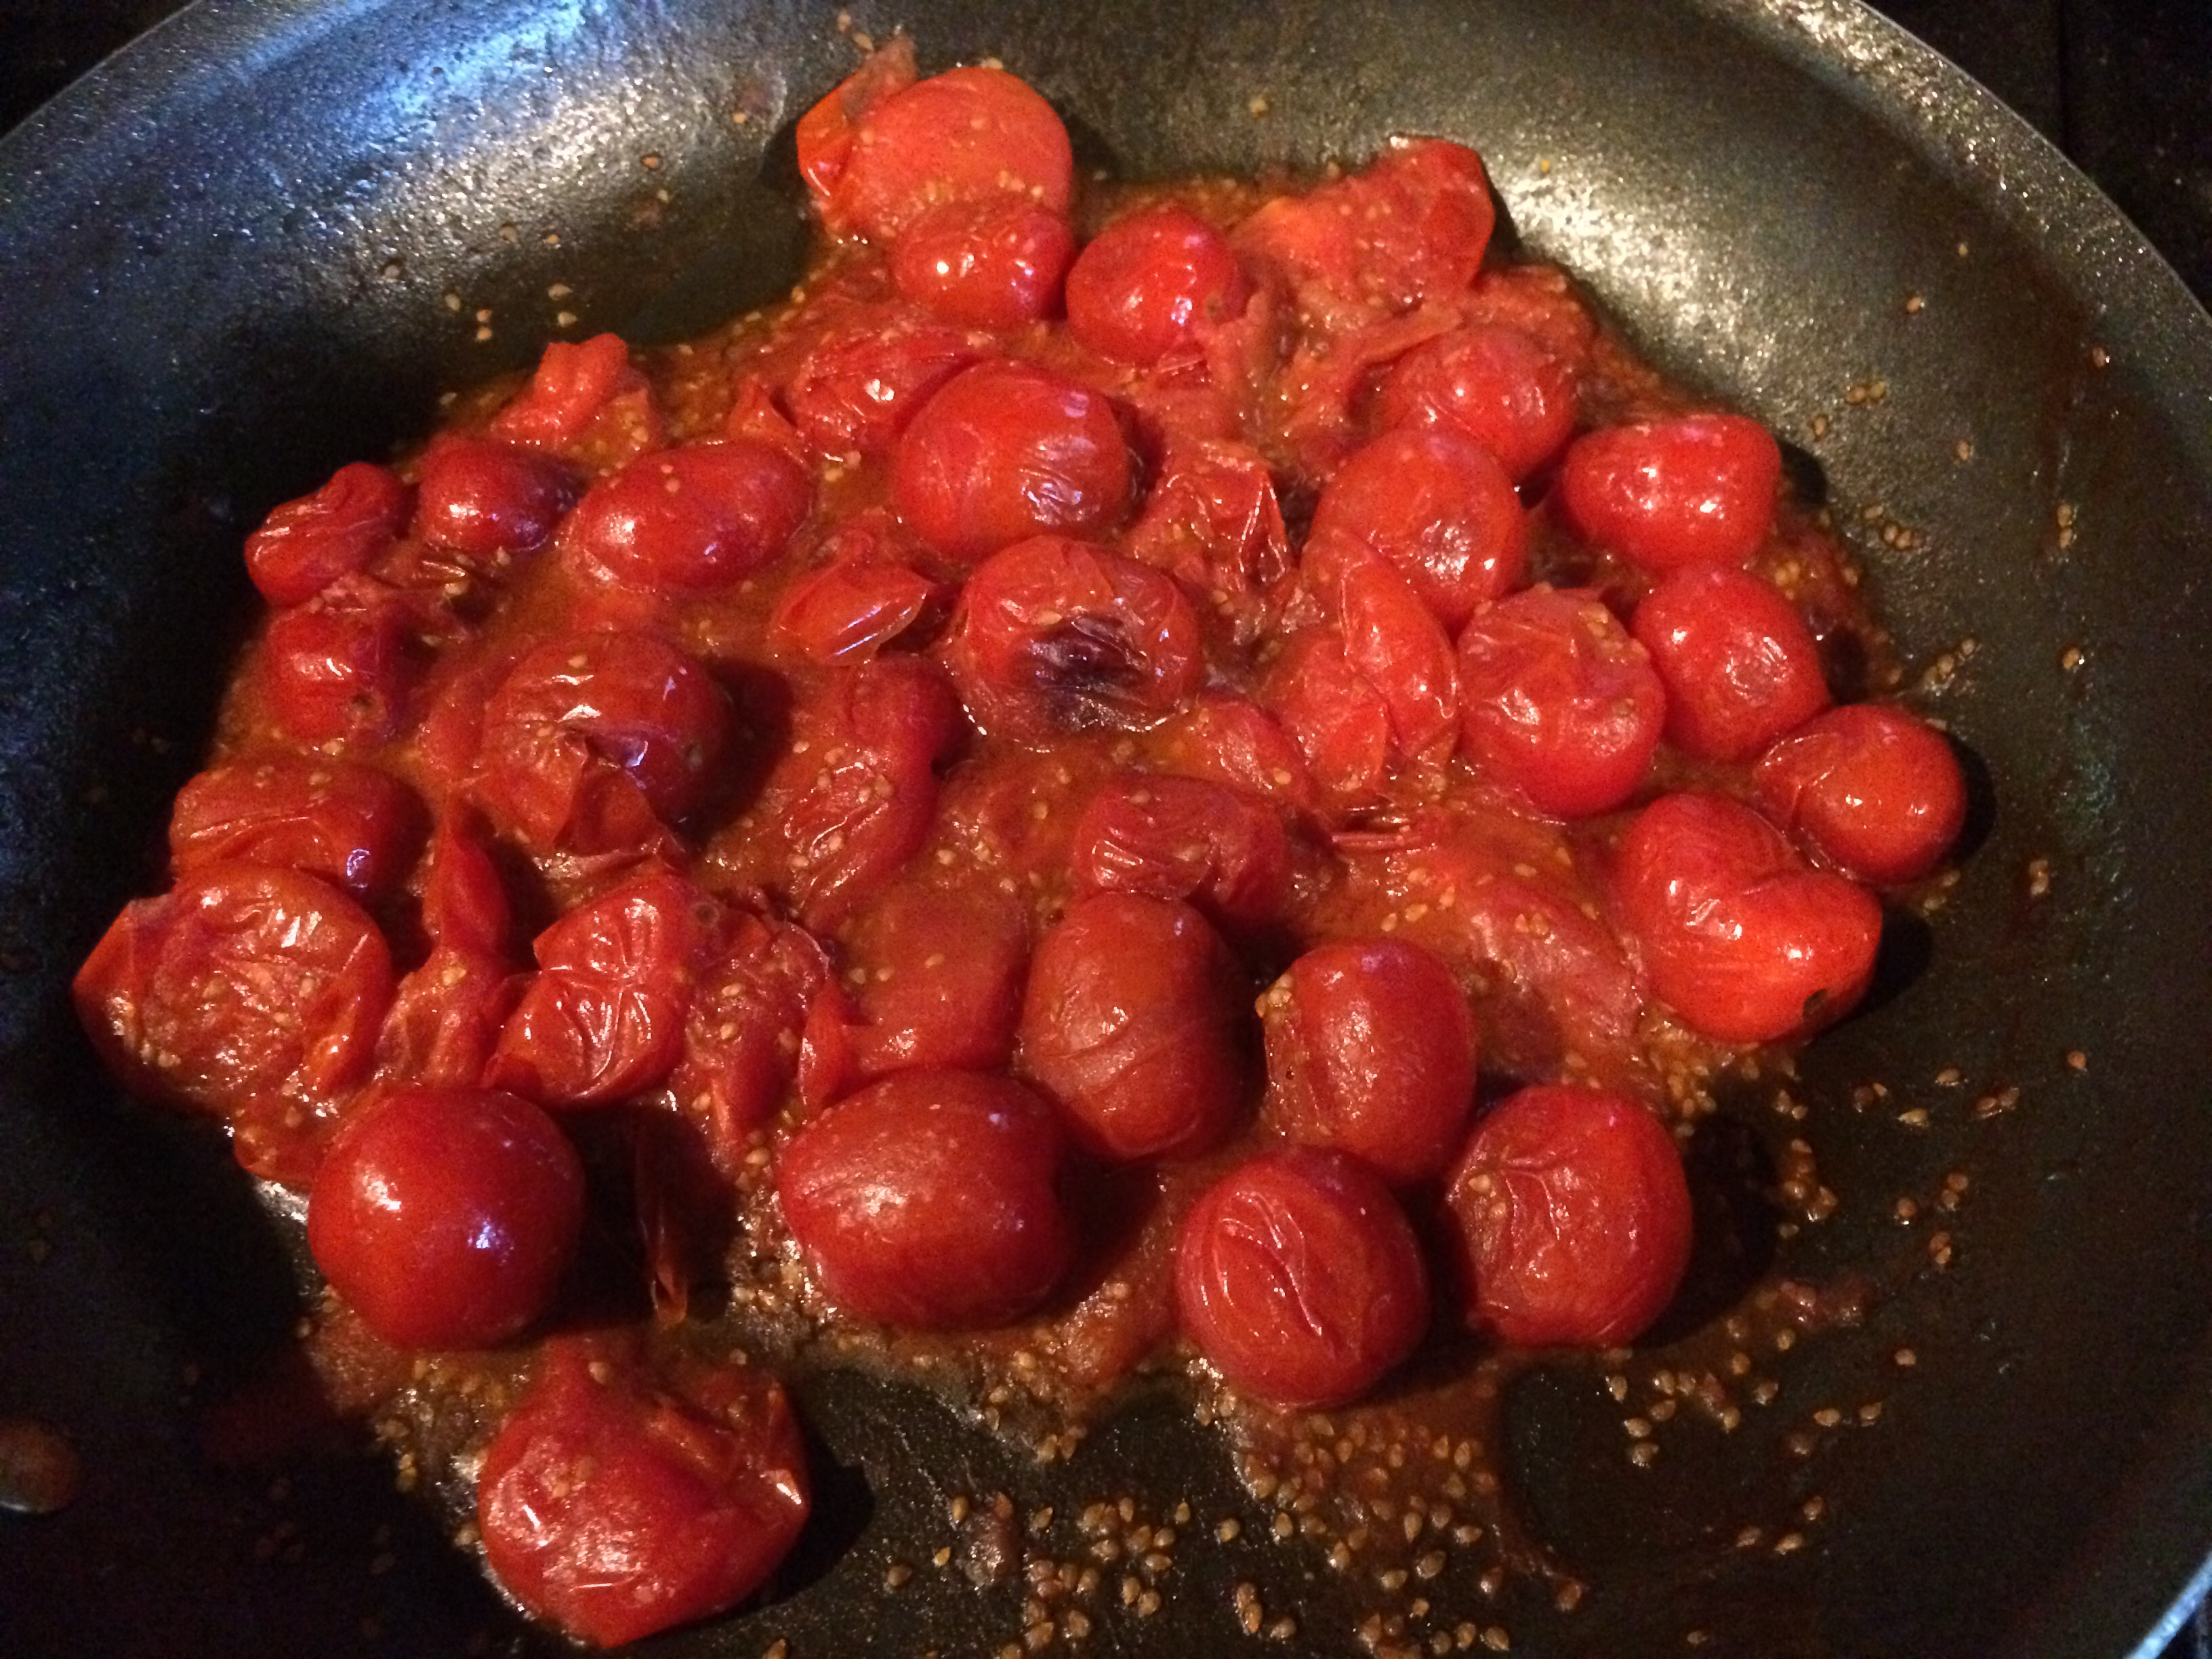
Cook tomatoes on medium high heat for 2-4 minutes, mashing half with a potato masher or spoon to release juices. When pasta is finished cooking, drain water and toss with tomatoes immediately. Cool to room temperature.
While the pasta is cooling, cut the lobster meat into bite size chunks, chop the tarragon, mince the shallot, dice the celery and juice the lemon.

Combine pasta and tomatoes with lobster, tarragon, shallot, celery and lemon juice in a large bowl.
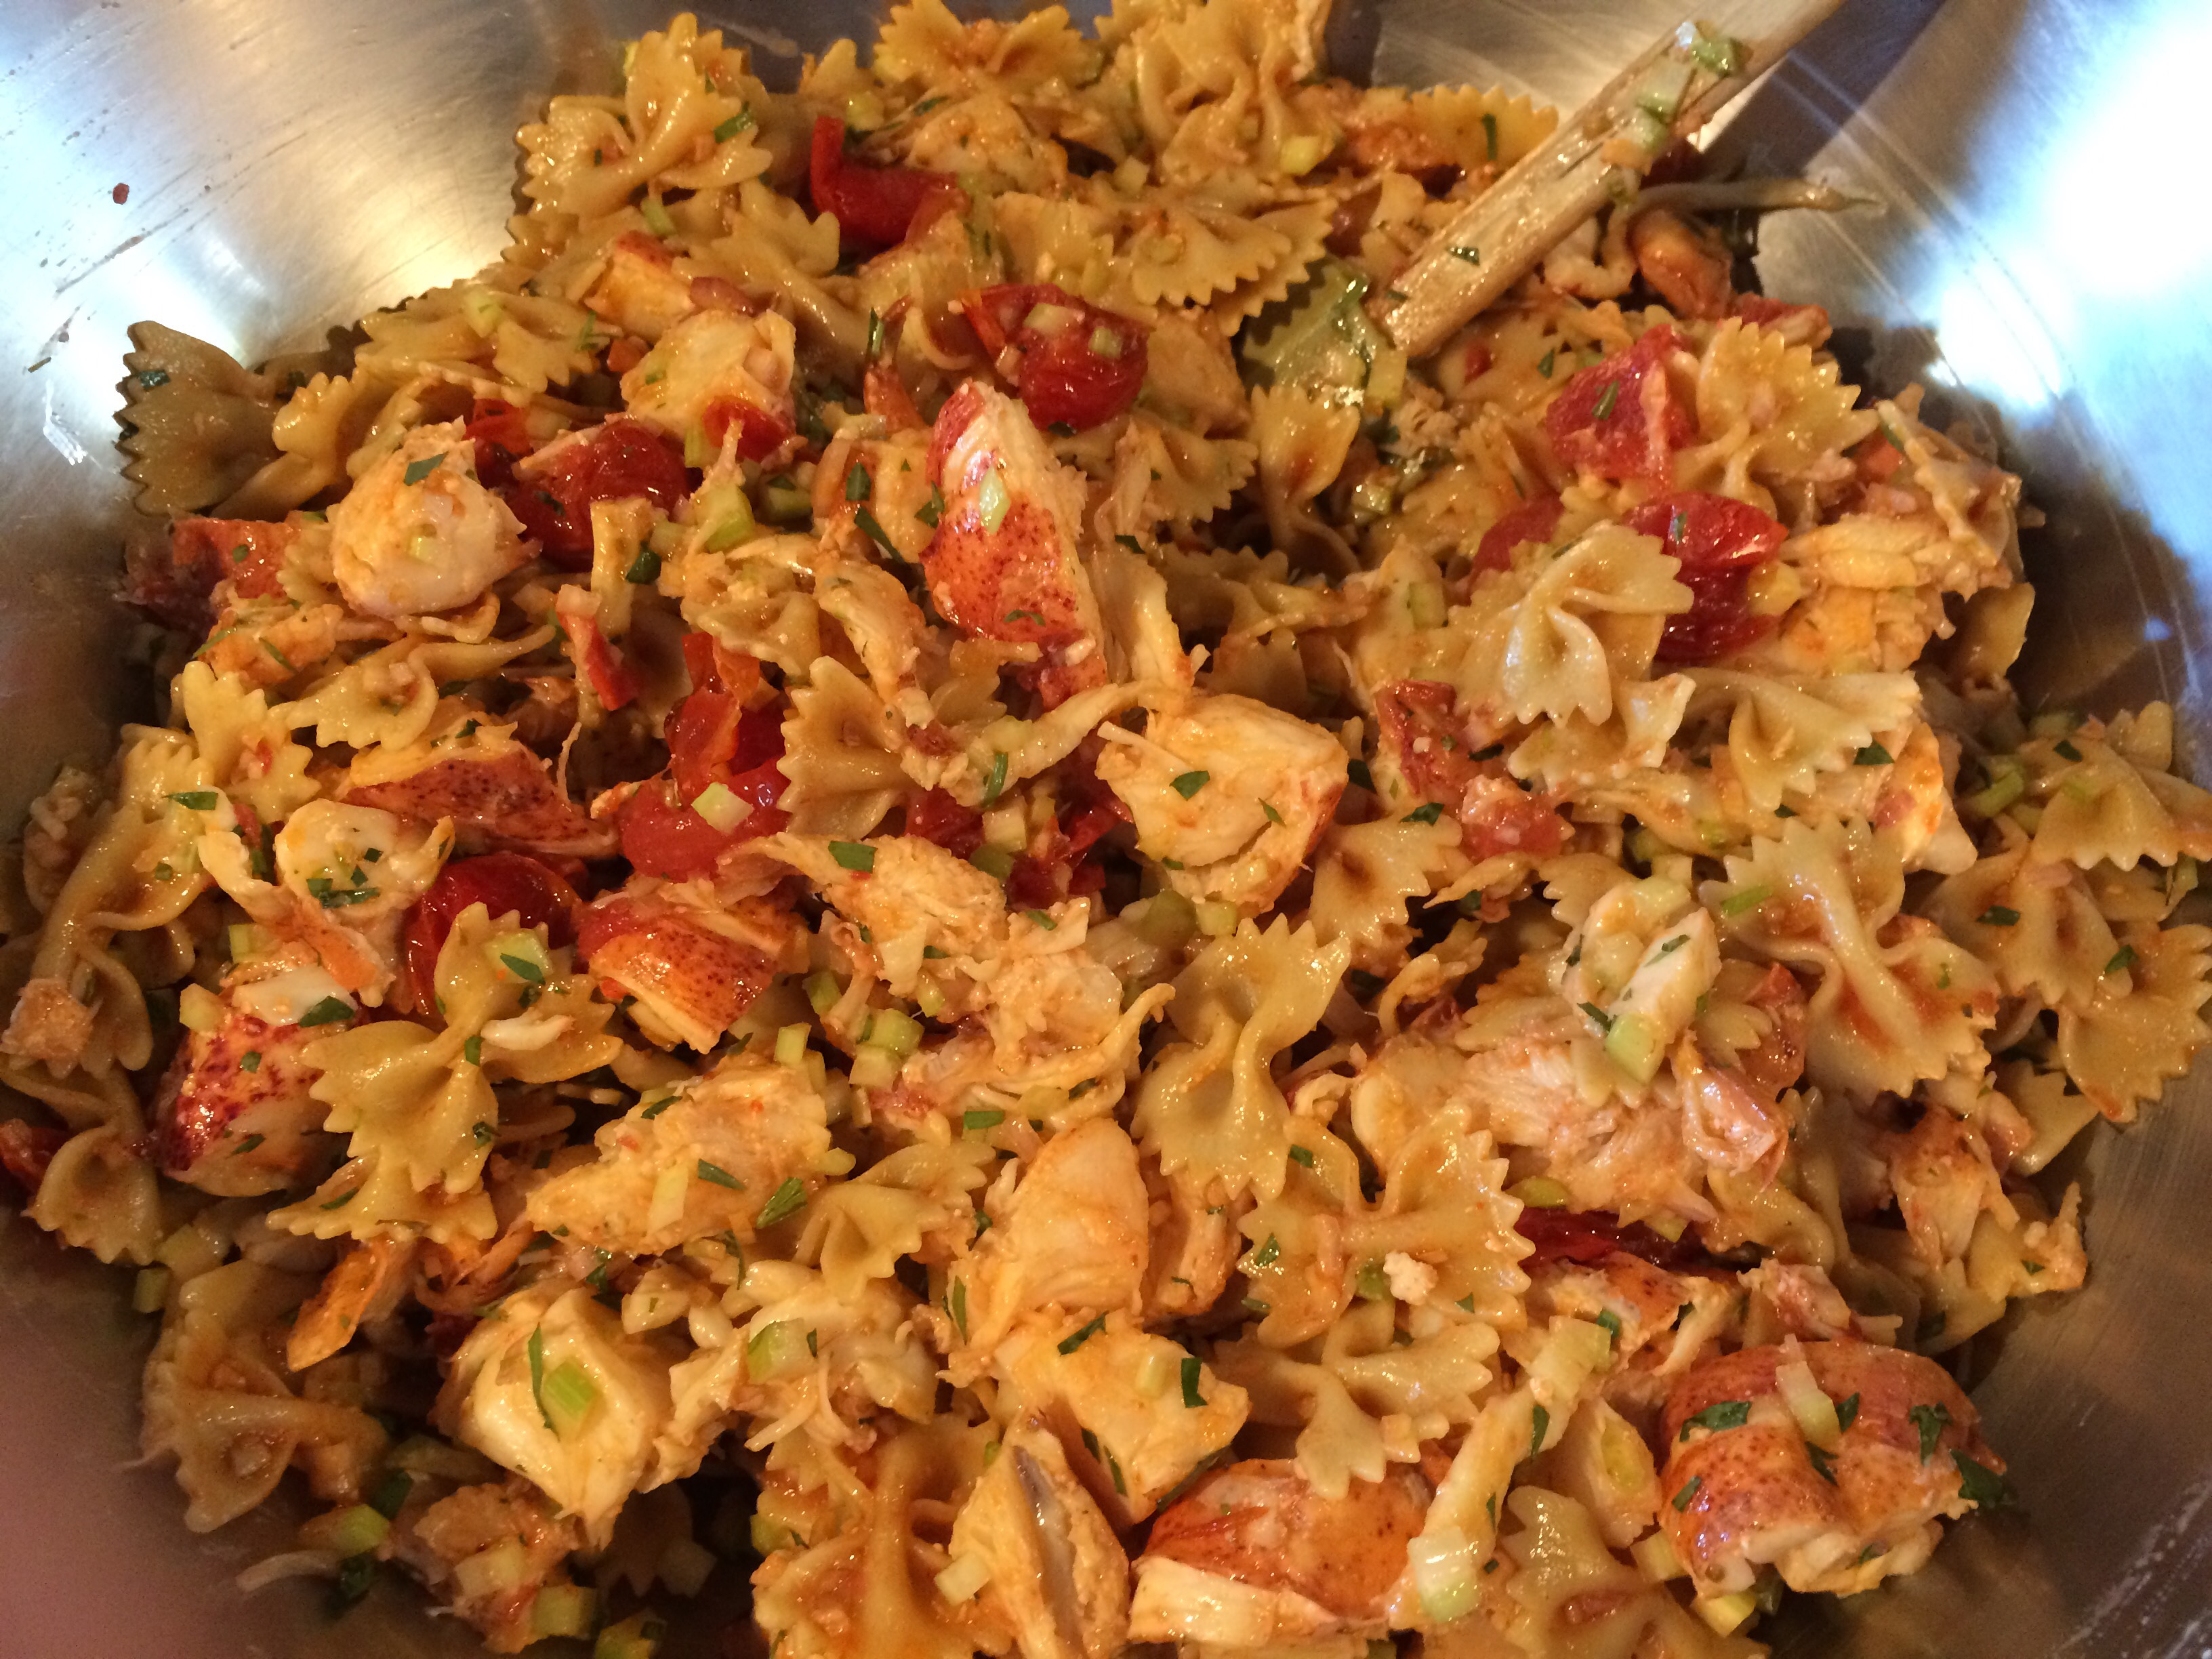
Add olive oil, salt and pepper and toss to coat. Taste after a few minutes and adjust seasoning if necessary. Transfer to a serving bowl or platter and enjoy!


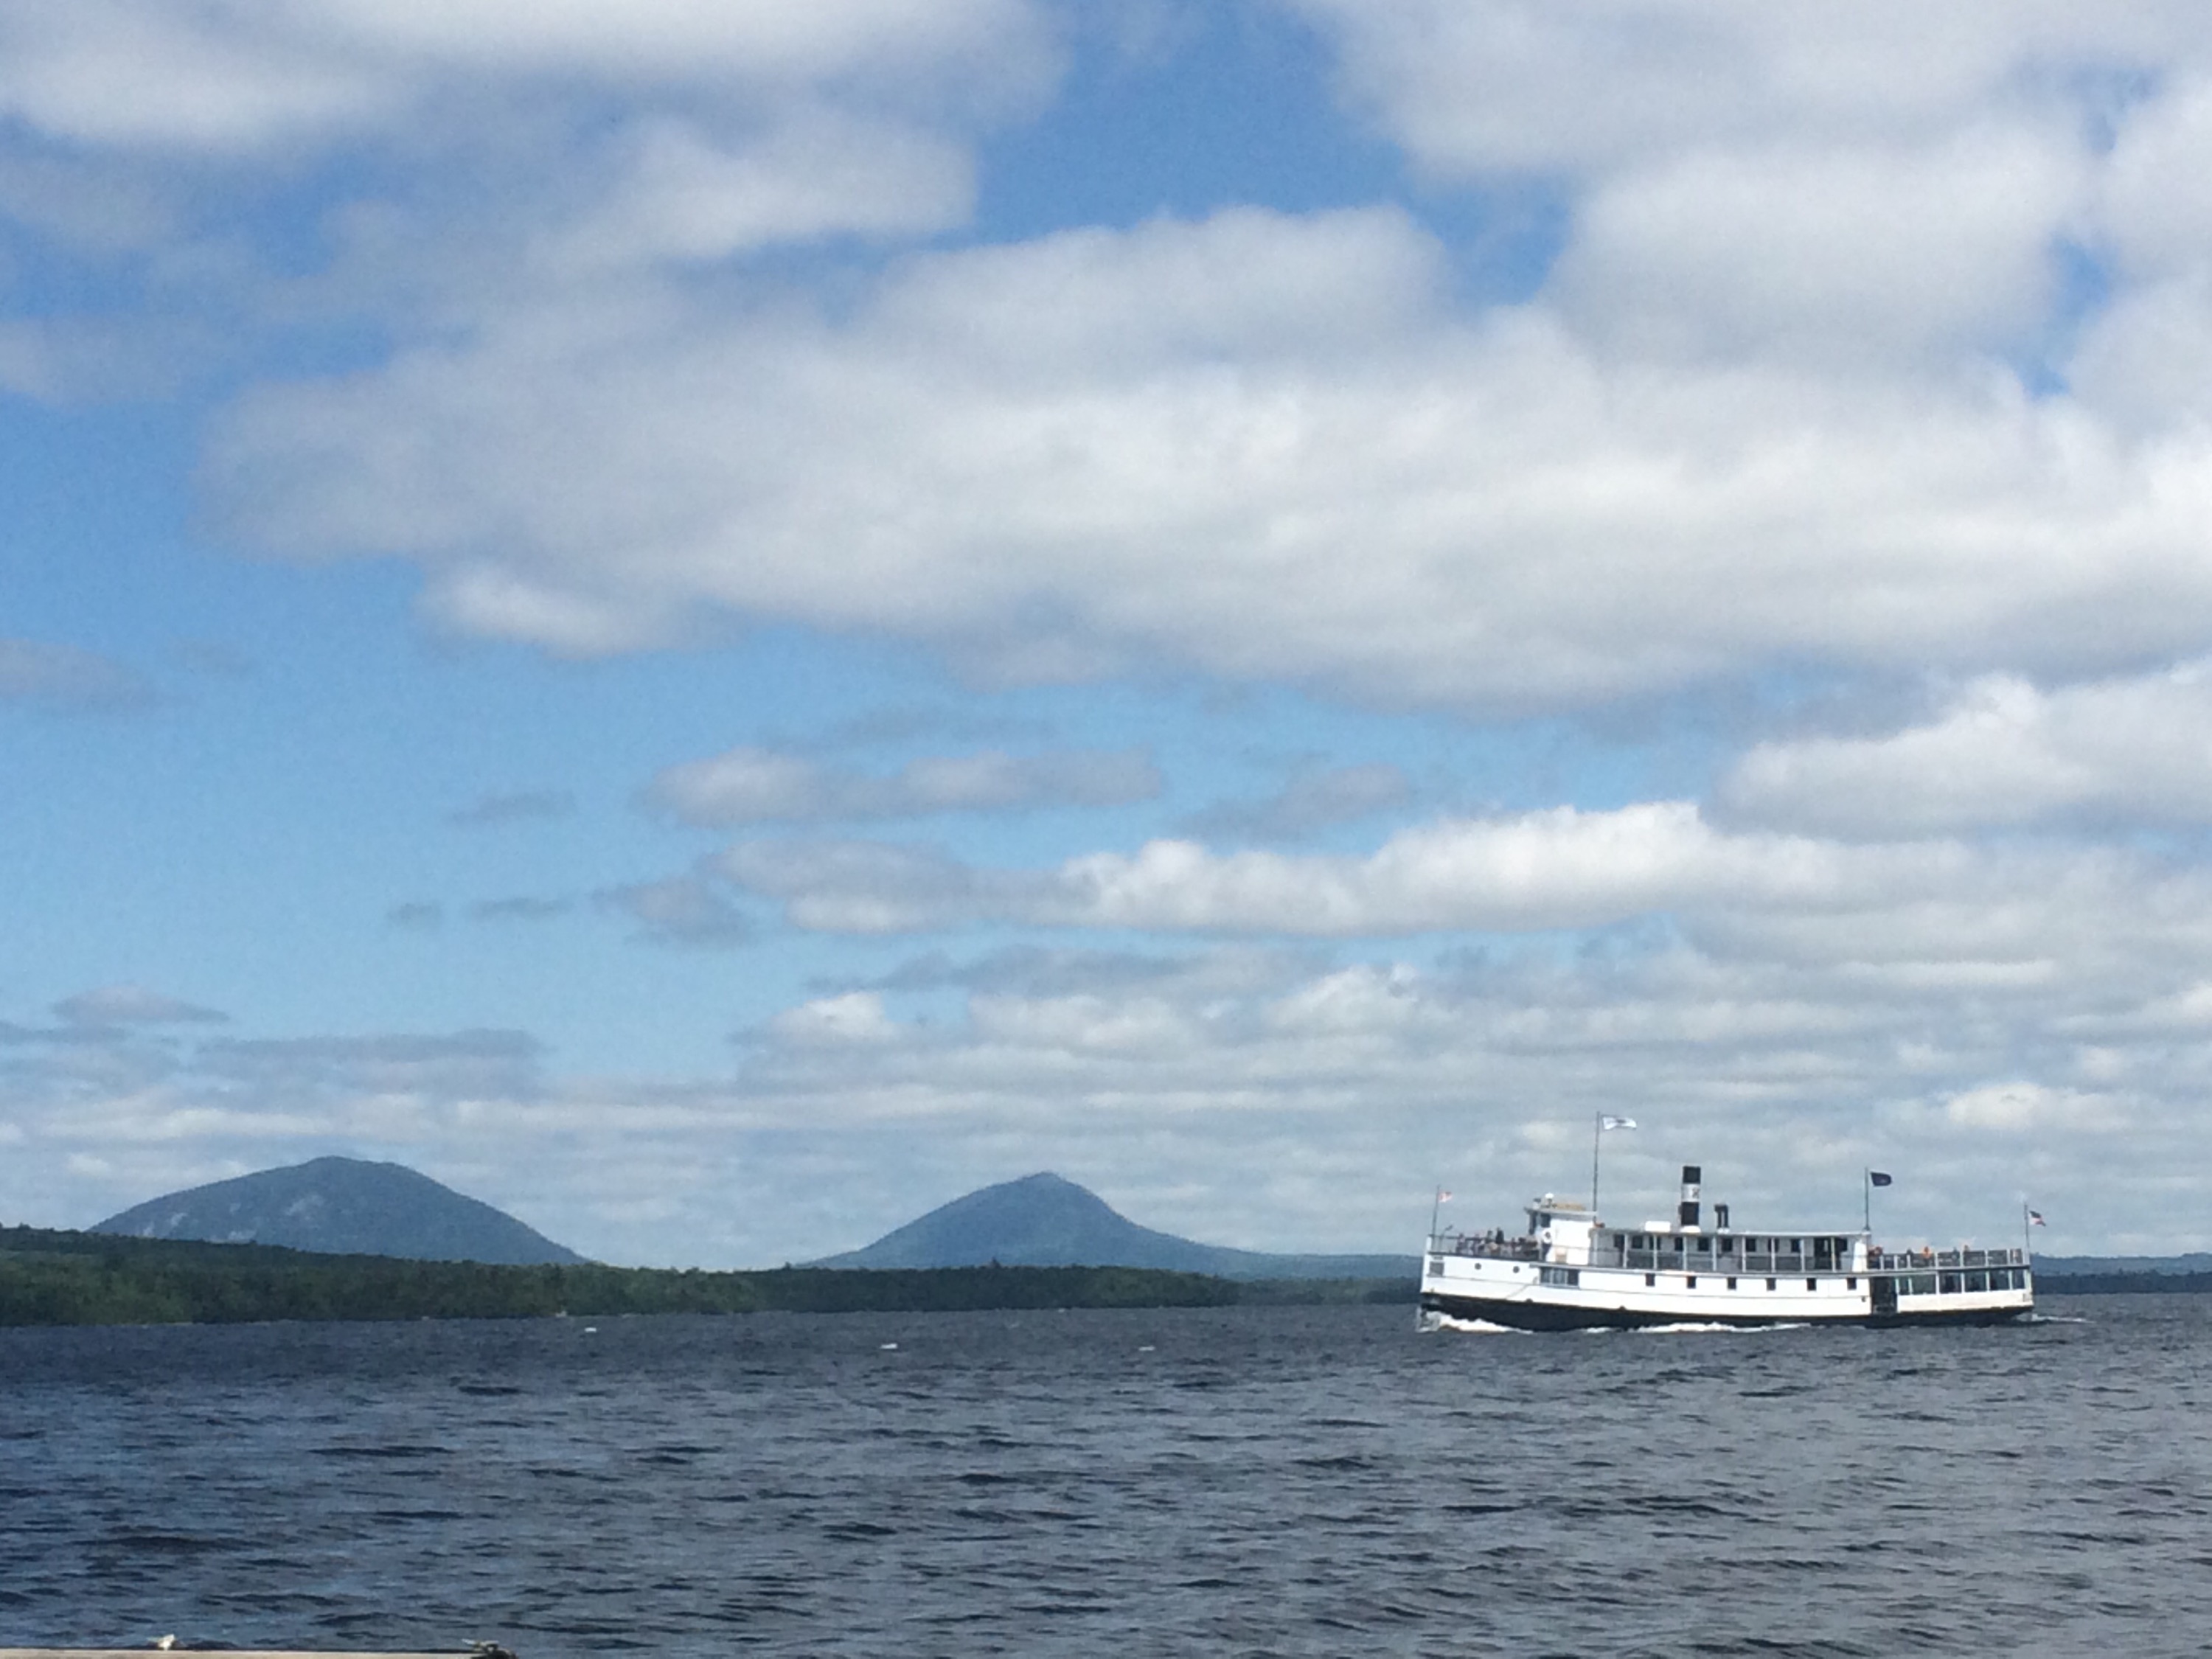
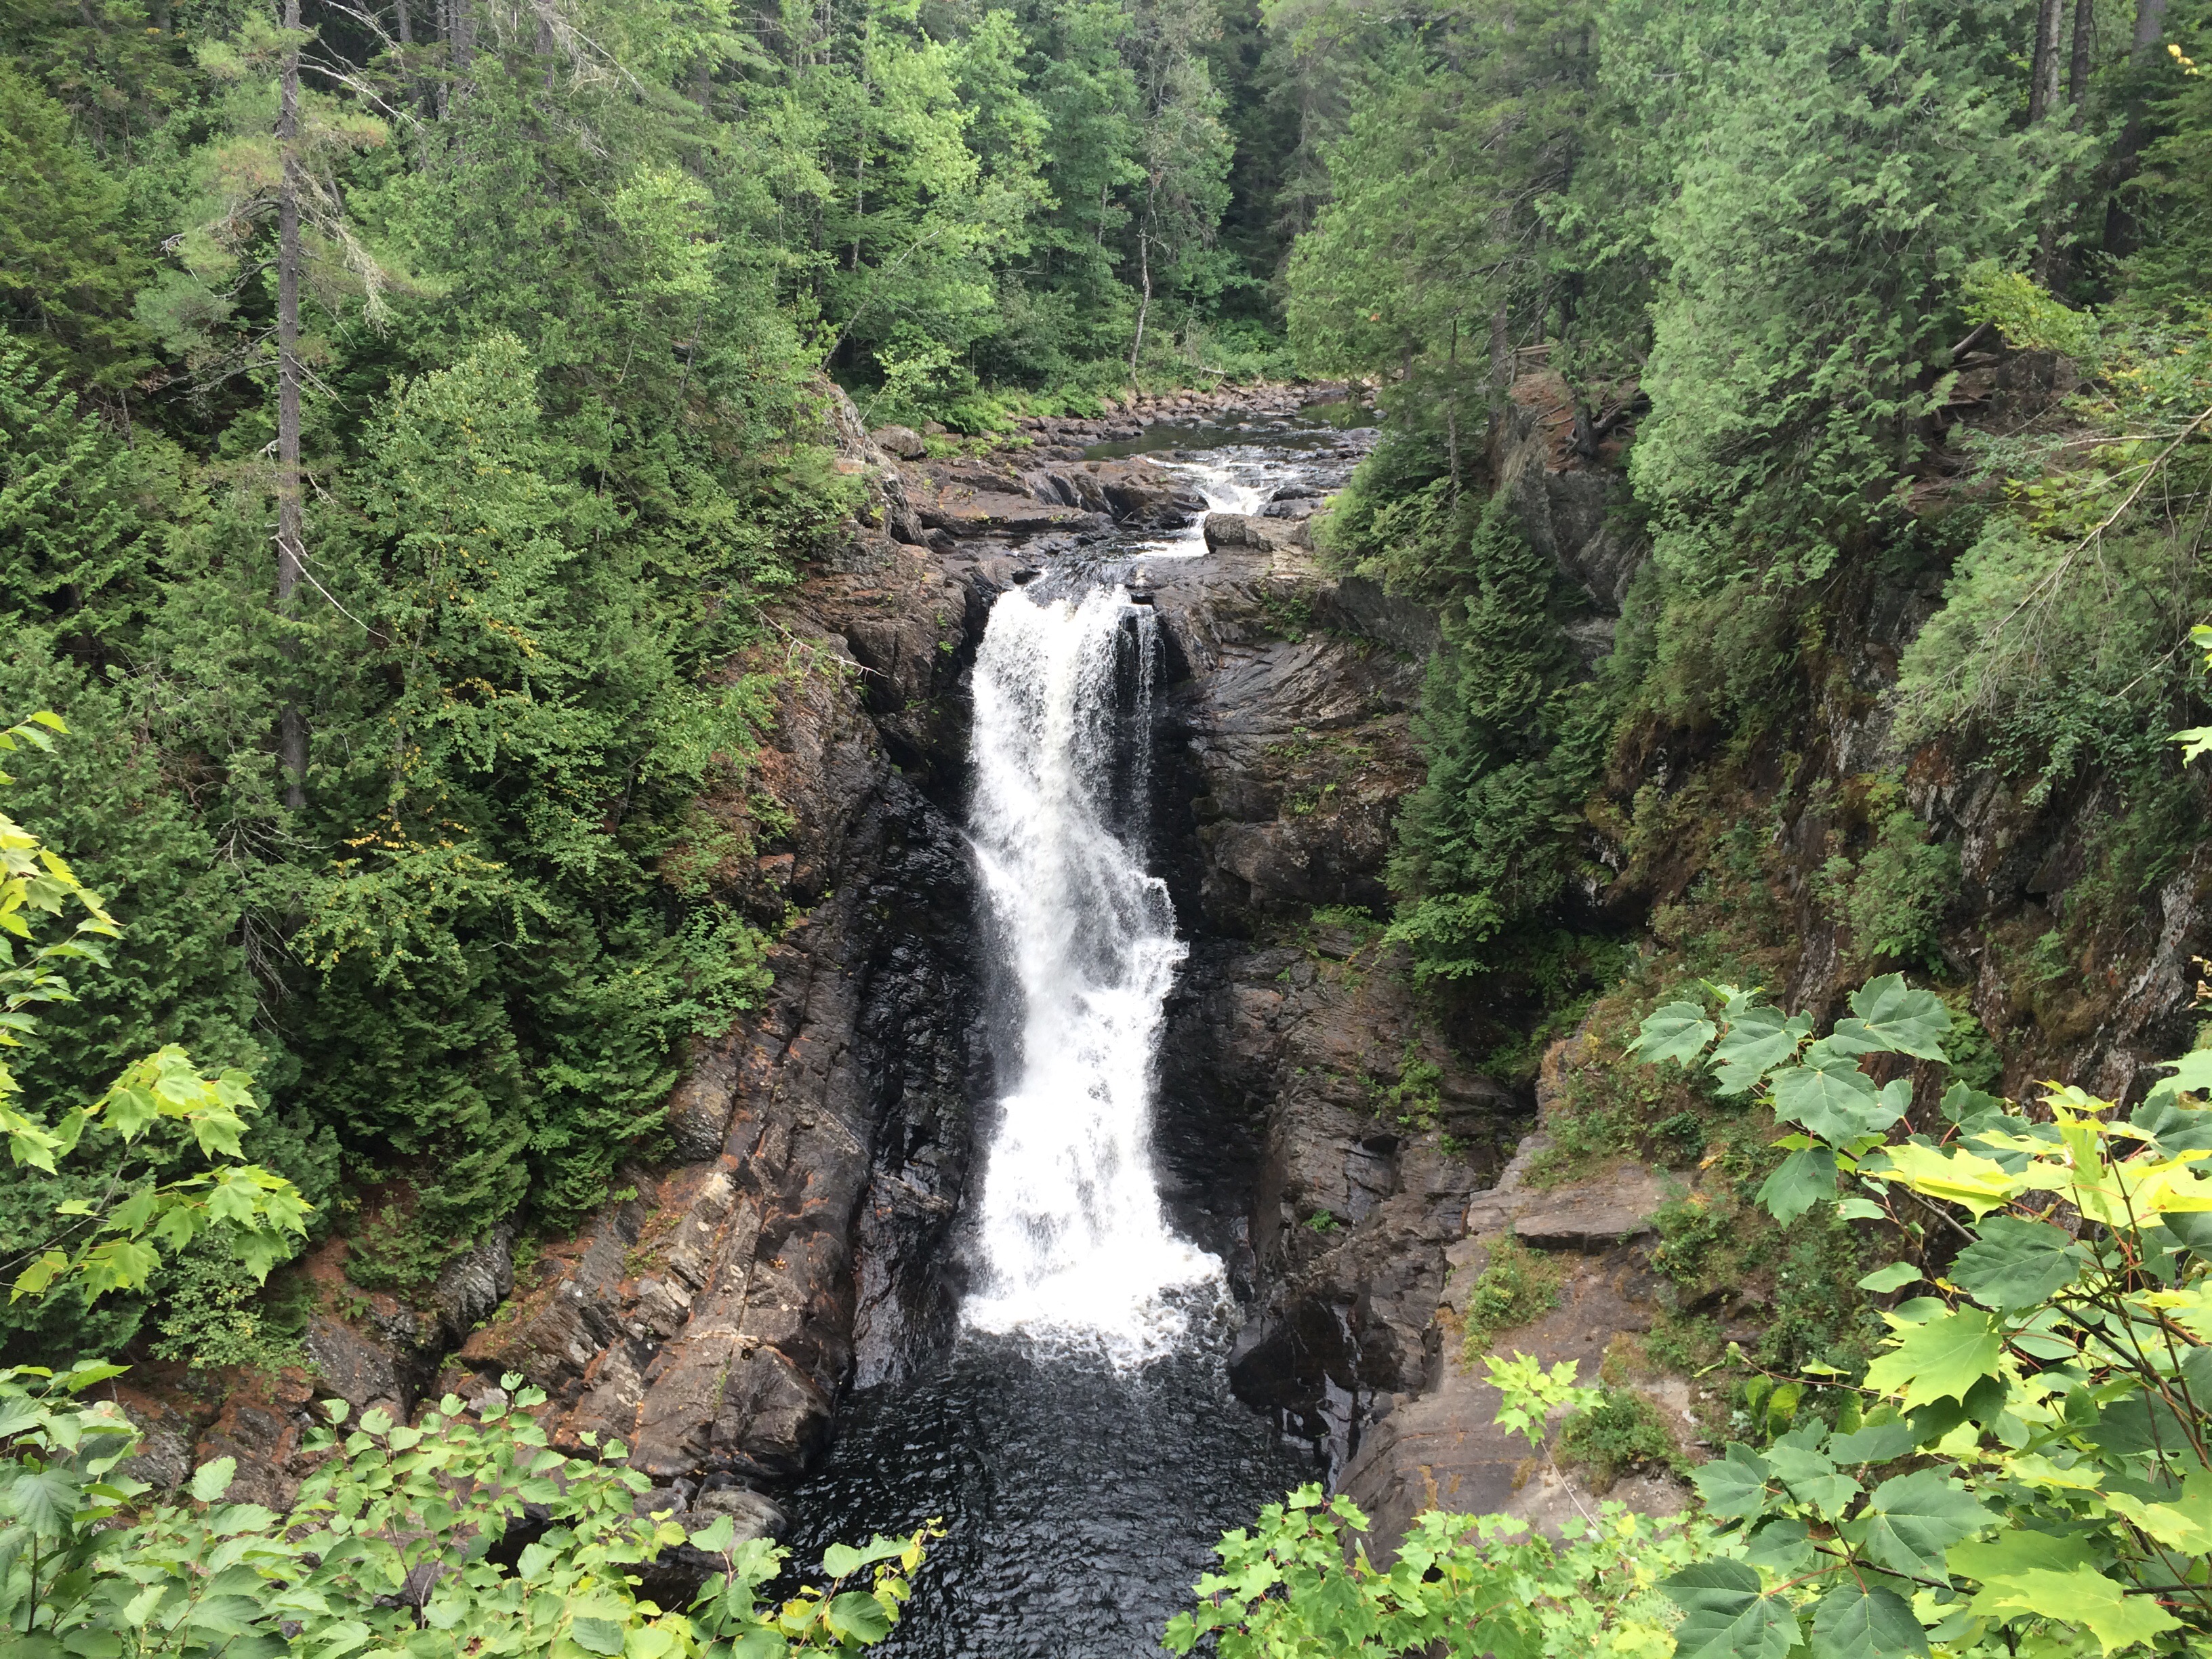
Moxie Falls

We packed up the van and drove down a long, unpaved road just outside of Greenville, Maine. It was slow going but we had the beautiful scenery to keep us entertained. After what seemed like quite a long drive into the middle of the North Woods, a paved road and a small town appeared suddenly. We had arrived at Lake Moxie.
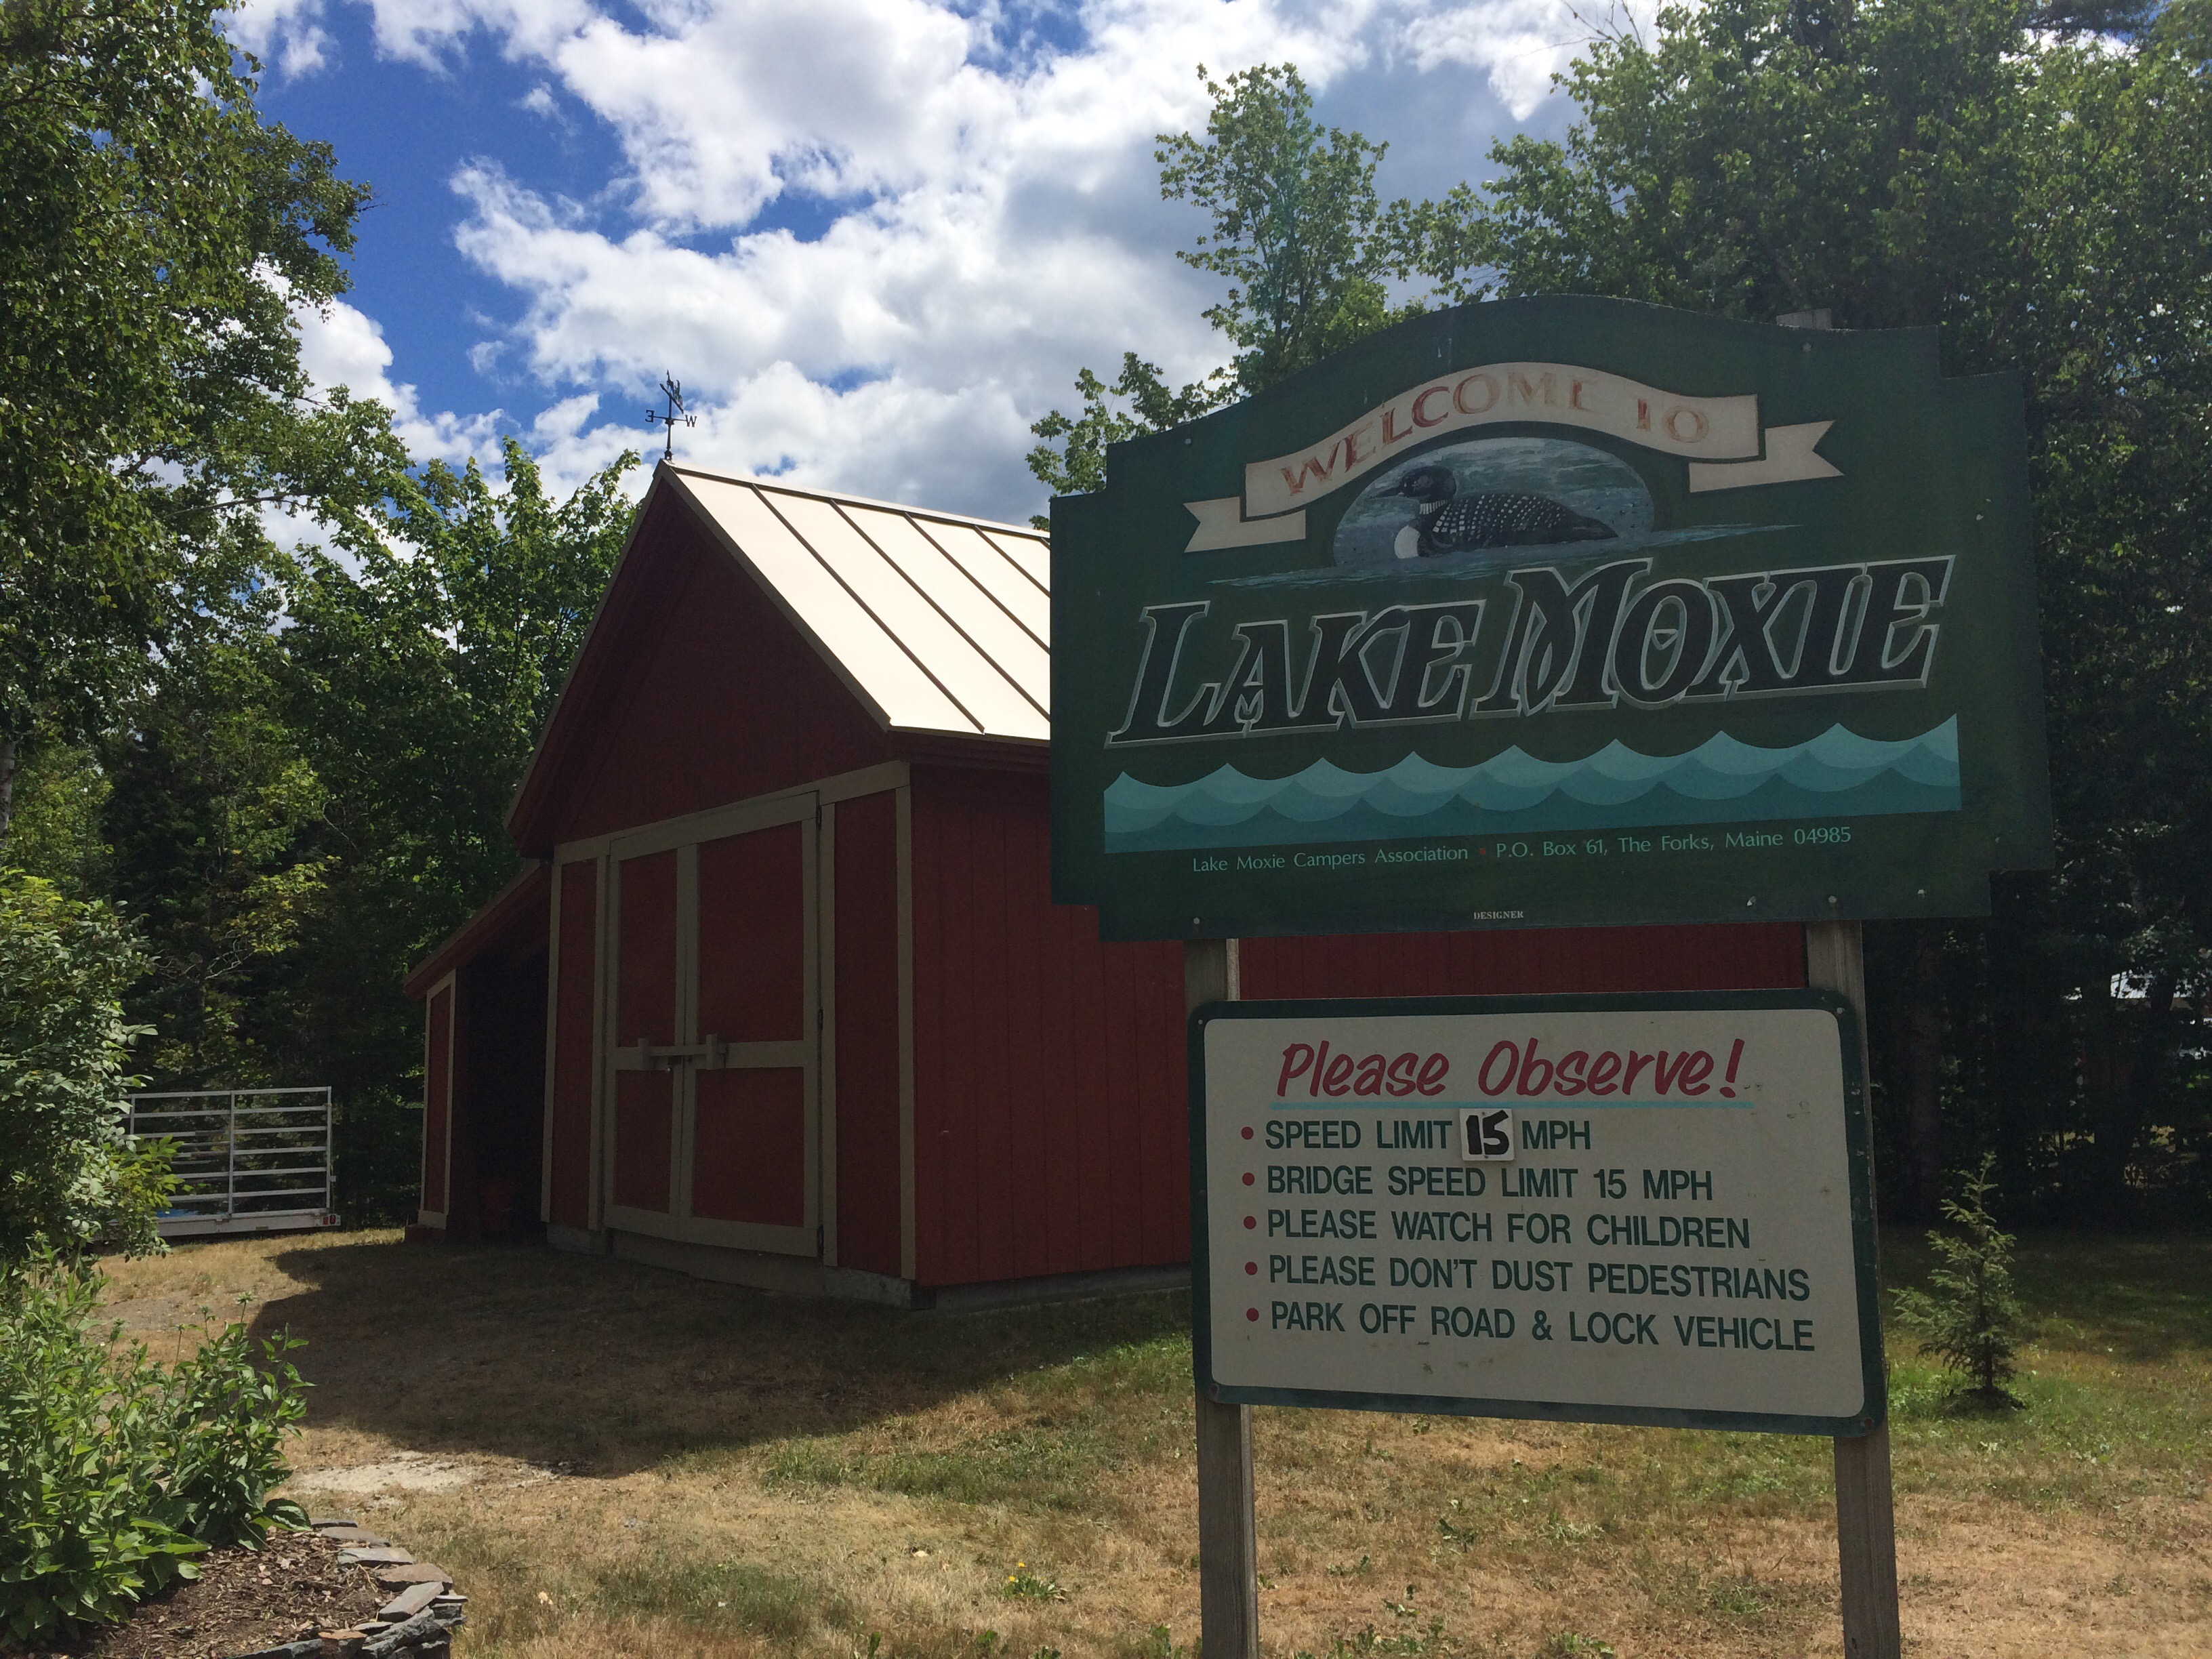
It might seem strange to find a quaint little town out in the middle of the woods. It is almost like something out of a fairy tale or fantasy novel. One look at Lake Moxie is all it takes to understand what draws people to this remote location. It is a beautiful view, teeming with life and all of nature’s majesty.

Lake Moxie
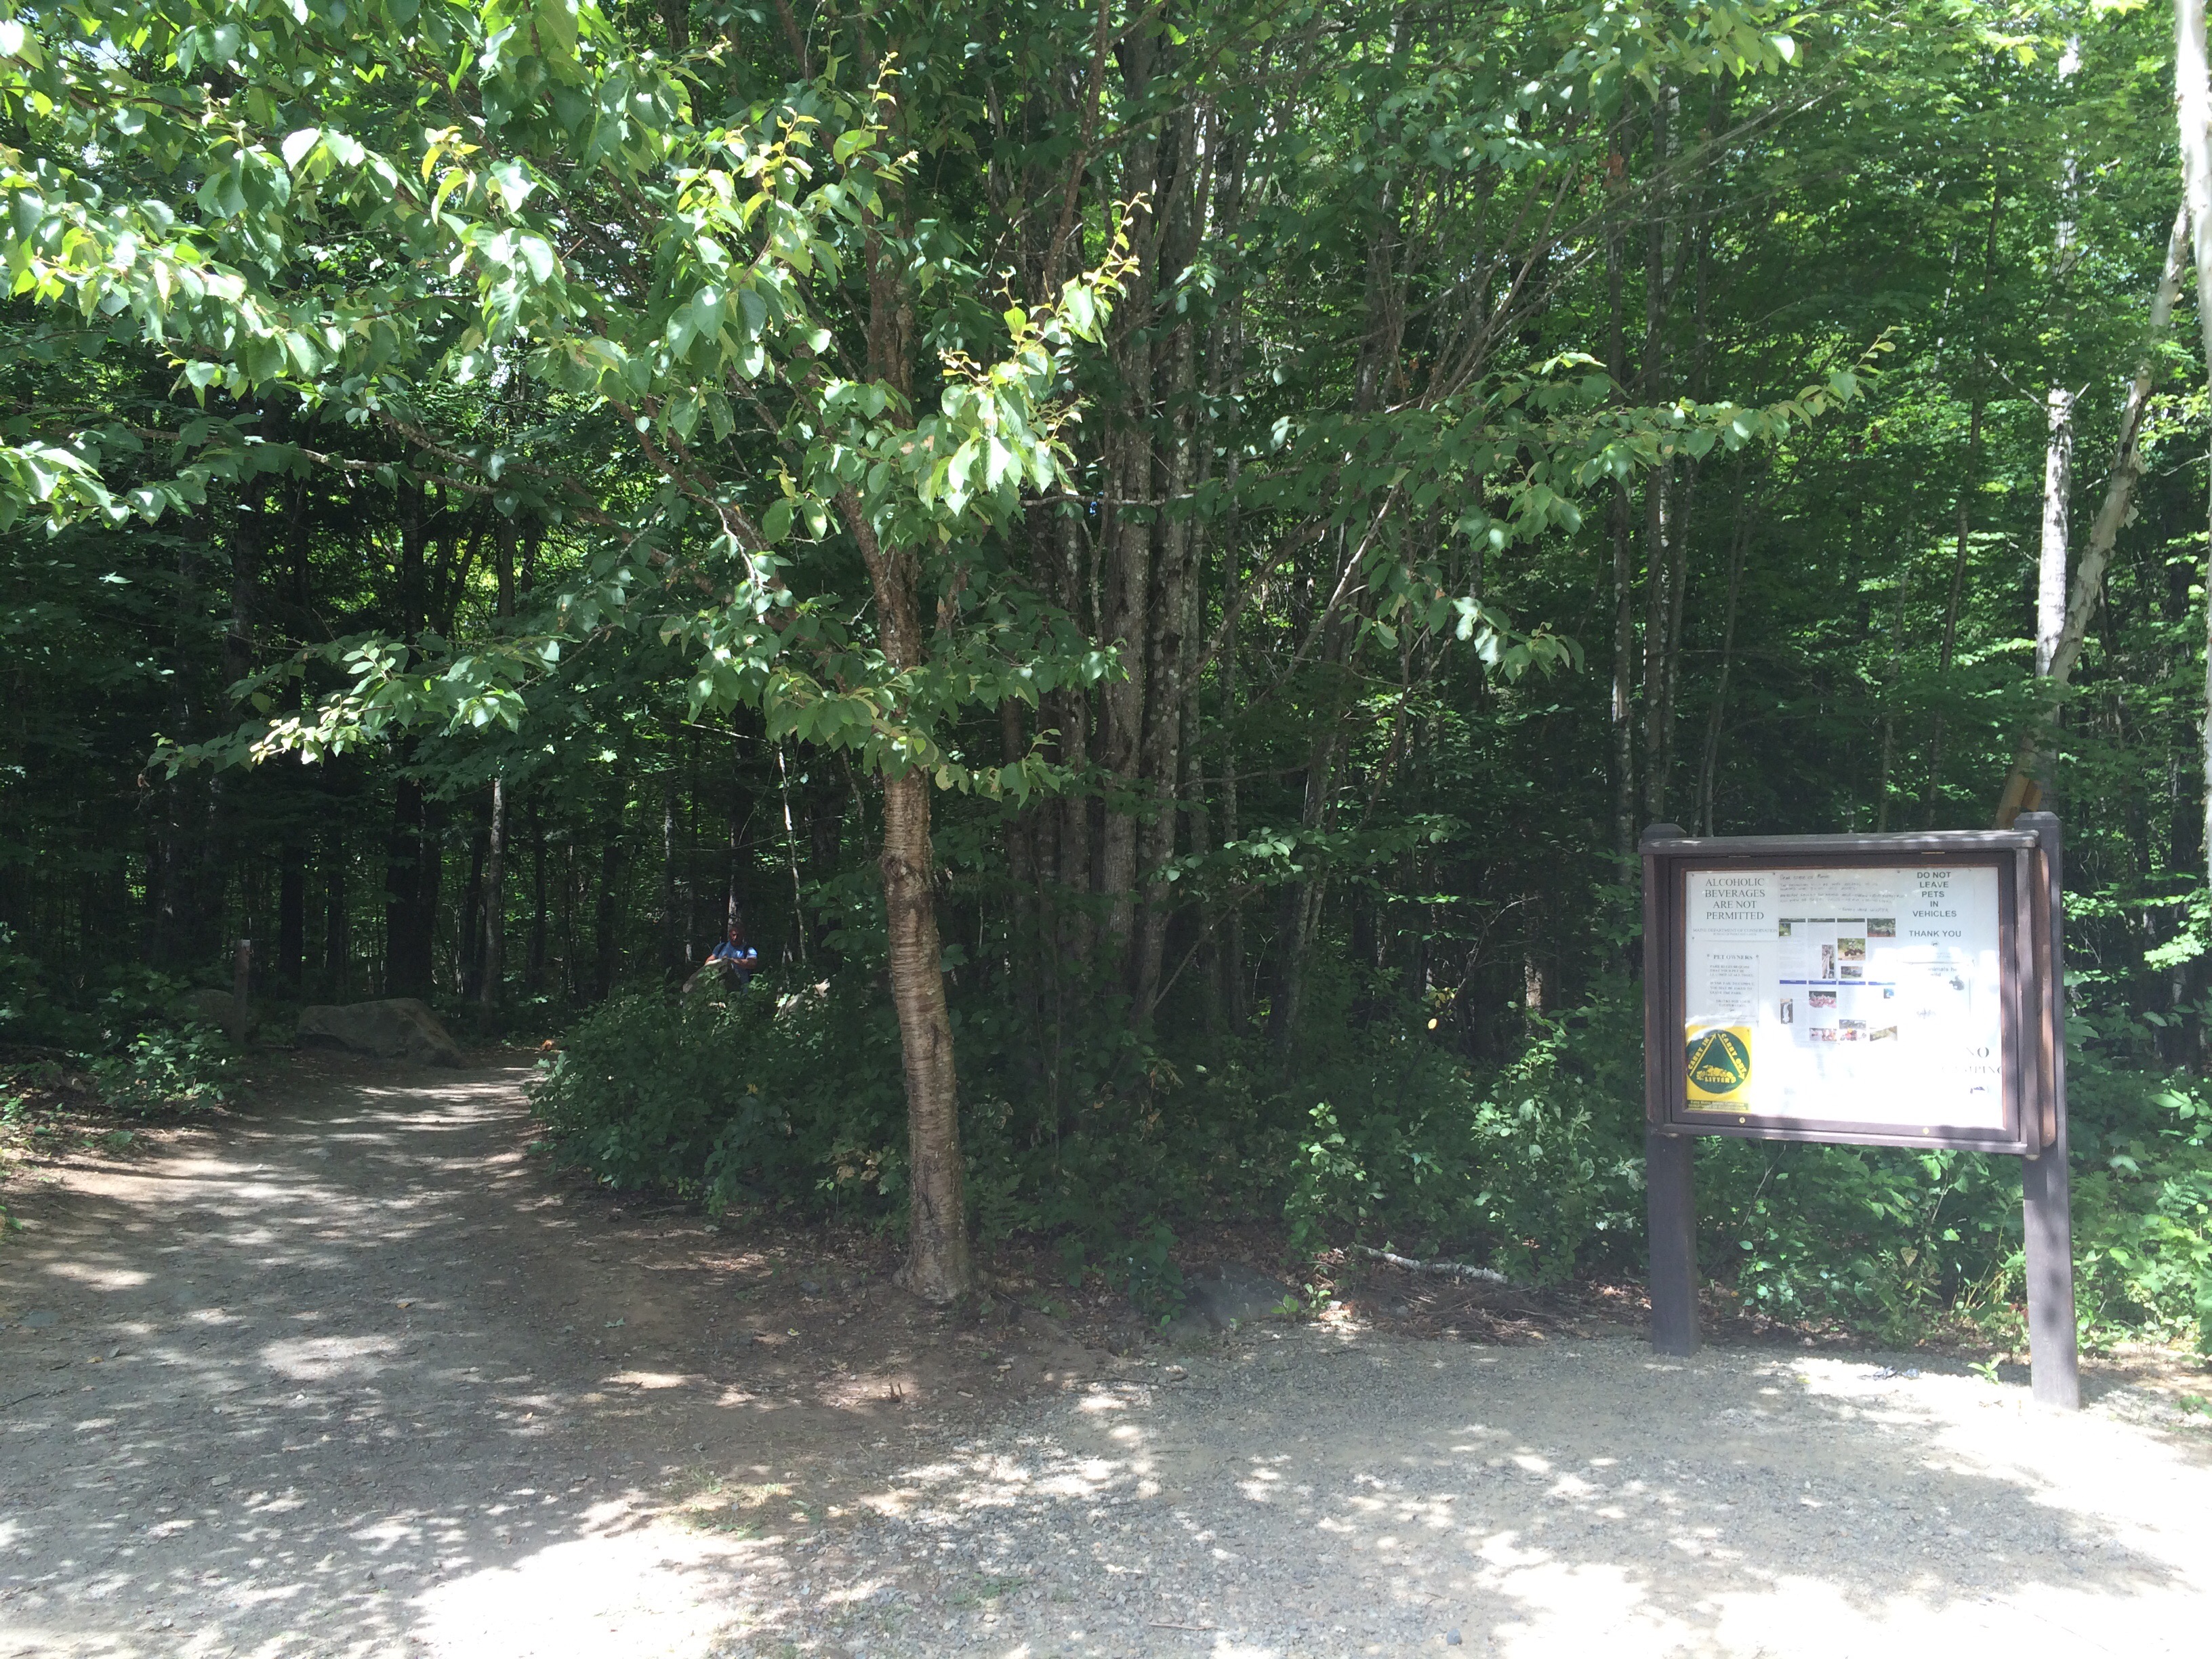
It was less like a hike, it turned out, and more like a delightful stroll on a well maintained path through a beautiful forest. My son quickly ran and leaped from rock to tree and back again, making laps around us with childish abandon.

About halfway down the mile long trail, he found an uprooted tree that he immediately declared his cave/castle and it was some time before we were able to uproot him and continue down the path.

We hadn’t gone too much farther when we encountered a sign marking the entrance to the falls and a series of steps leading down toward the sound of rushing water.

The first area we discovered was a large pool at the top of the waterfall where we could hop across rocks and swim in the water. It would have been a delightful place to have a picnic if we weren’t so excited about exploring the beauty of this natural wonder.
As we explored further, we noticed that there is a series of small falls before the main waterfall. Everywhere we looked, there was some small wonder or great beauty to discover.
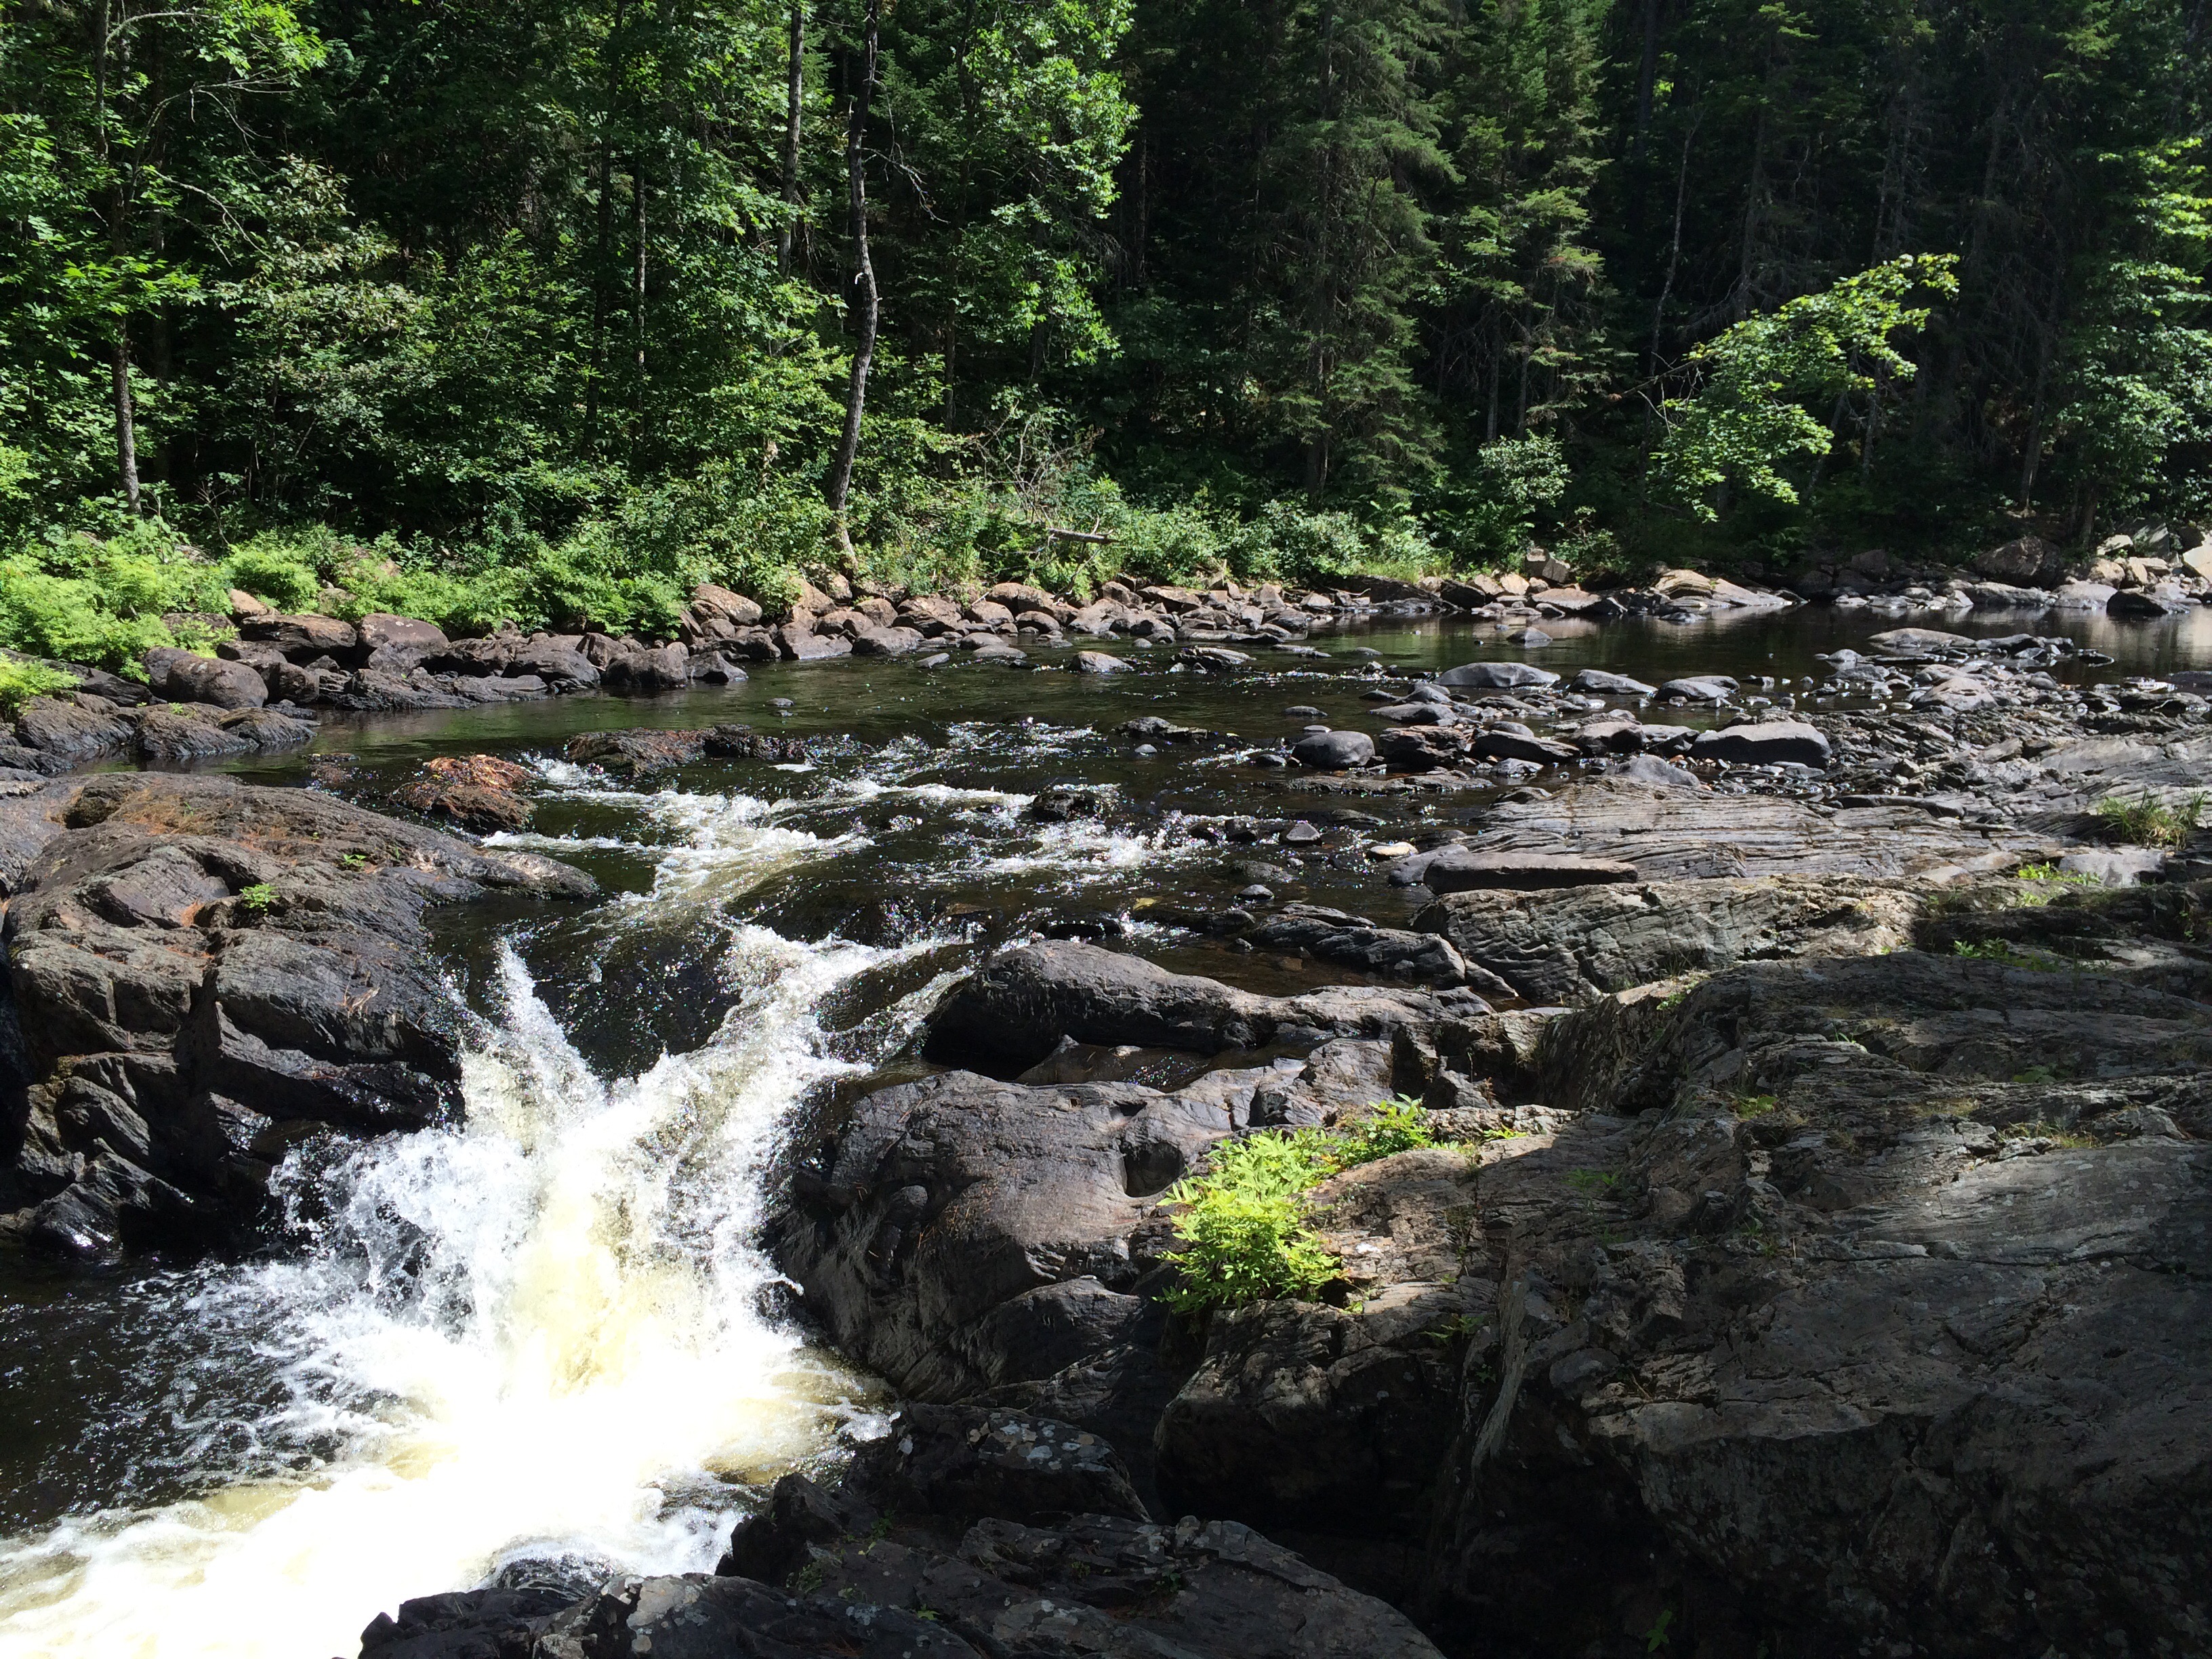
Moxie Falls is one of the highest waterfalls in all of New England. It drops an impressive 90 feet into a pool that is about 17 feet deep. It is a beautiful and majestic sight to behold.

One of the highlights of the hike for both my son and I was the impressive rock formations found in and around the pools of cool, flowing water. We all enjoyed climbing them and appreciated their unique natural beauty.

After a snack of apples and another splash in the water, we took one last look at the falls and decided to head back toward the van.

On our way back up the path, my wife pointed out a small trail heading off in the opposite direction. It seemed that none of us were actually ready to leave just yet, so we set off down the trail not knowing where it might lead.

It wasn’t long before we found out. The trail led us upstream to another series of small falls.

It seems none of us ever tires of walking through the woods, swimming in the water or climbing on the rocks. Even after a full day of doing nothing else we were delighted to spend another hour swimming and exploring.


We all headed back up the trail in good spirits. It had been a beautiful day filled with fun and surprises. When we returned to the trail head, we piled into the van and said goodbye to Moxie Falls as we headed east toward The Forks. This drive was much shorter on a paved road.

As we turned north and drove along the Kennebec River toward Jackman, we all felt refreshed. It was as if the waterfall had washed away all our troubles and the worries of everyday life.

Near Jackman, we stopped at a scenic overlook to enjoy the impressive view north to the Canadian border. My wife and I reflected on our day together and the summer that was so quickly coming to a close. It was only August but we could already feel the autumn chill in the evening air.

When my clients asked me to shop in Montreal to make them dinner, I jumped at the chance. The produce at the markets is so beautiful and fresh and the selection of items seems to go on forever.
I had a wonderful time perusing the Jean-Talon Market and when I saw the duck breasts and tasted the red currants, I knew what I wanted to do. Seared duck breast with a red currant sauce and rainbow carrots with soft polenta. We rushed back to Maine and I got to work right away. The results were fantastic! Succulent duck with a crispy skin, fragrant polenta and sweet baby carrots all paired beautifully with the spice and acidity of the bold red currant-Cabernet sauce.

The following recipes will show you how to replicate this dish at home. When you break the dish down into individual components, you might be surprised at how simple it is to execute. The polenta and carrots can be prepared up to a few hours ahead of time, allowing you to focus on the duck and the sauce. When everything is ready, you simply heat, plate and serve!
Maple Glazed Baby Carrots
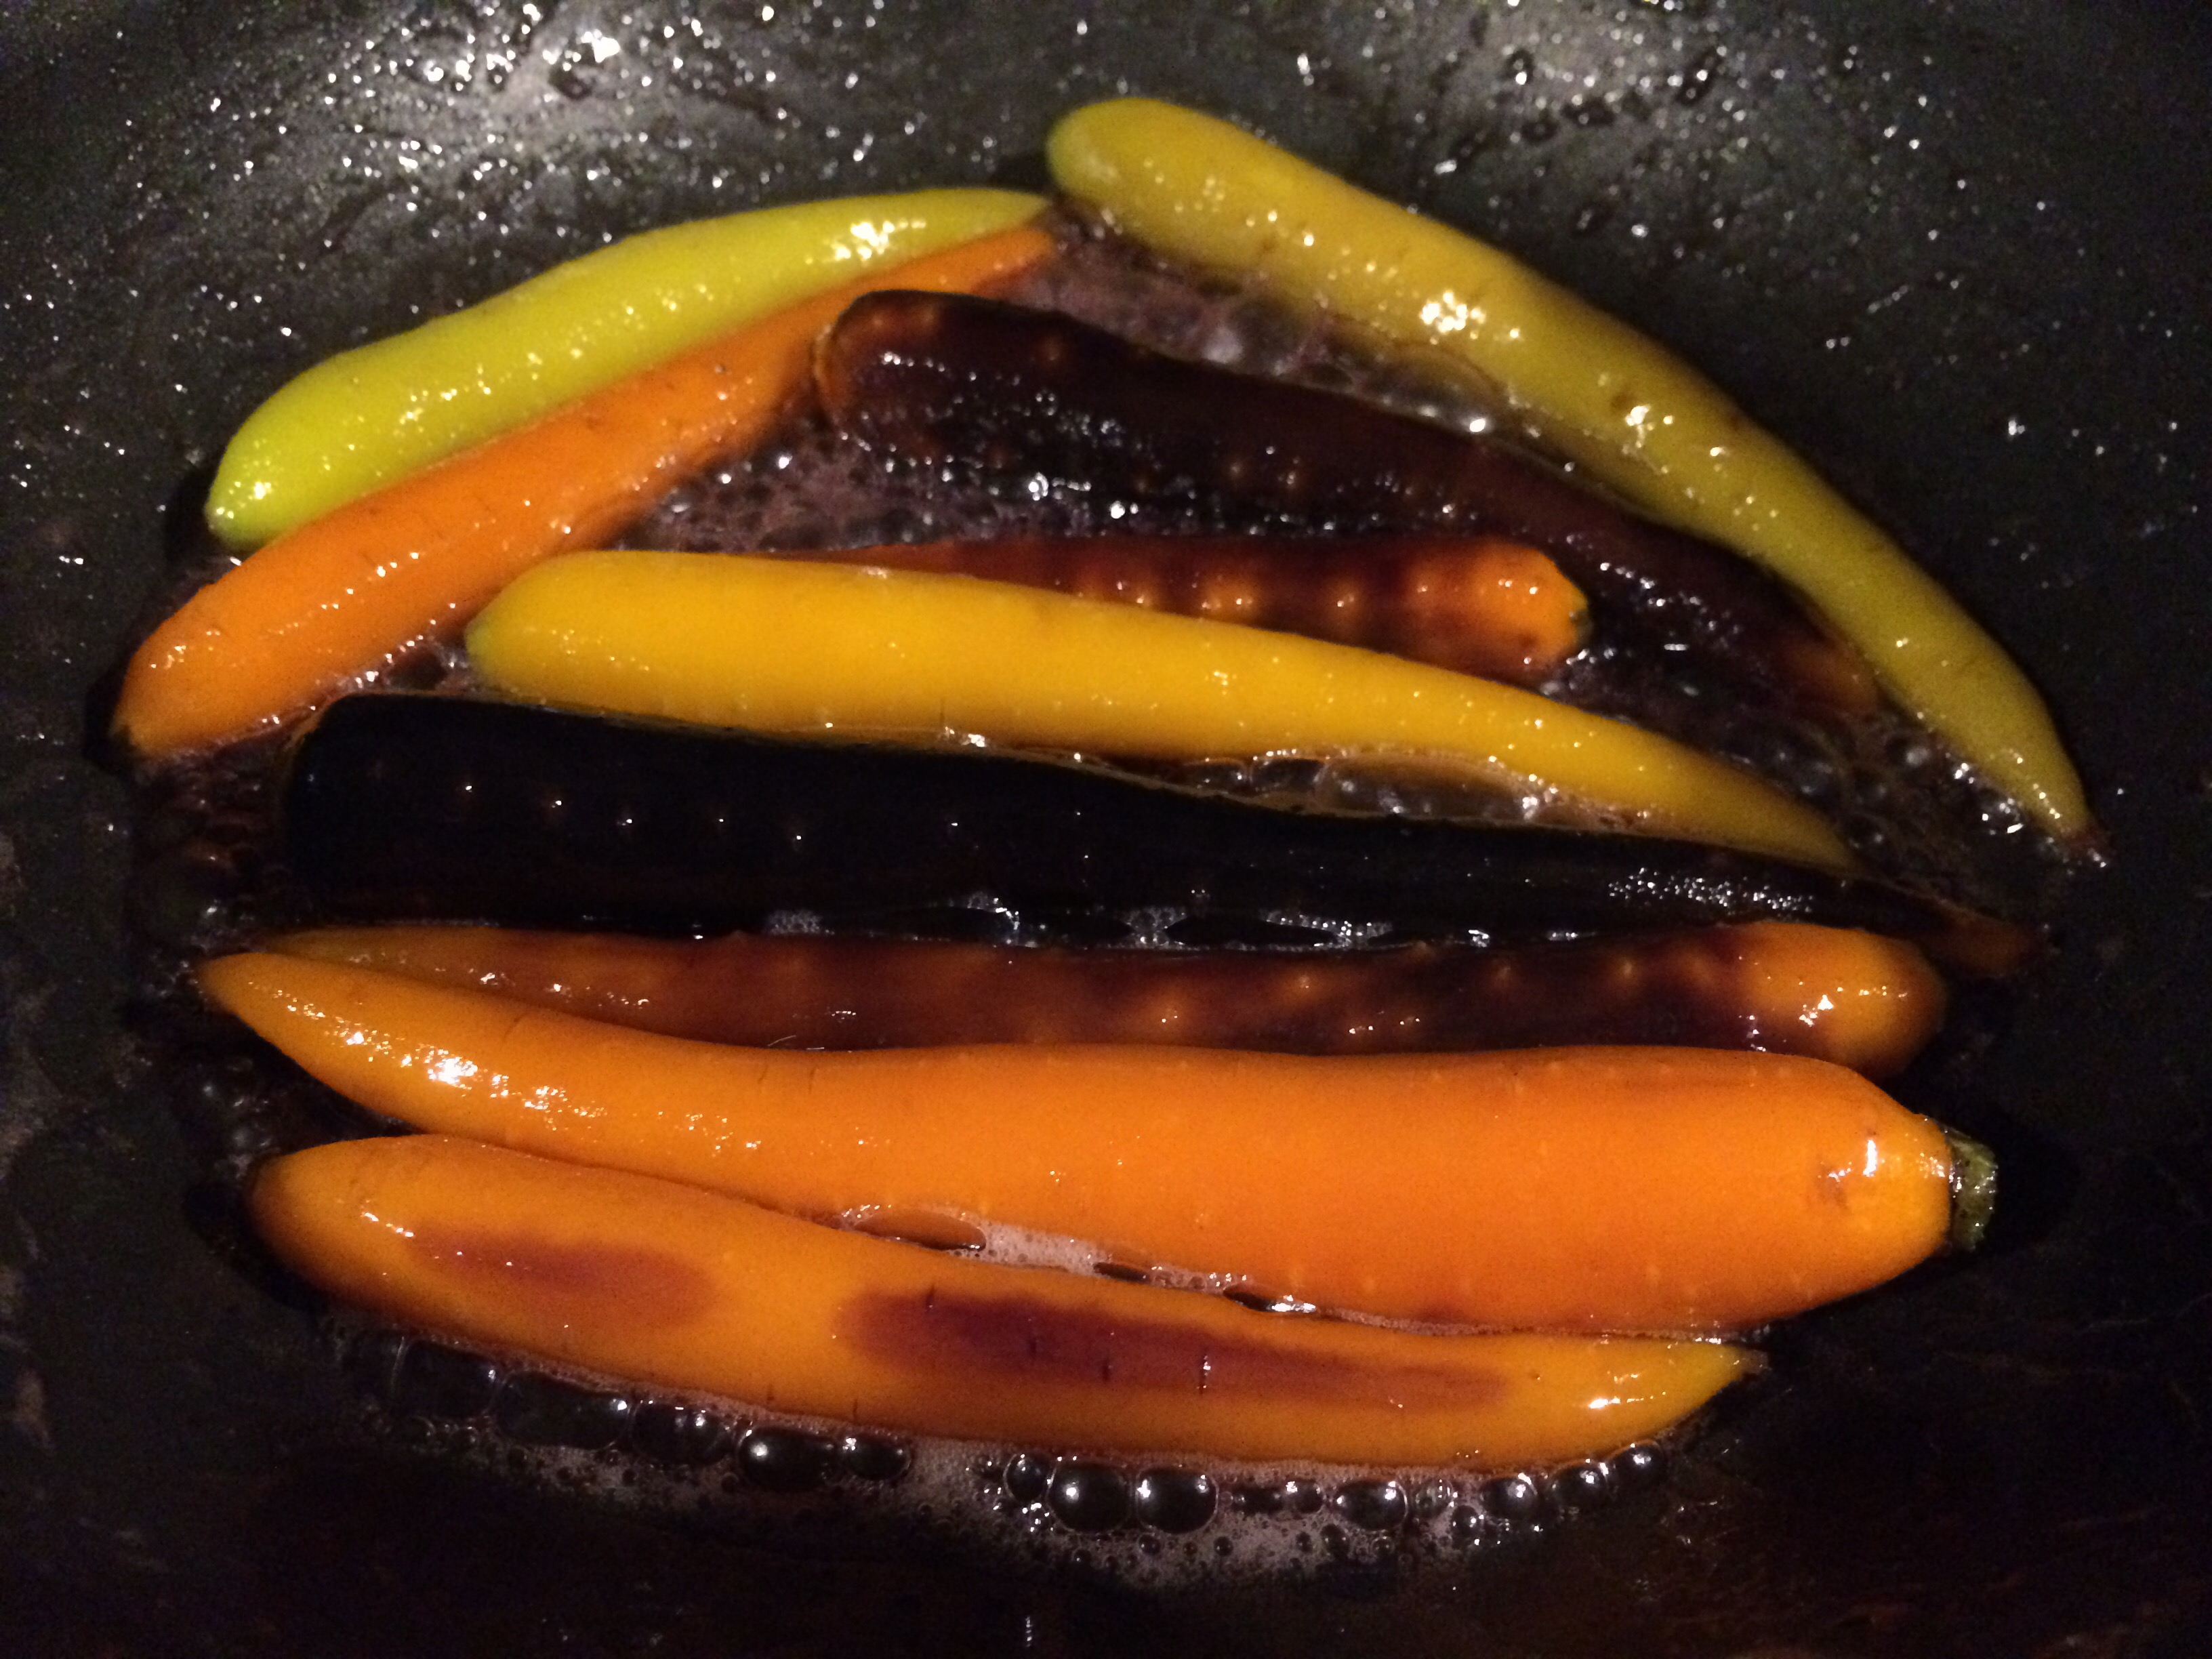
Ingredients:
8-10 Baby Carrots
1 Tbsp Butter
1 Tbsp Brown Sugar
2 Tbsp Maple Syrup
Coarse Salt to taste
Directions:
Bring a pot of salted water to a boil. Peel carrots and trim green stems very short. Boil carrots for 10 minutes or until a knife pierces them with little resistance.

Collect carrots in strainer, remove from water and cool to room temperature. Place in a cold sauté pan with butter, brown sugar and maple syrup until ready to serve.
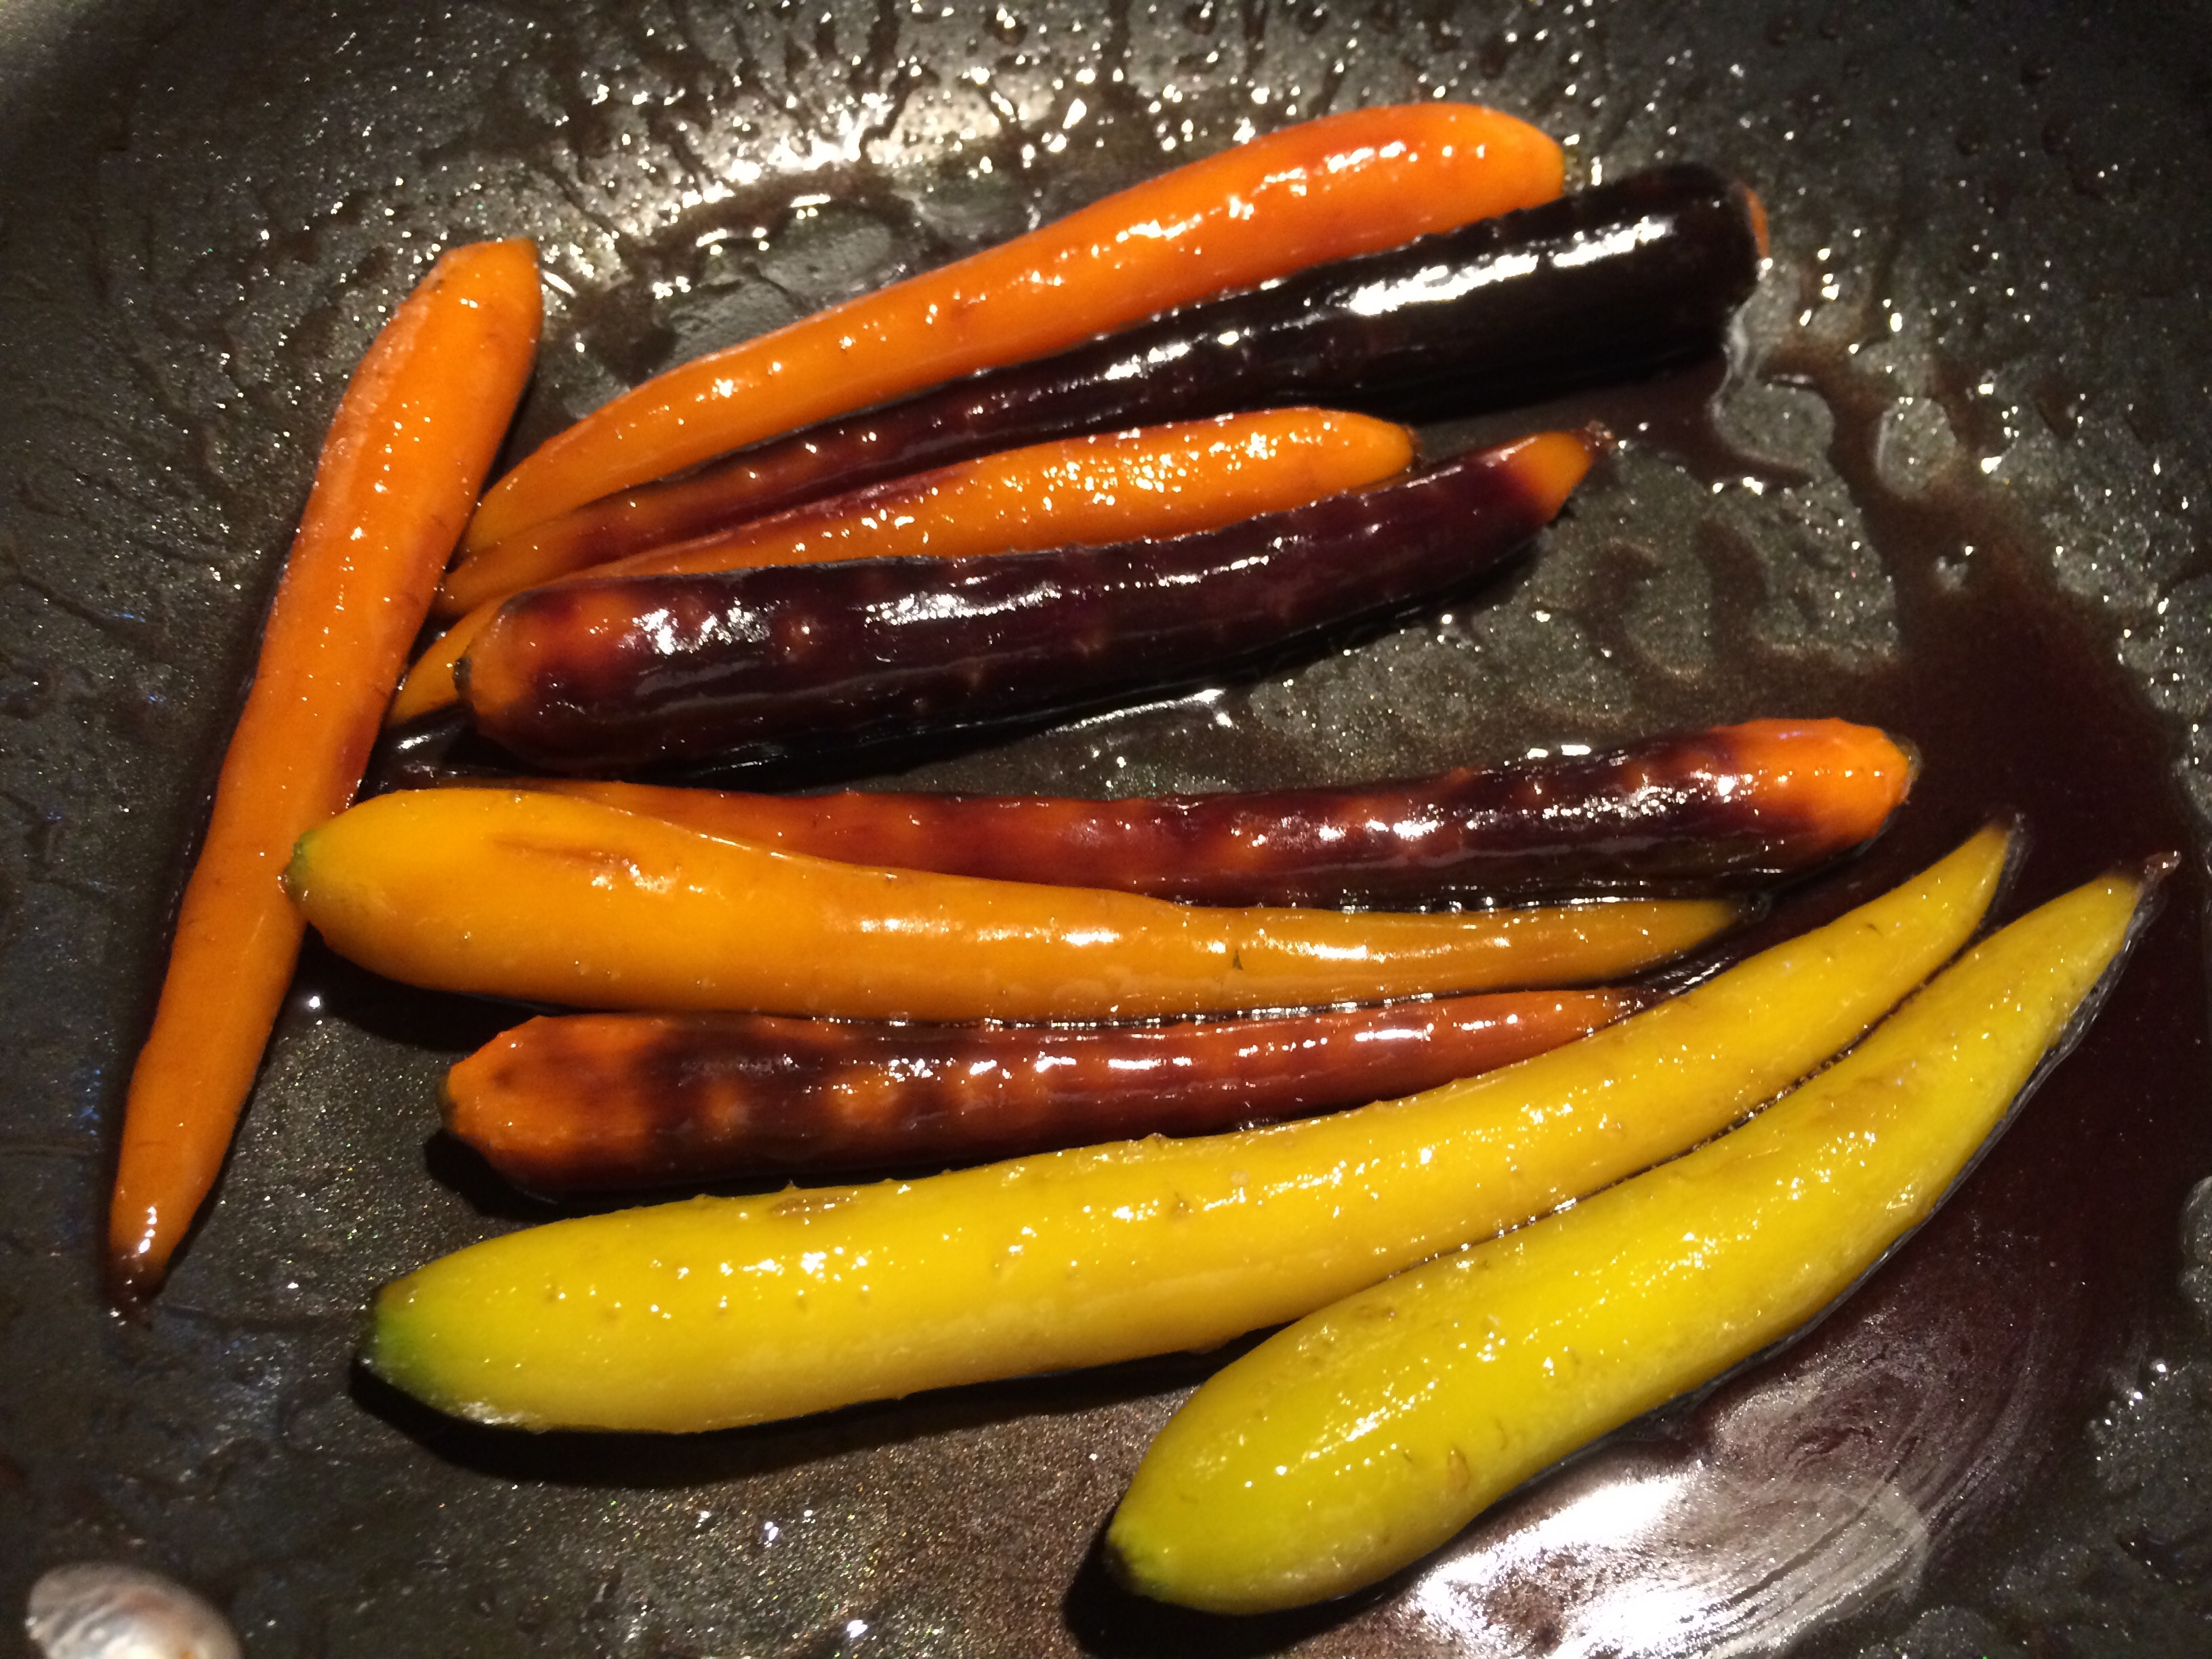
When ready to serve, simmer over medium-low heat until butter melts and sauce thickens into a glaze, 5-10 minutes. Sprinkle with coarse salt just before serving.
Truffled Polenta
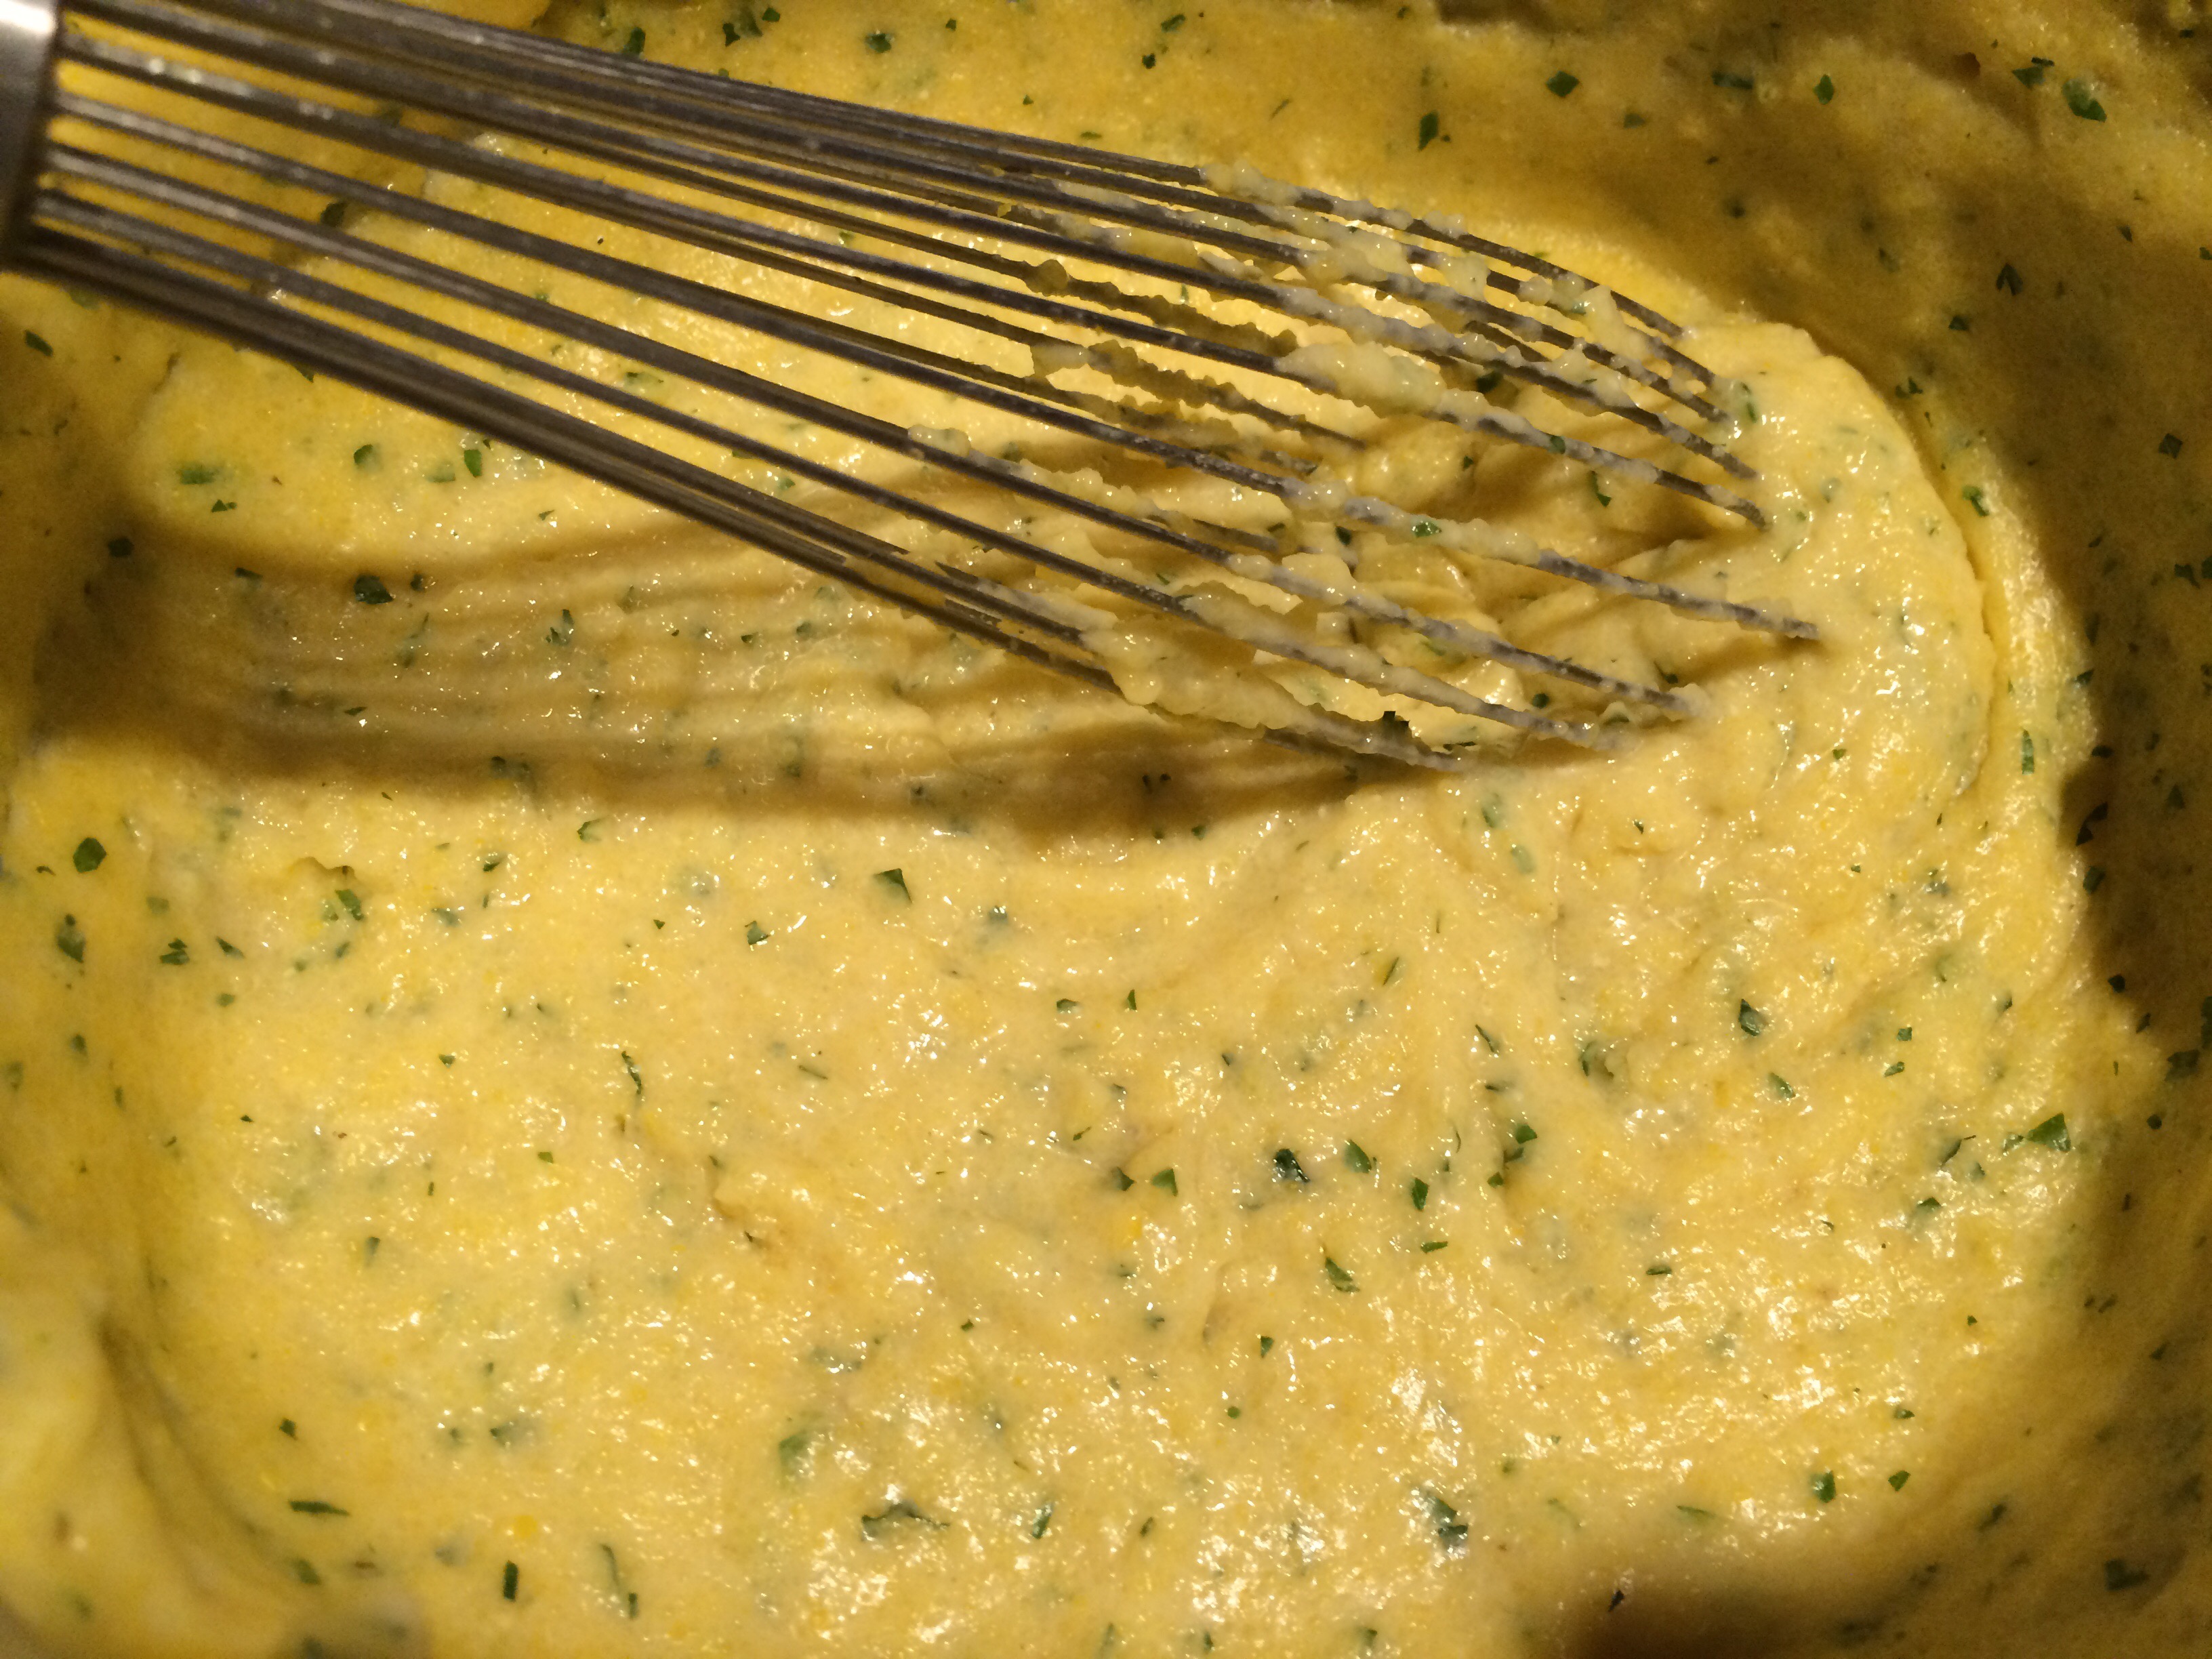
Ingredients:
1 1/2 Cups Chicken Stock
1 1/2 Cups Milk
1/2 Cup Yellow Corn Meal
2 Tbsp Chopped Fresh Parsley
1 Tbsp Butter
1 Tbsp White Truffle Oil
Directions:
Combine chicken stock and milk in a medium pot and bring to a boil. Reduce to a simmer and add polenta, whisking constantly. Cook, stirring occasionally for about 5 minutes. Turn off heat and let sit at room temperature until ready to serve.
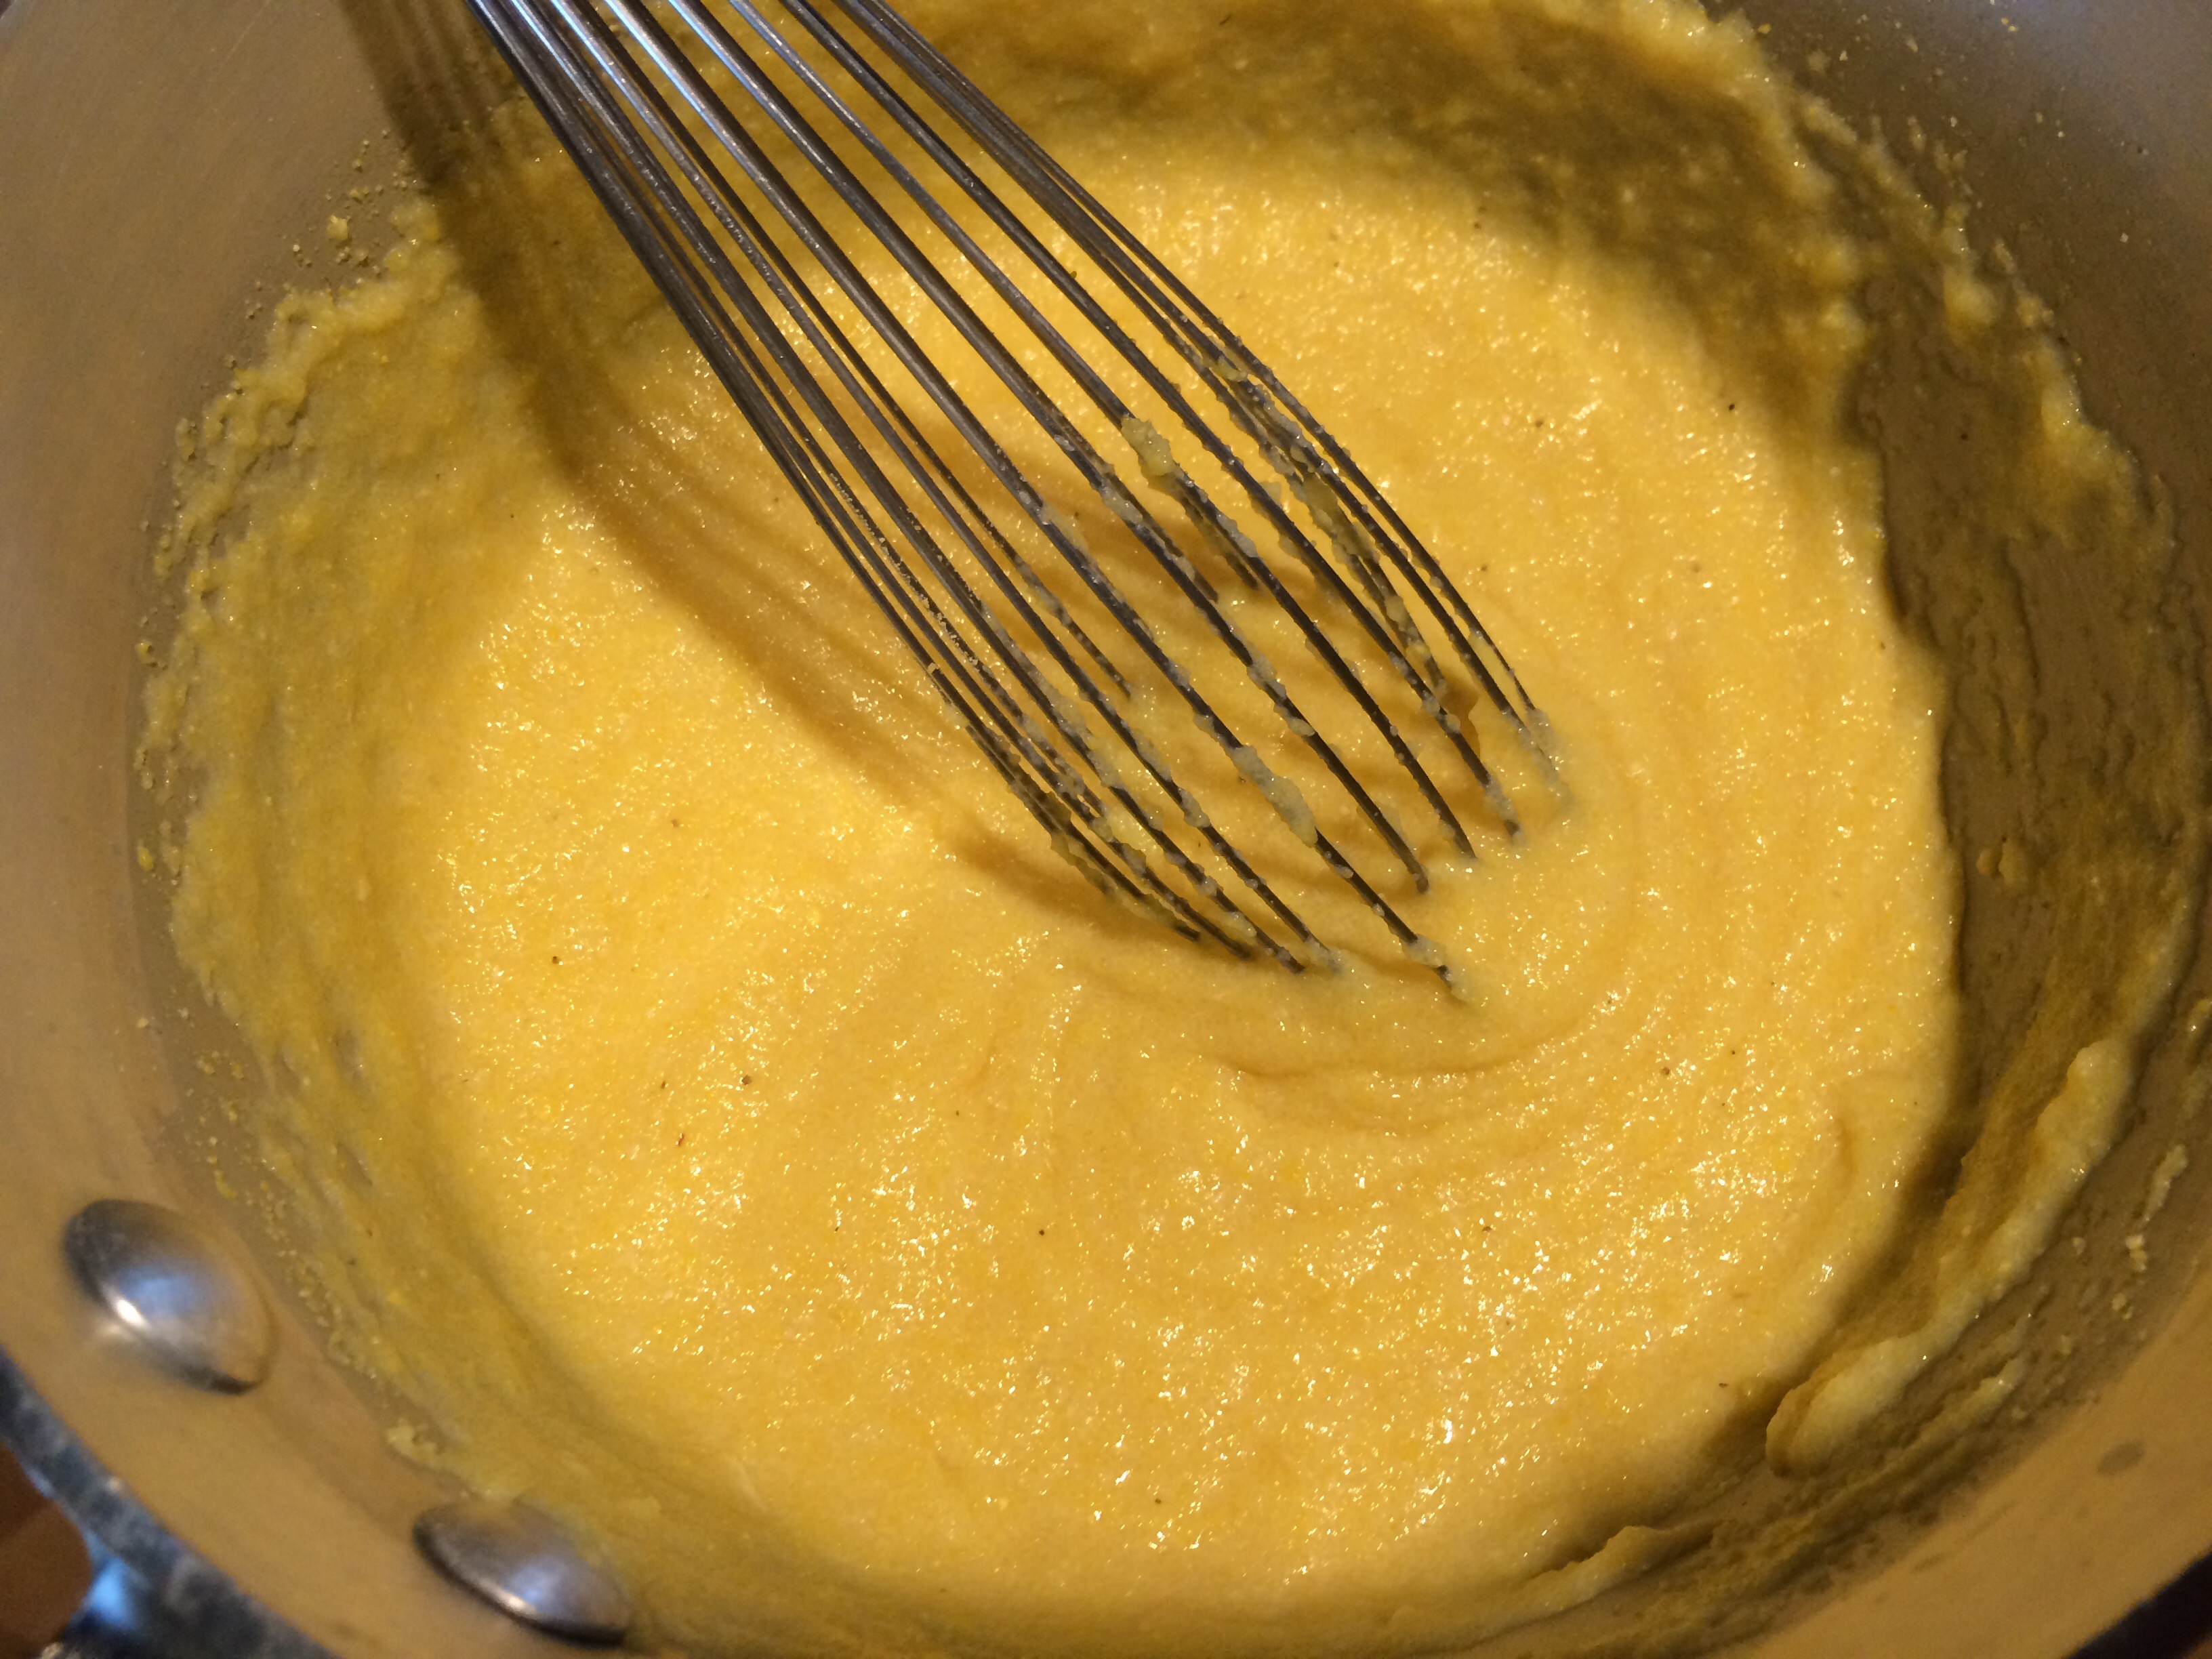
When ready to serve, add remaining ingredients and heat on medium low while stirring. You may need to add additional liquid to thin if it becomes too thick. You can use chicken stock, milk or water. Polenta should be the consistency of porridge. Taste and season with salt if necessary.
Pan Seared Duck Breast with Cabernet-Red Currant Reduction
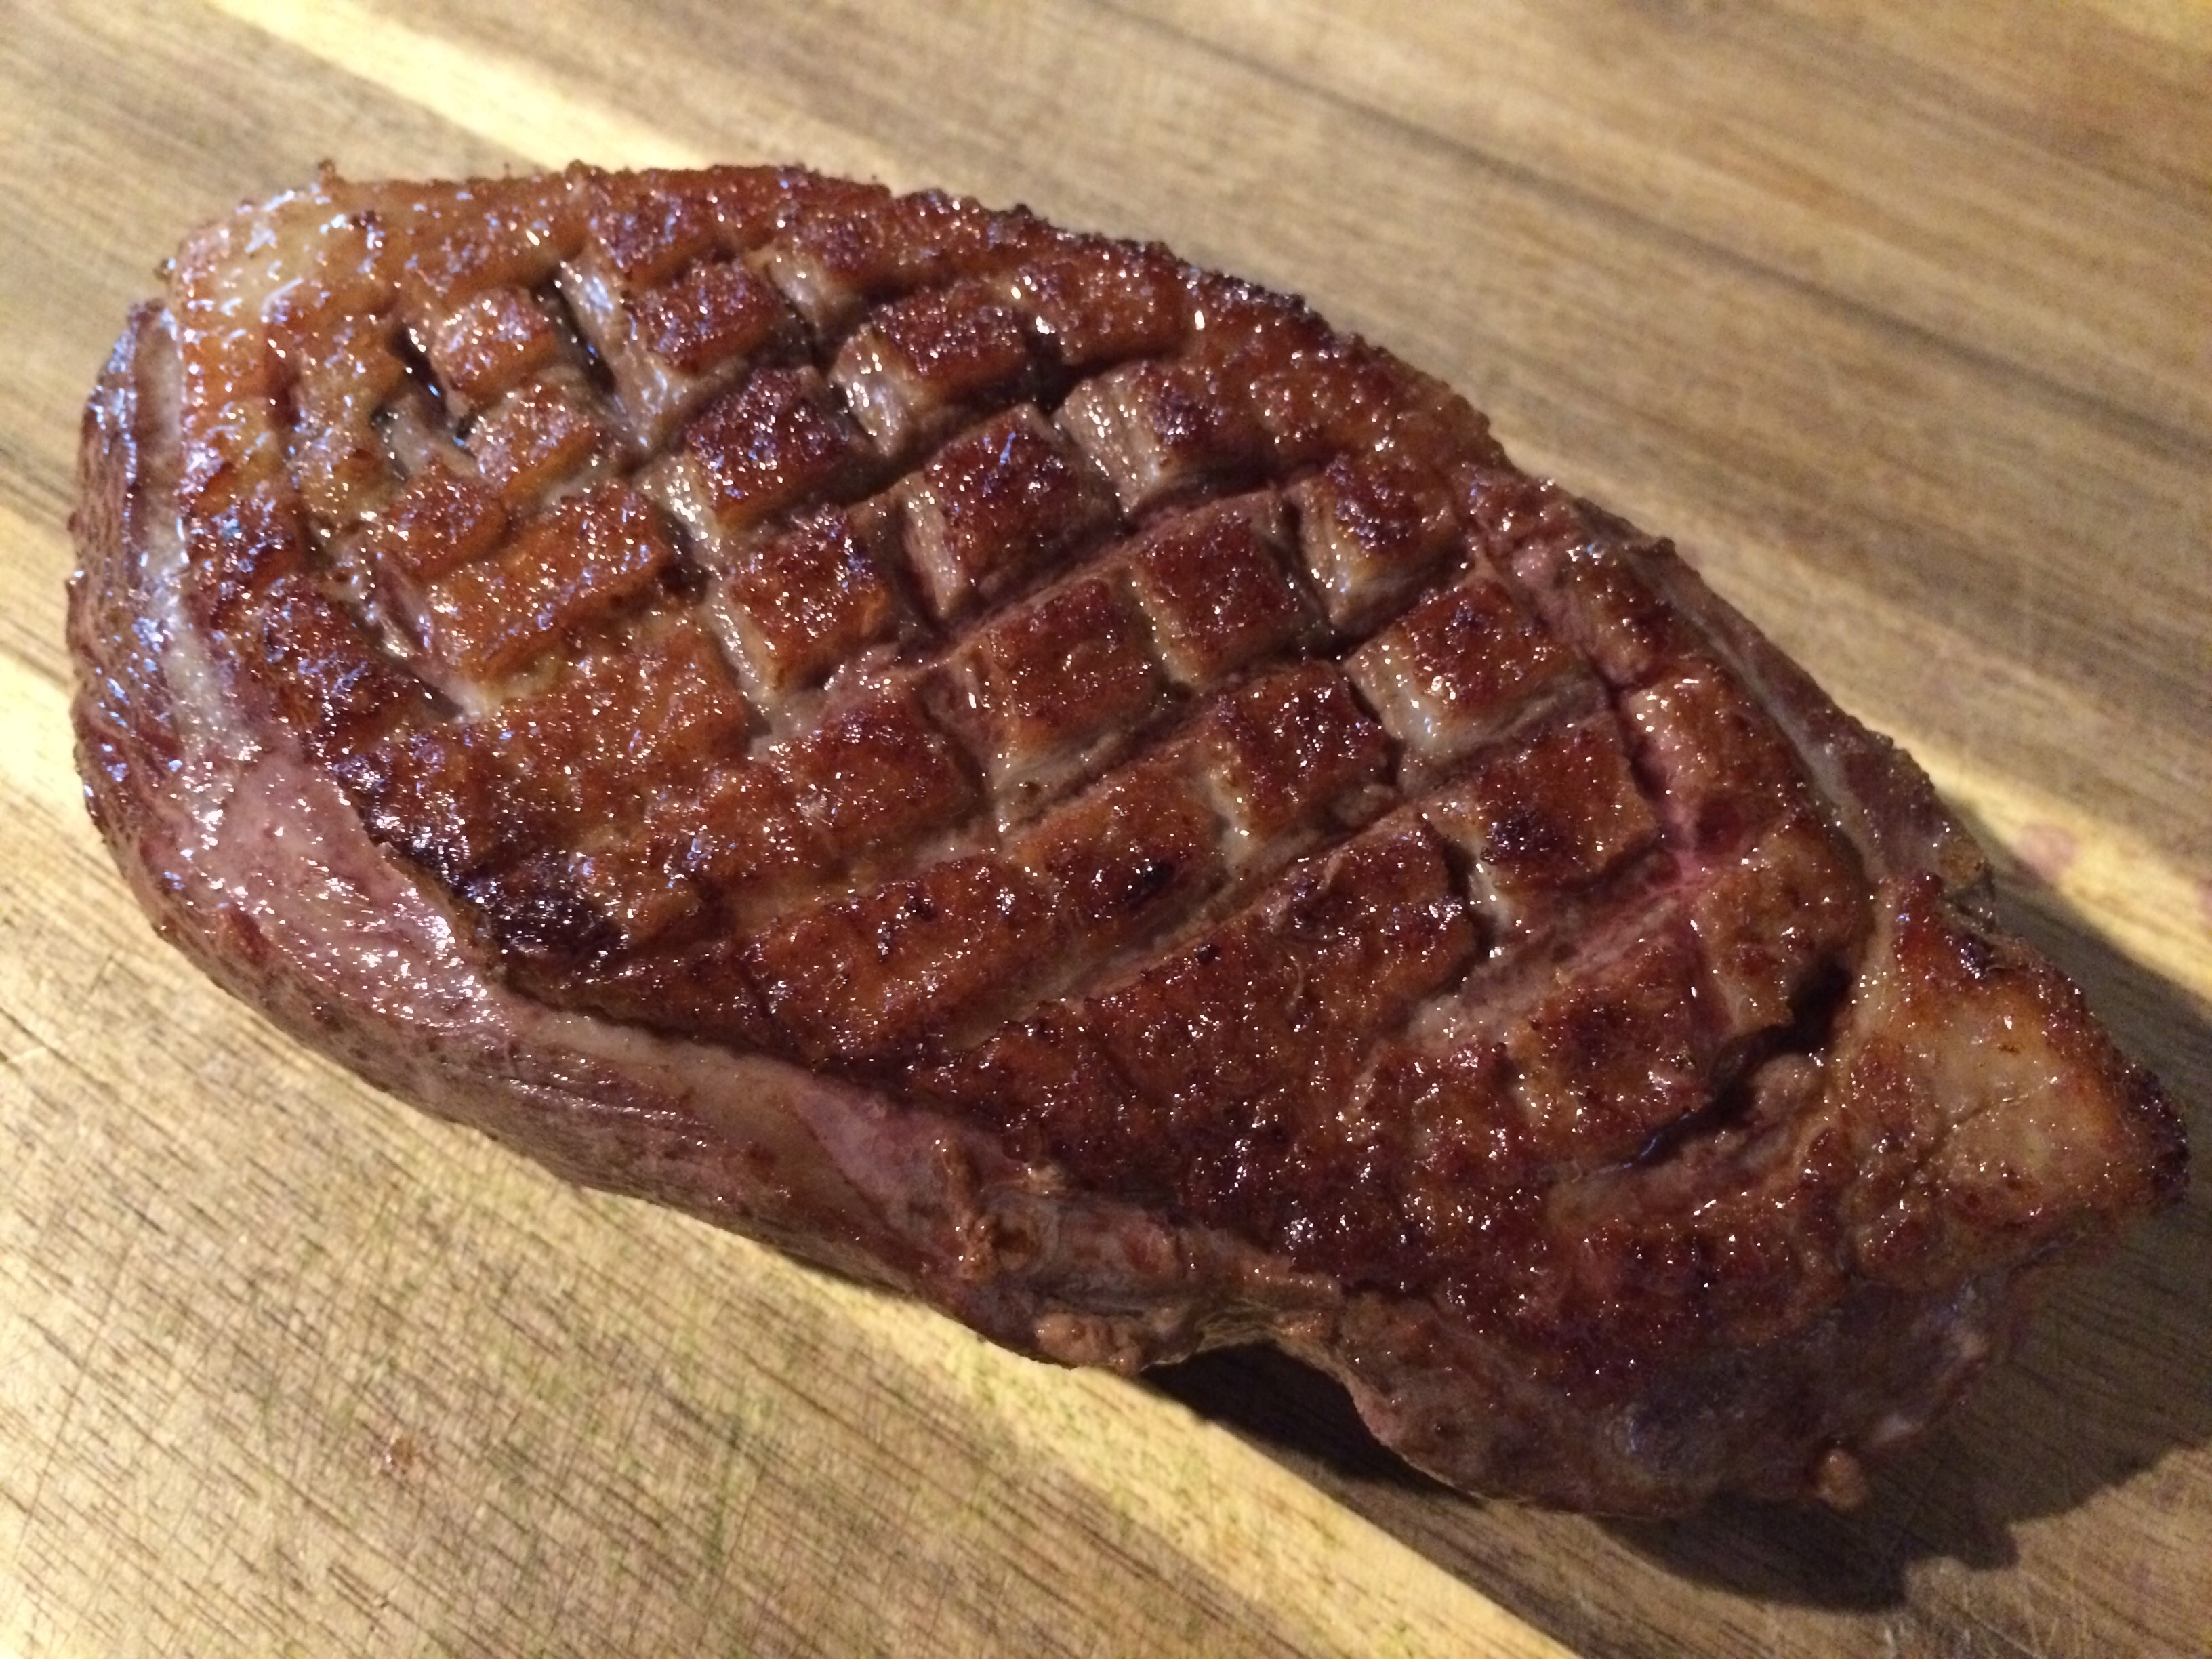
Ingredients:
1-2 Duck Breasts, depending on size and appetite
1-2 Shallots, Chopped or Sliced
1/2 Cup Cabernet Sauvignon
1 Small Bunch Fresh Thyme
Freshly Ground Black Pepper
2.5-3 Ounces Red Currants (if you are unable to find fresh currants, you may substitute your favorite fruit or berry (blackberries, cherries or plums would be nice)
4 Tbsp Cold Butter, cut into pieces
Directions:

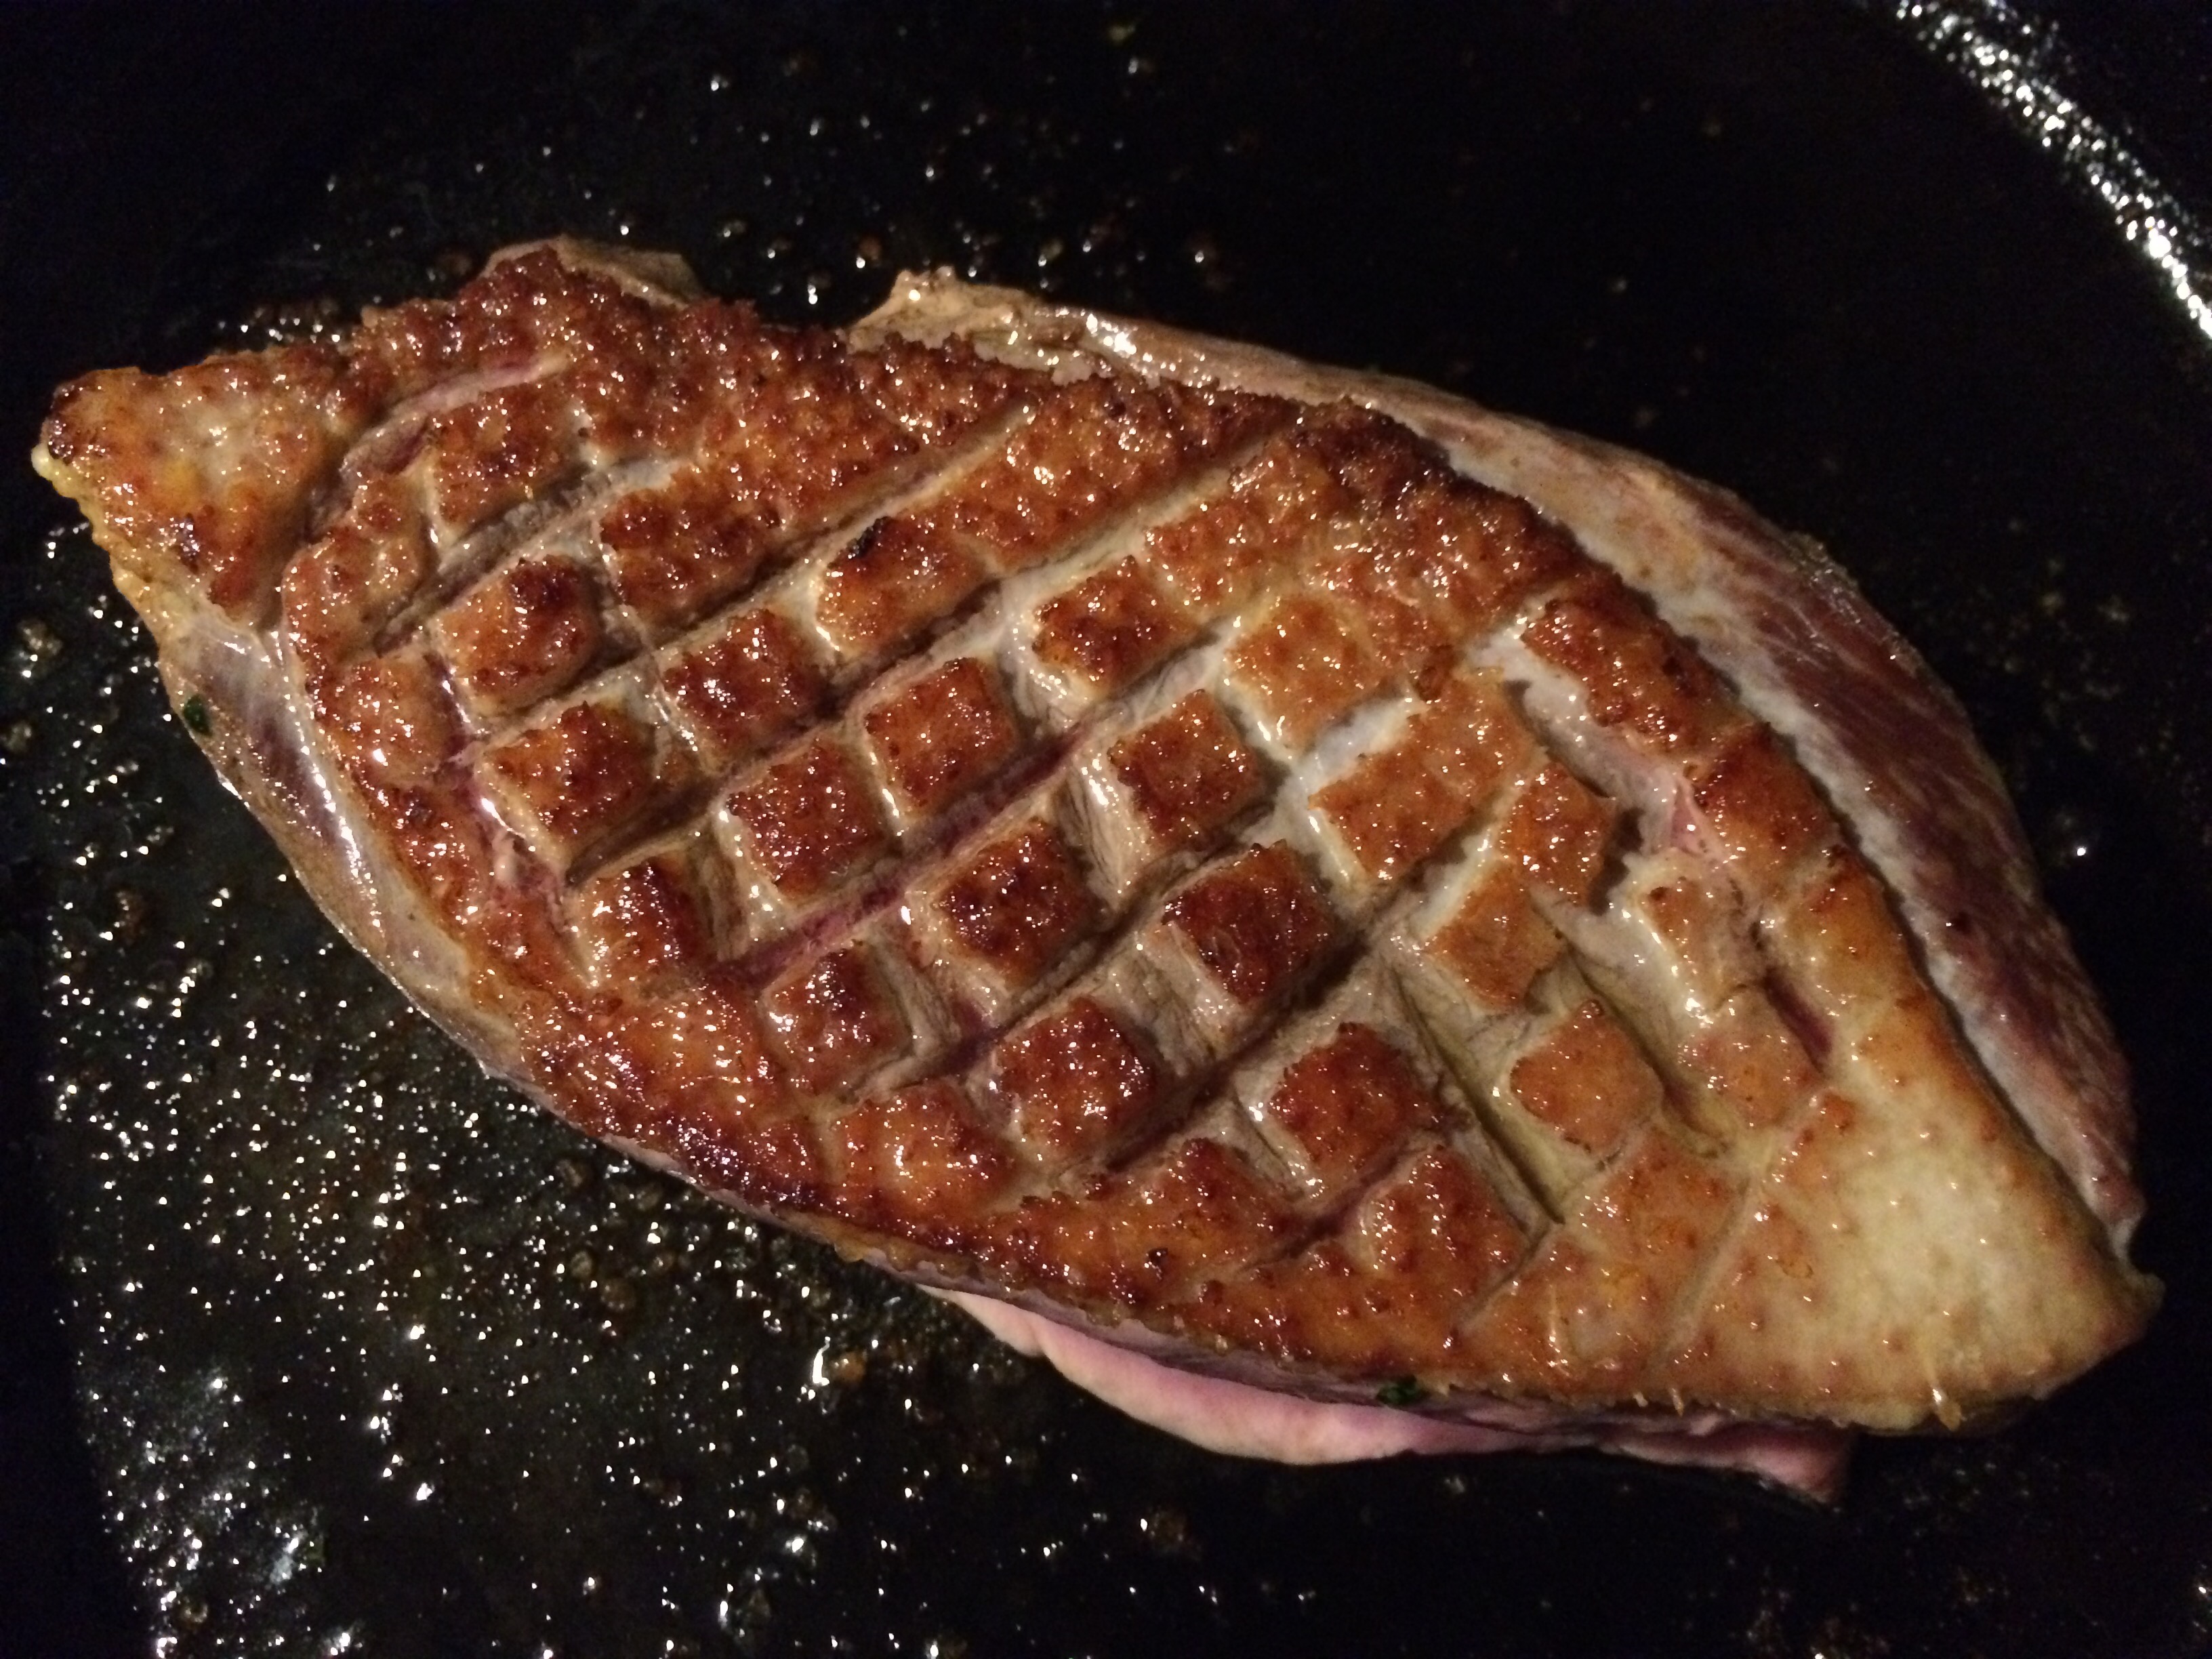
Heat a pan on the stove over medium heat and preheat the oven to 350 F. Using a very sharp knife, cut through the skin of the duck, first one way, then the other to make a diamond pattern. Be careful not to cut into the flesh.

Season liberally with coarse salt and place skin side down in the heated pan. As the duck cooks, the fat under the skin will render into the pan, eliminating the need for oil and making the skin crispy. Cook gently over medium heat for 5-7 minutes undisturbed until skin is golden brown and releases from the pan easily.
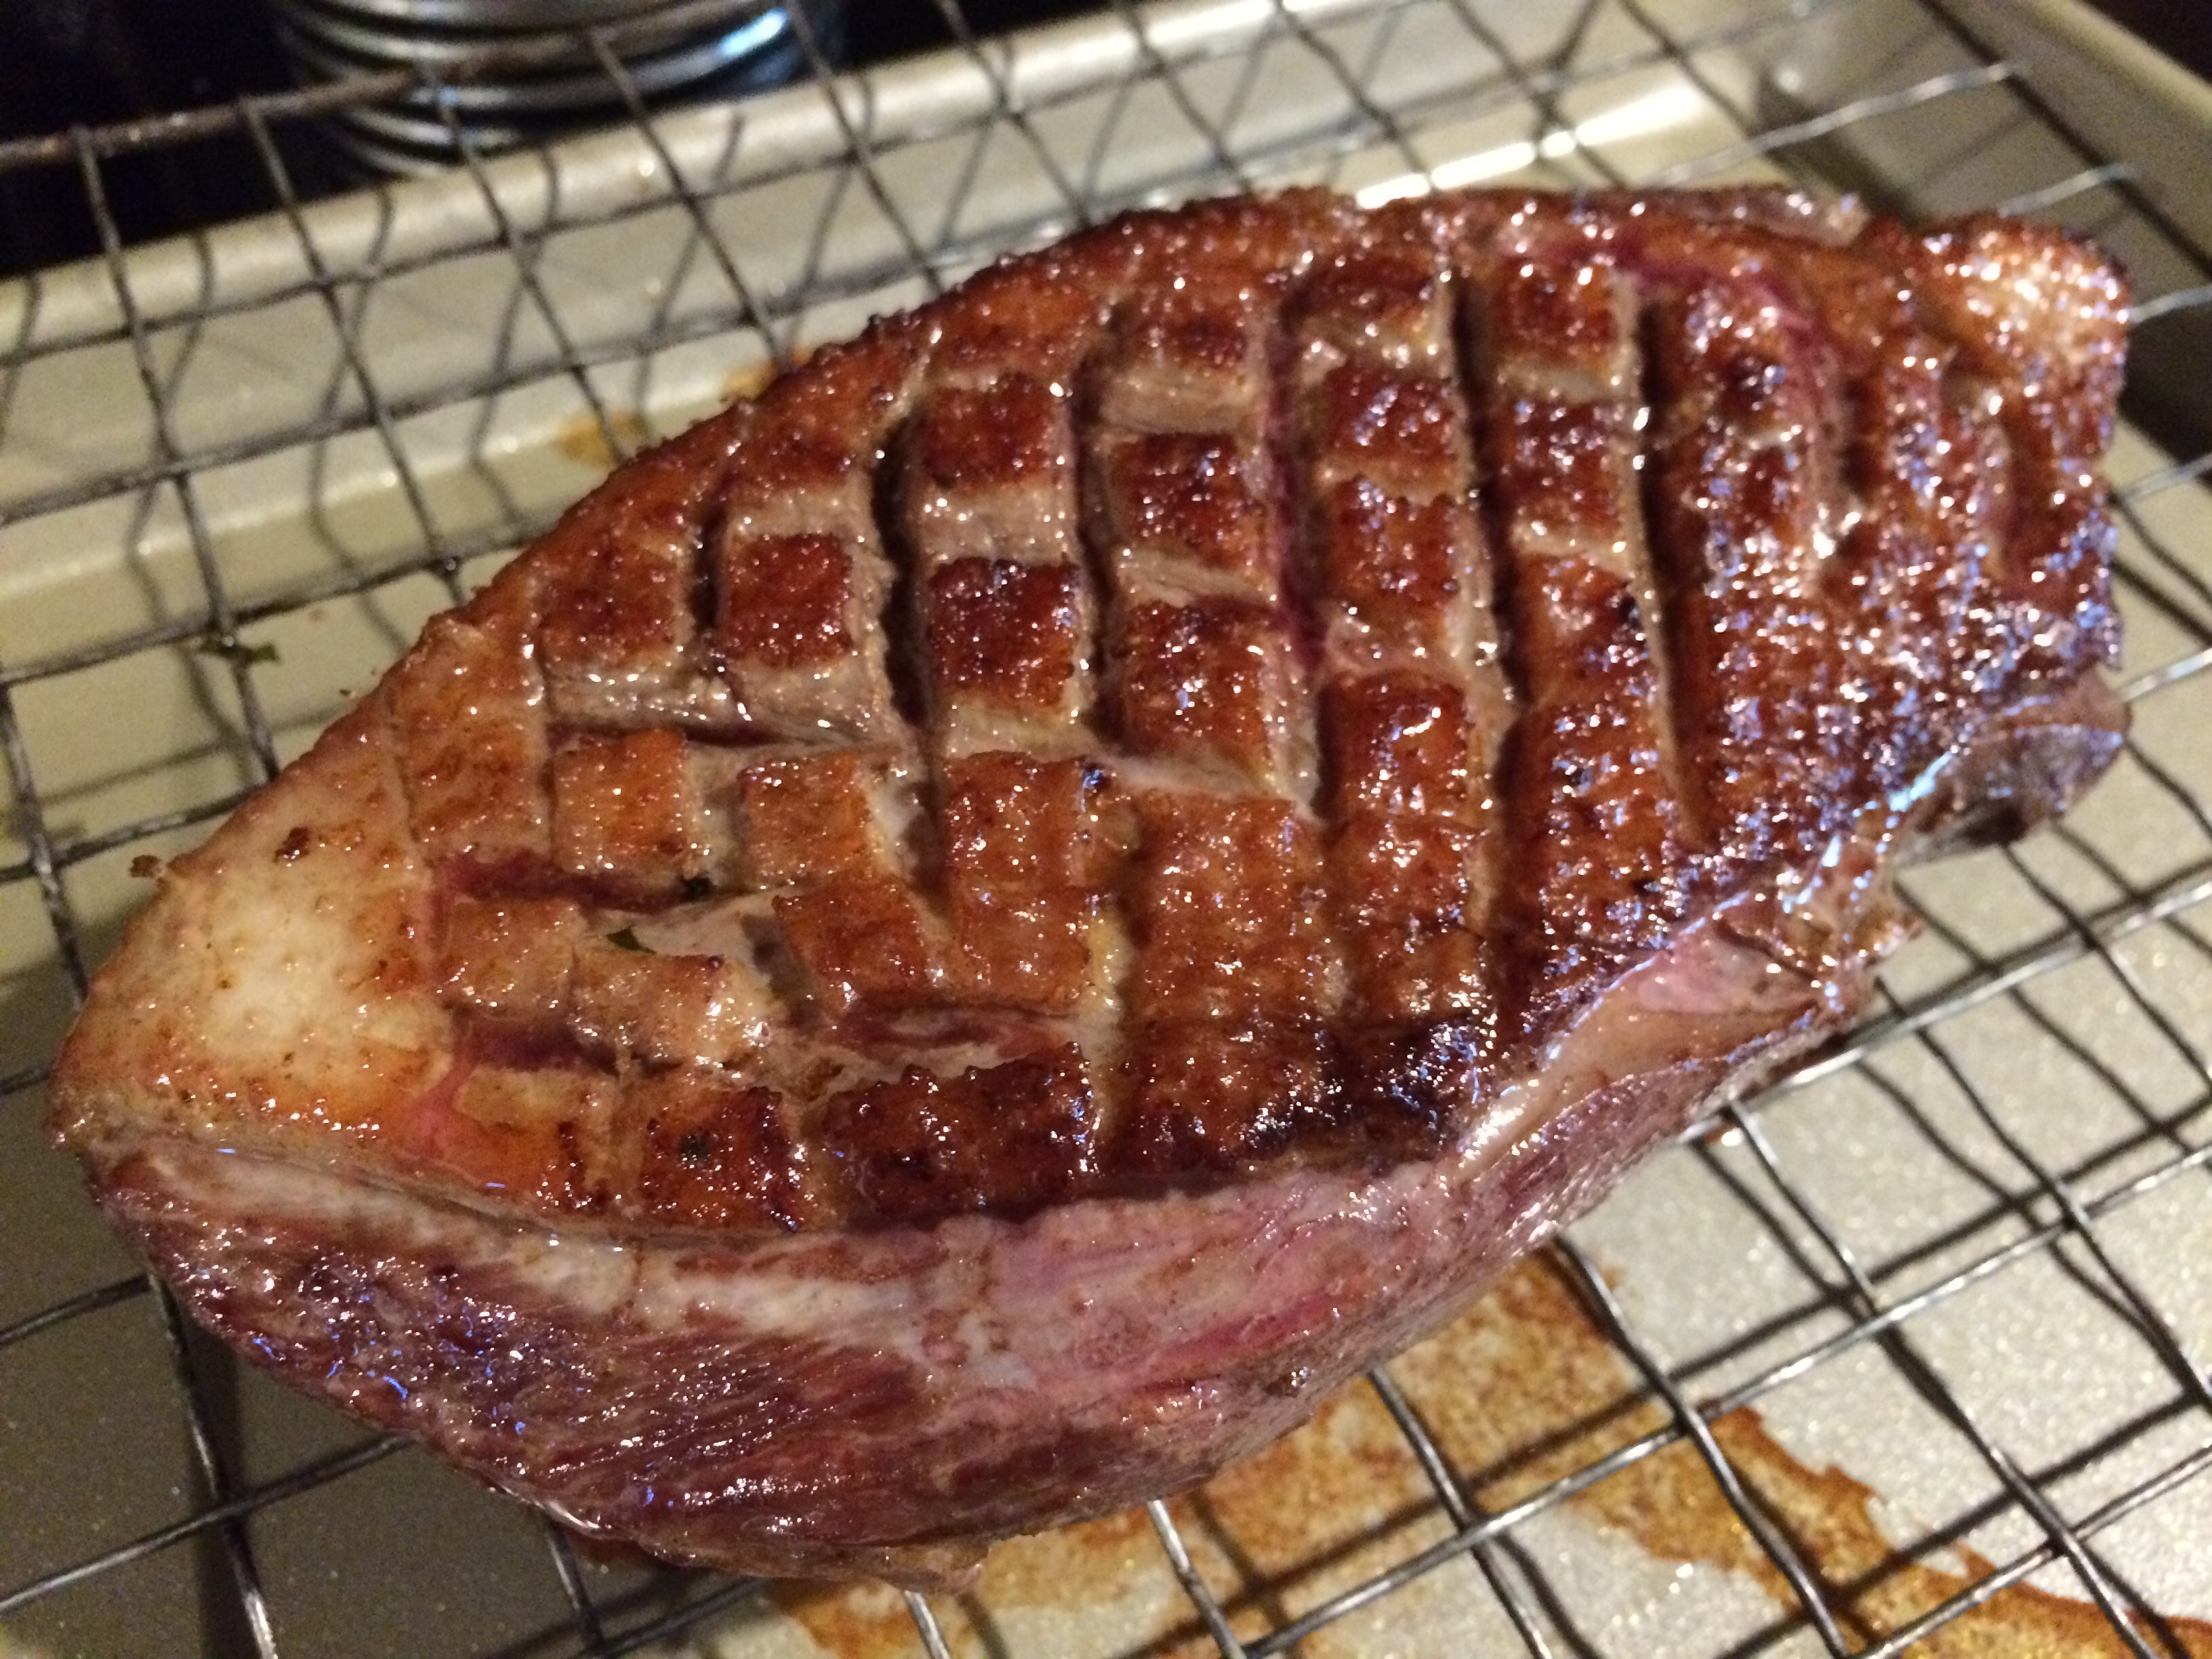
Turn heat up to medium-high, flip over the breast and sear the other side, about 3-5 minutes. Turn heat off and place the duck breast on a wire rack on a baking sheet. Cook in oven 2-3 minutes for medium rare, 5 minutes for medium. If you prefer your duck rare, just place it on the rack to rest. When duck is finished cooking, allow it to rest on the rack at least 5 minutes while you prepare the sauce.

While the duck is resting, turn the heat back on your pan, pour off any excess fat and add all remaining ingredients except the butter to the pan. Bring to a boil, lower heat and reduce, mashing up currants to help them release their juices, until almost all the liquid has evaporated.
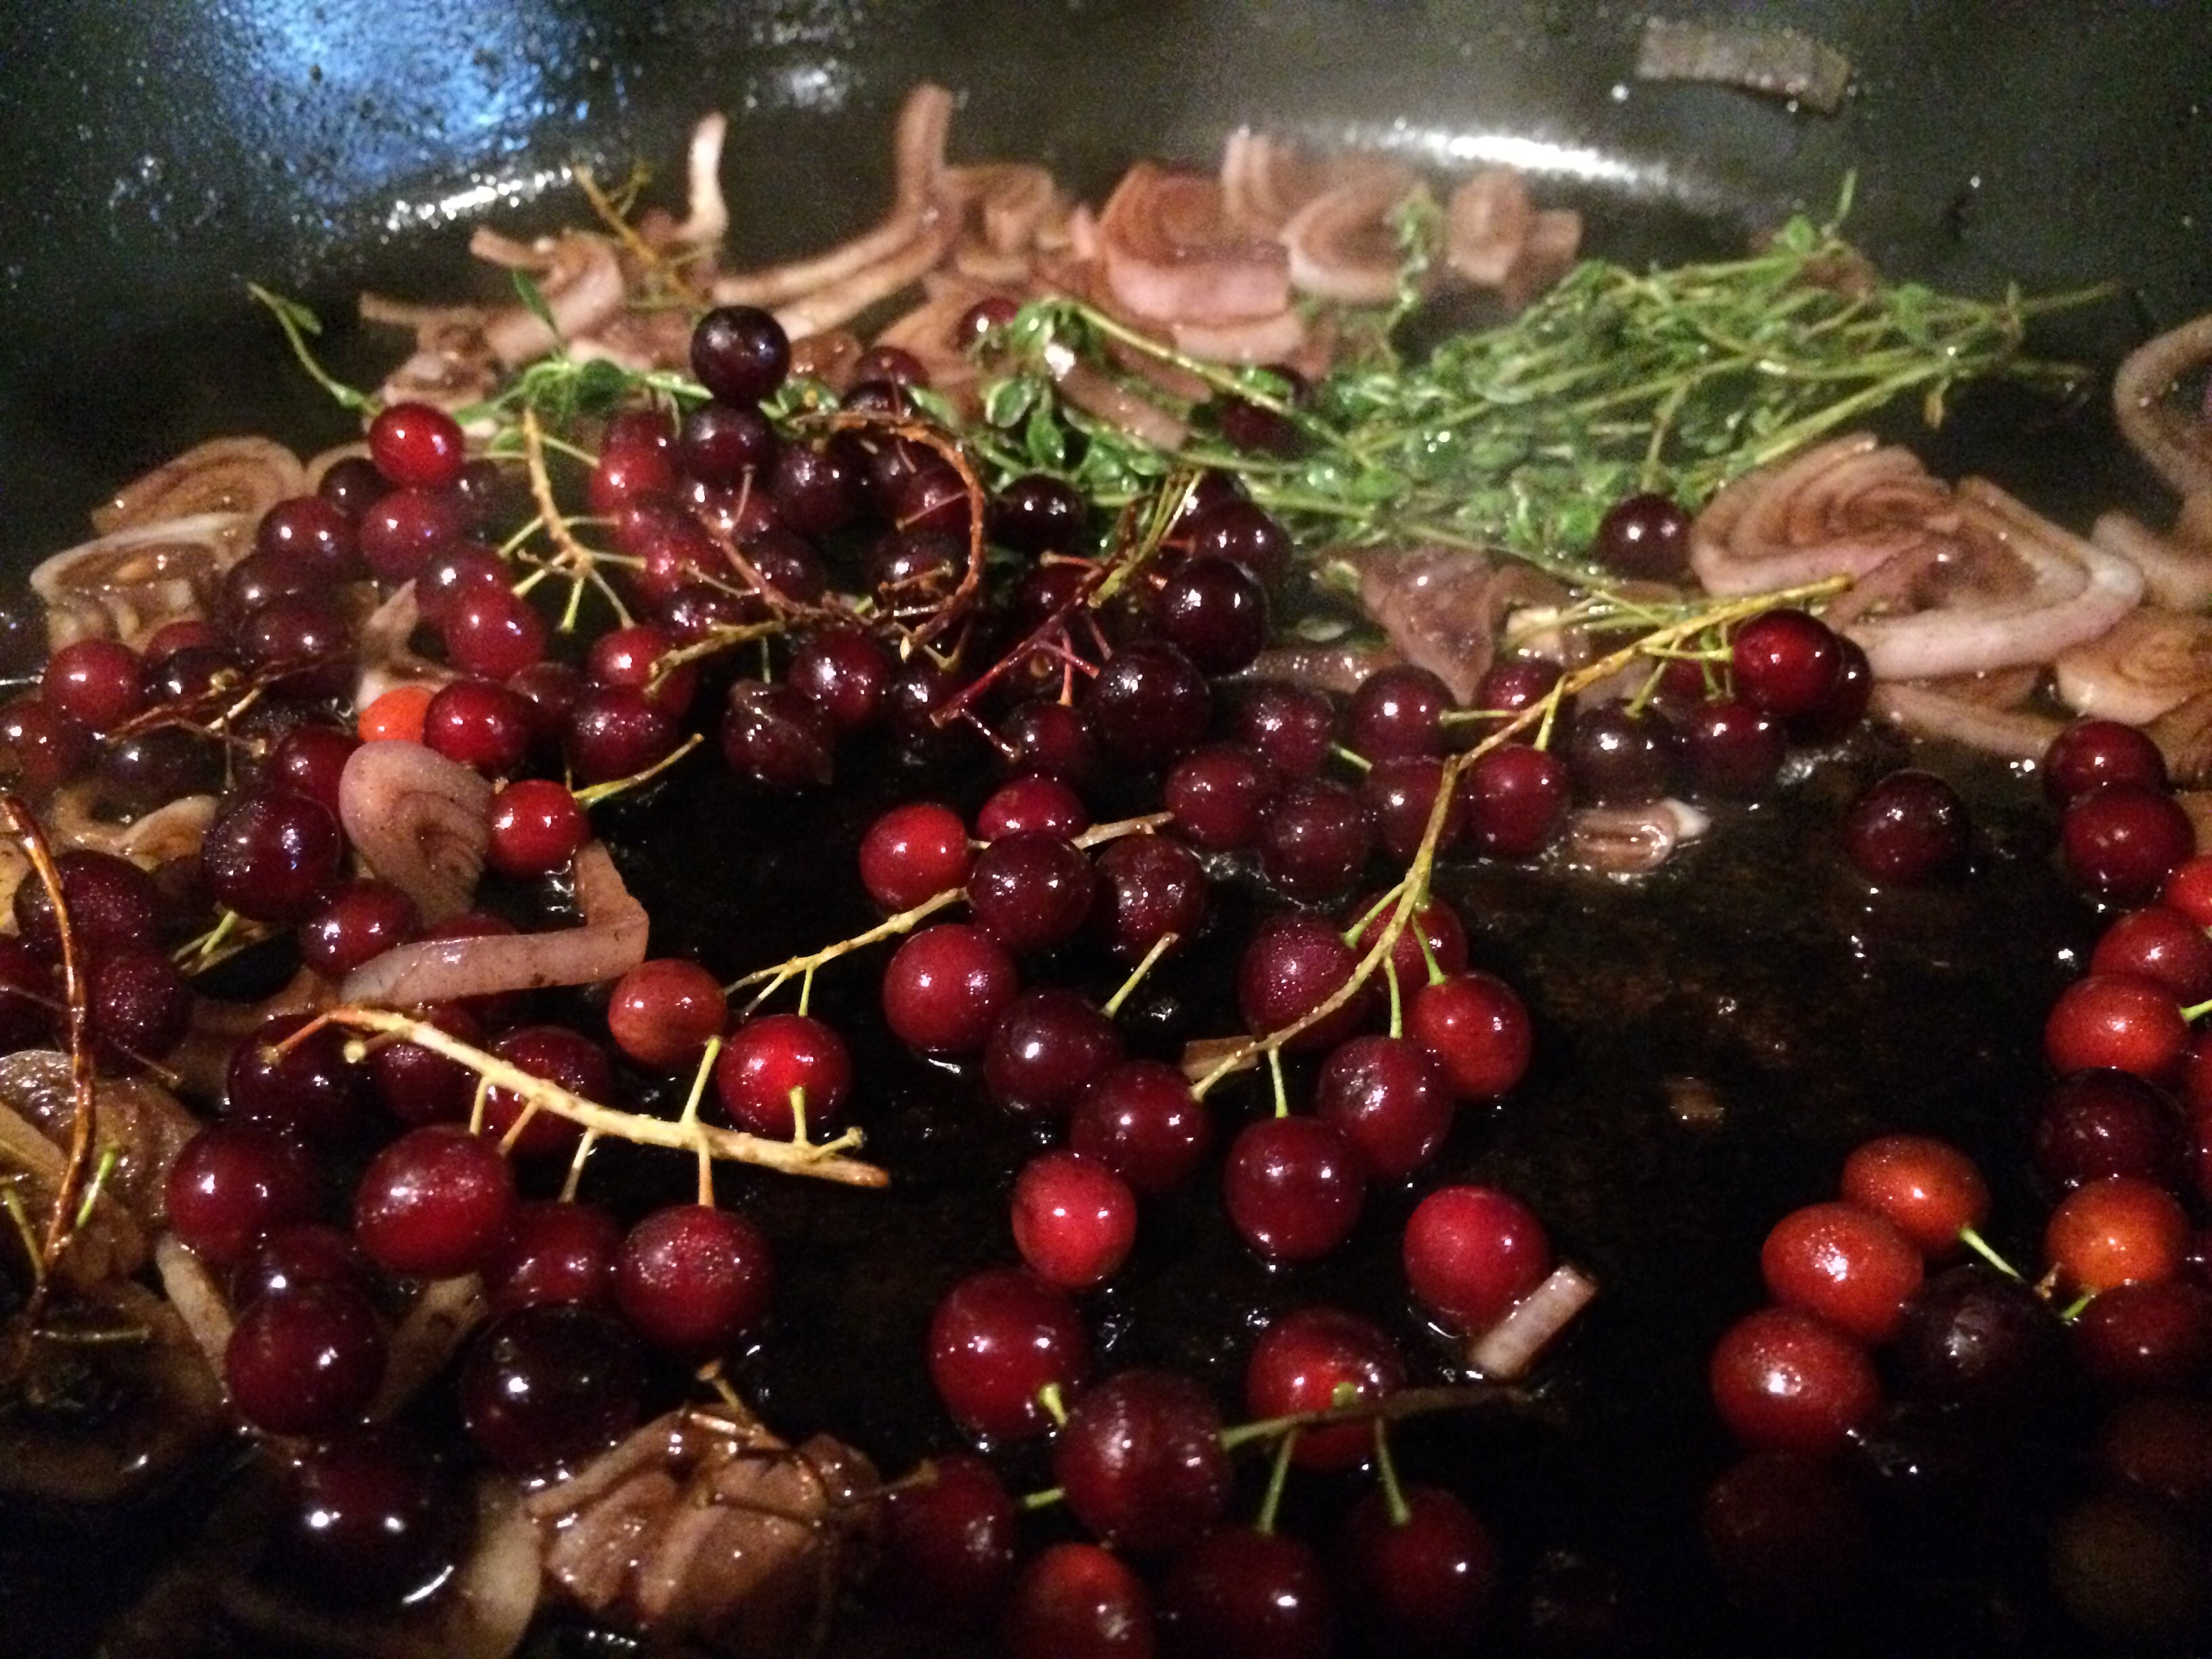
Turn off heat and add the cold butter. Stir the melting butter into the sauce and as soon as butter is completely melted, pour through a strainer into a room temperature container. Place finished sauce in a warm, but not hot part of the kitchen until ready to serve.
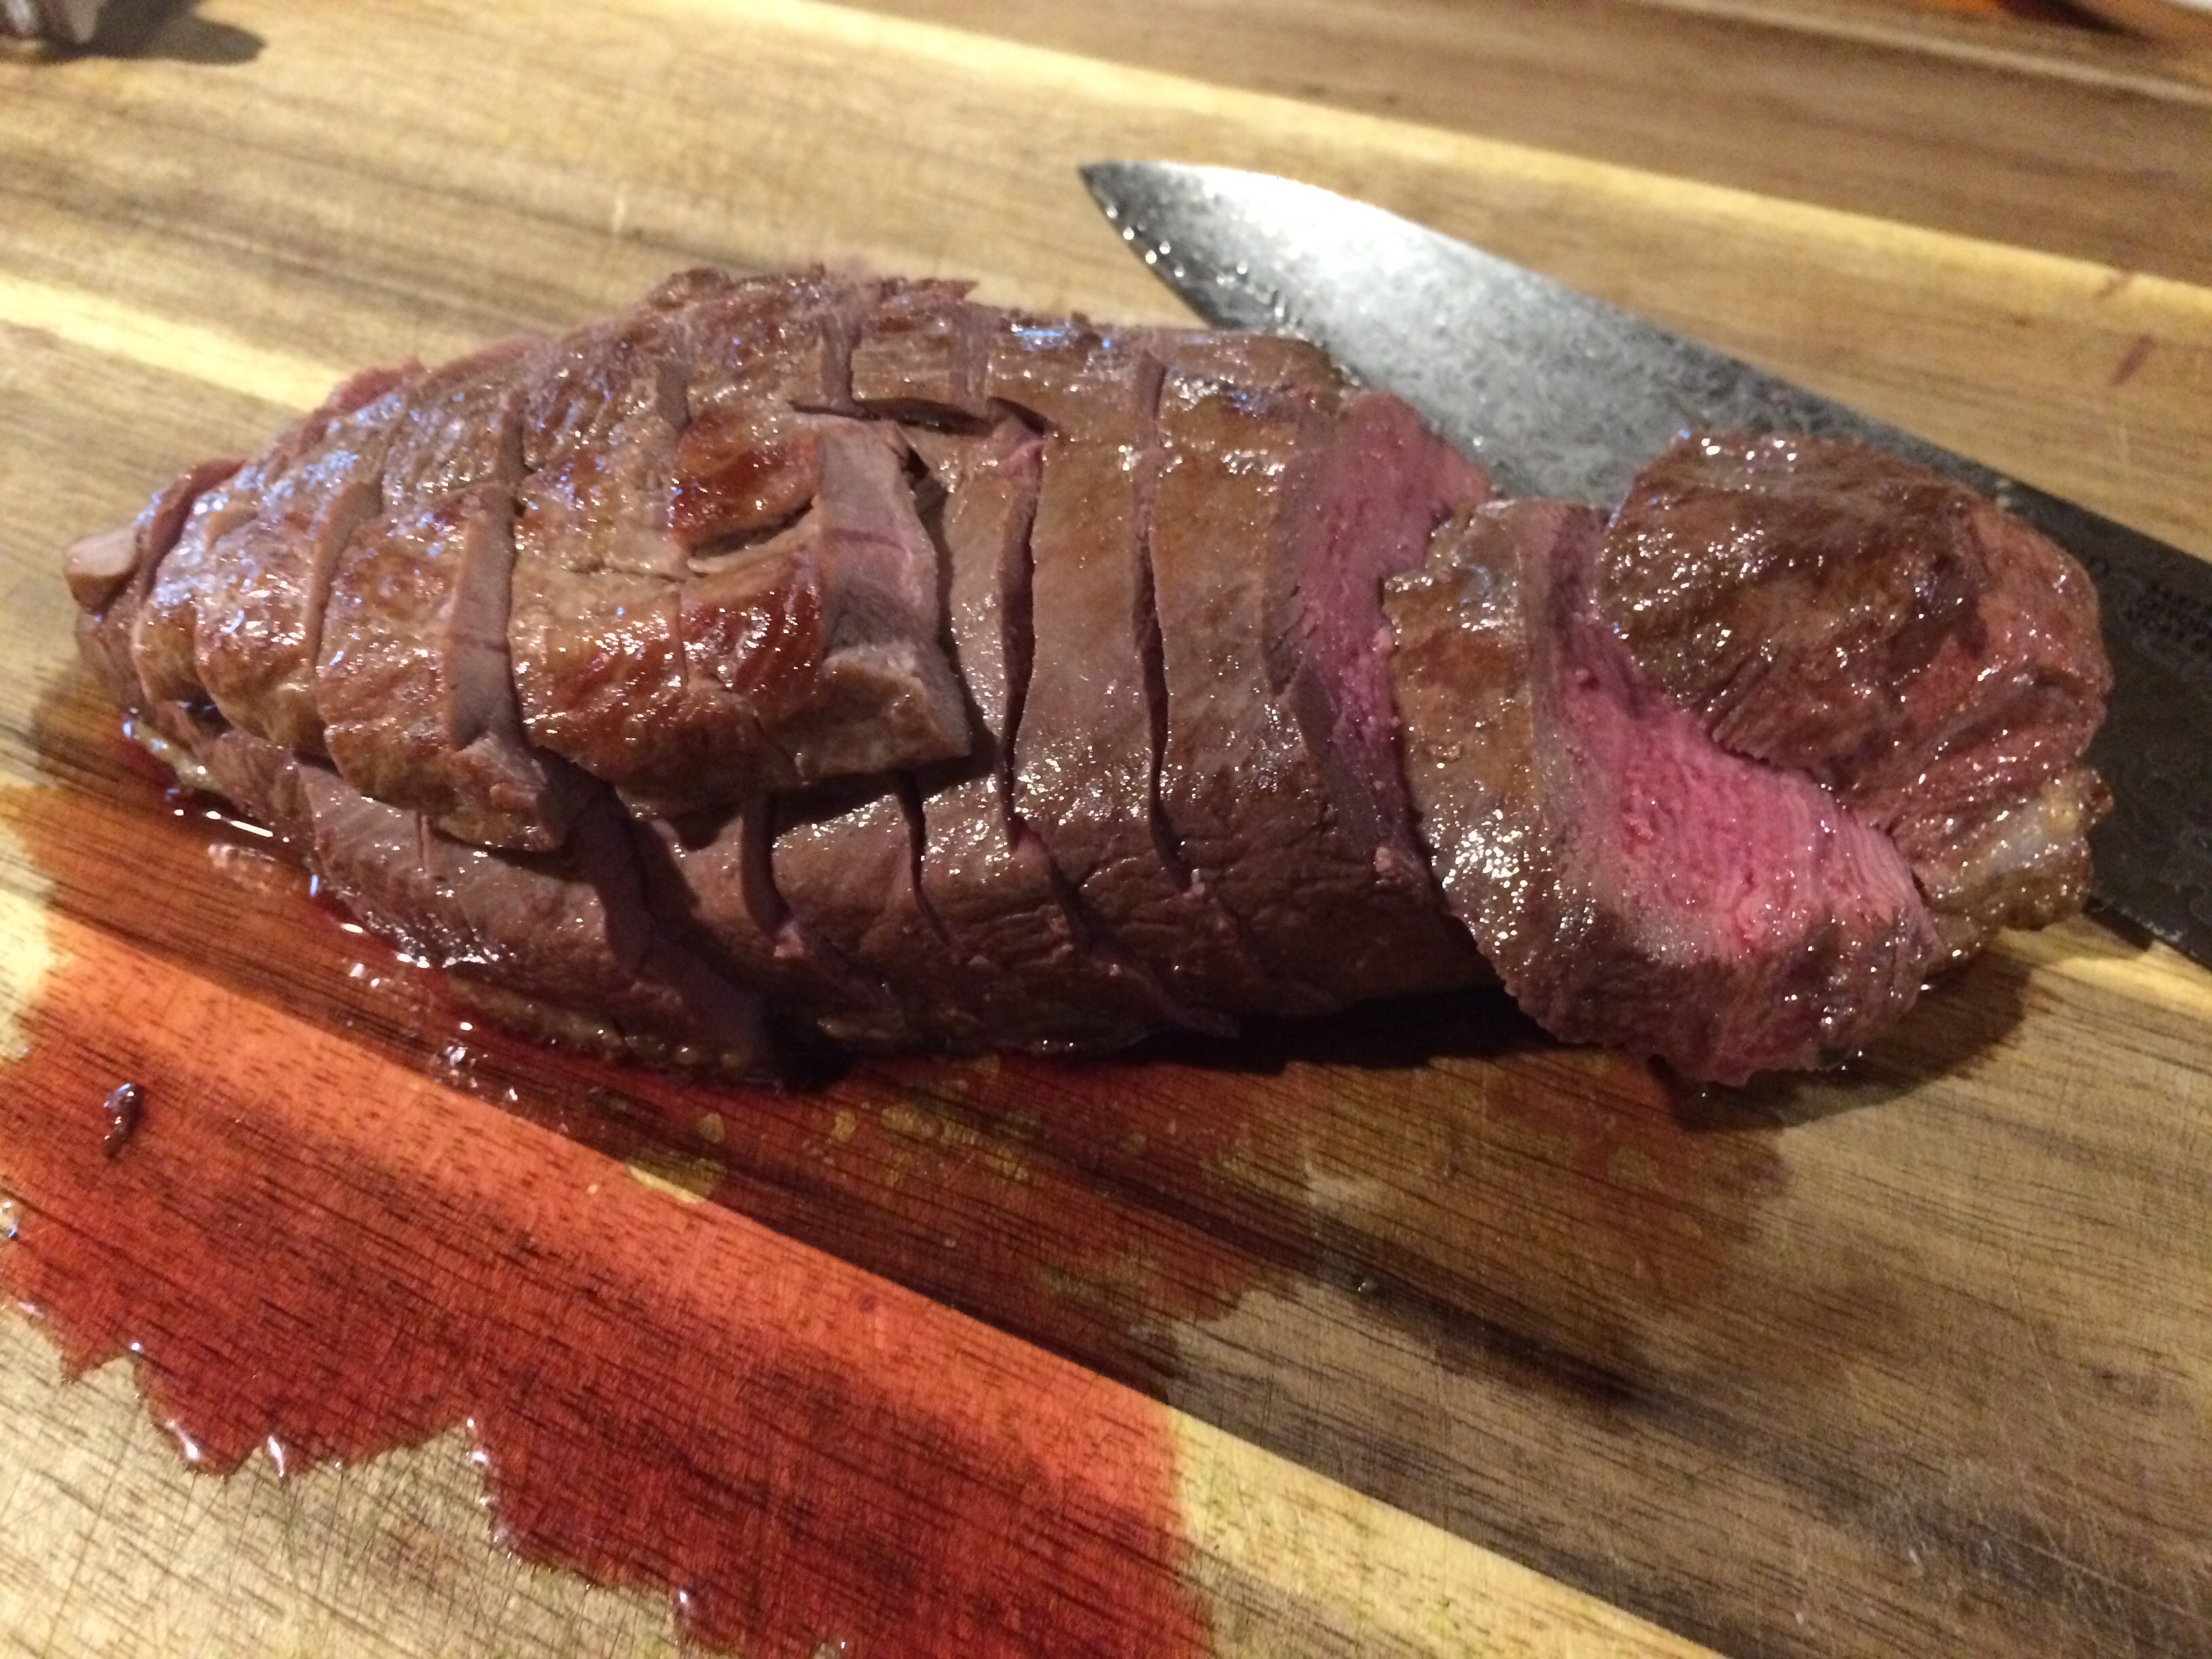
After the duck has rested, place it on a cutting board, skin side down and slice with a sharp knife.
Place polenta, carrots and sliced duck on a warm plate and pour sauce around. Serve immediately and enjoy!

