Wild Blueberry and Lemon Sorbet

This is the time of year I start thinking about Maine. The weather here in Florida starts heating up and my compass seems to only point north.

 Boca Grande, Fl Sunset 
I was lucky enough to get my hands on some IQF (Individual Quick Frozen) wild blueberries recently so I decided to turn them into a frozen treat to keep me cool until we head back to Moosehead Lake.

 Wild Blueberry Lemon Sorbet 
I was so happy with the results, I just had to share the recipe. To my tastebuds, this is what summer in Maine is all about. Wild blueberries, fresh lemonade and home churned frozen goodness all in one glorious bite! Don’t worry if you can’t find wild blueberries, regular blueberries will do just fine. Or feel free to substitute blackberries, raspberries, strawberries or a mix of whatever fruit you have available. Half the fun of making sorbet is trying new flavors!

Best of all, sorbet is naturally gluten free and completely vegan!

Wild Blueberry and Lemon Sorbet

  
Ingredients:

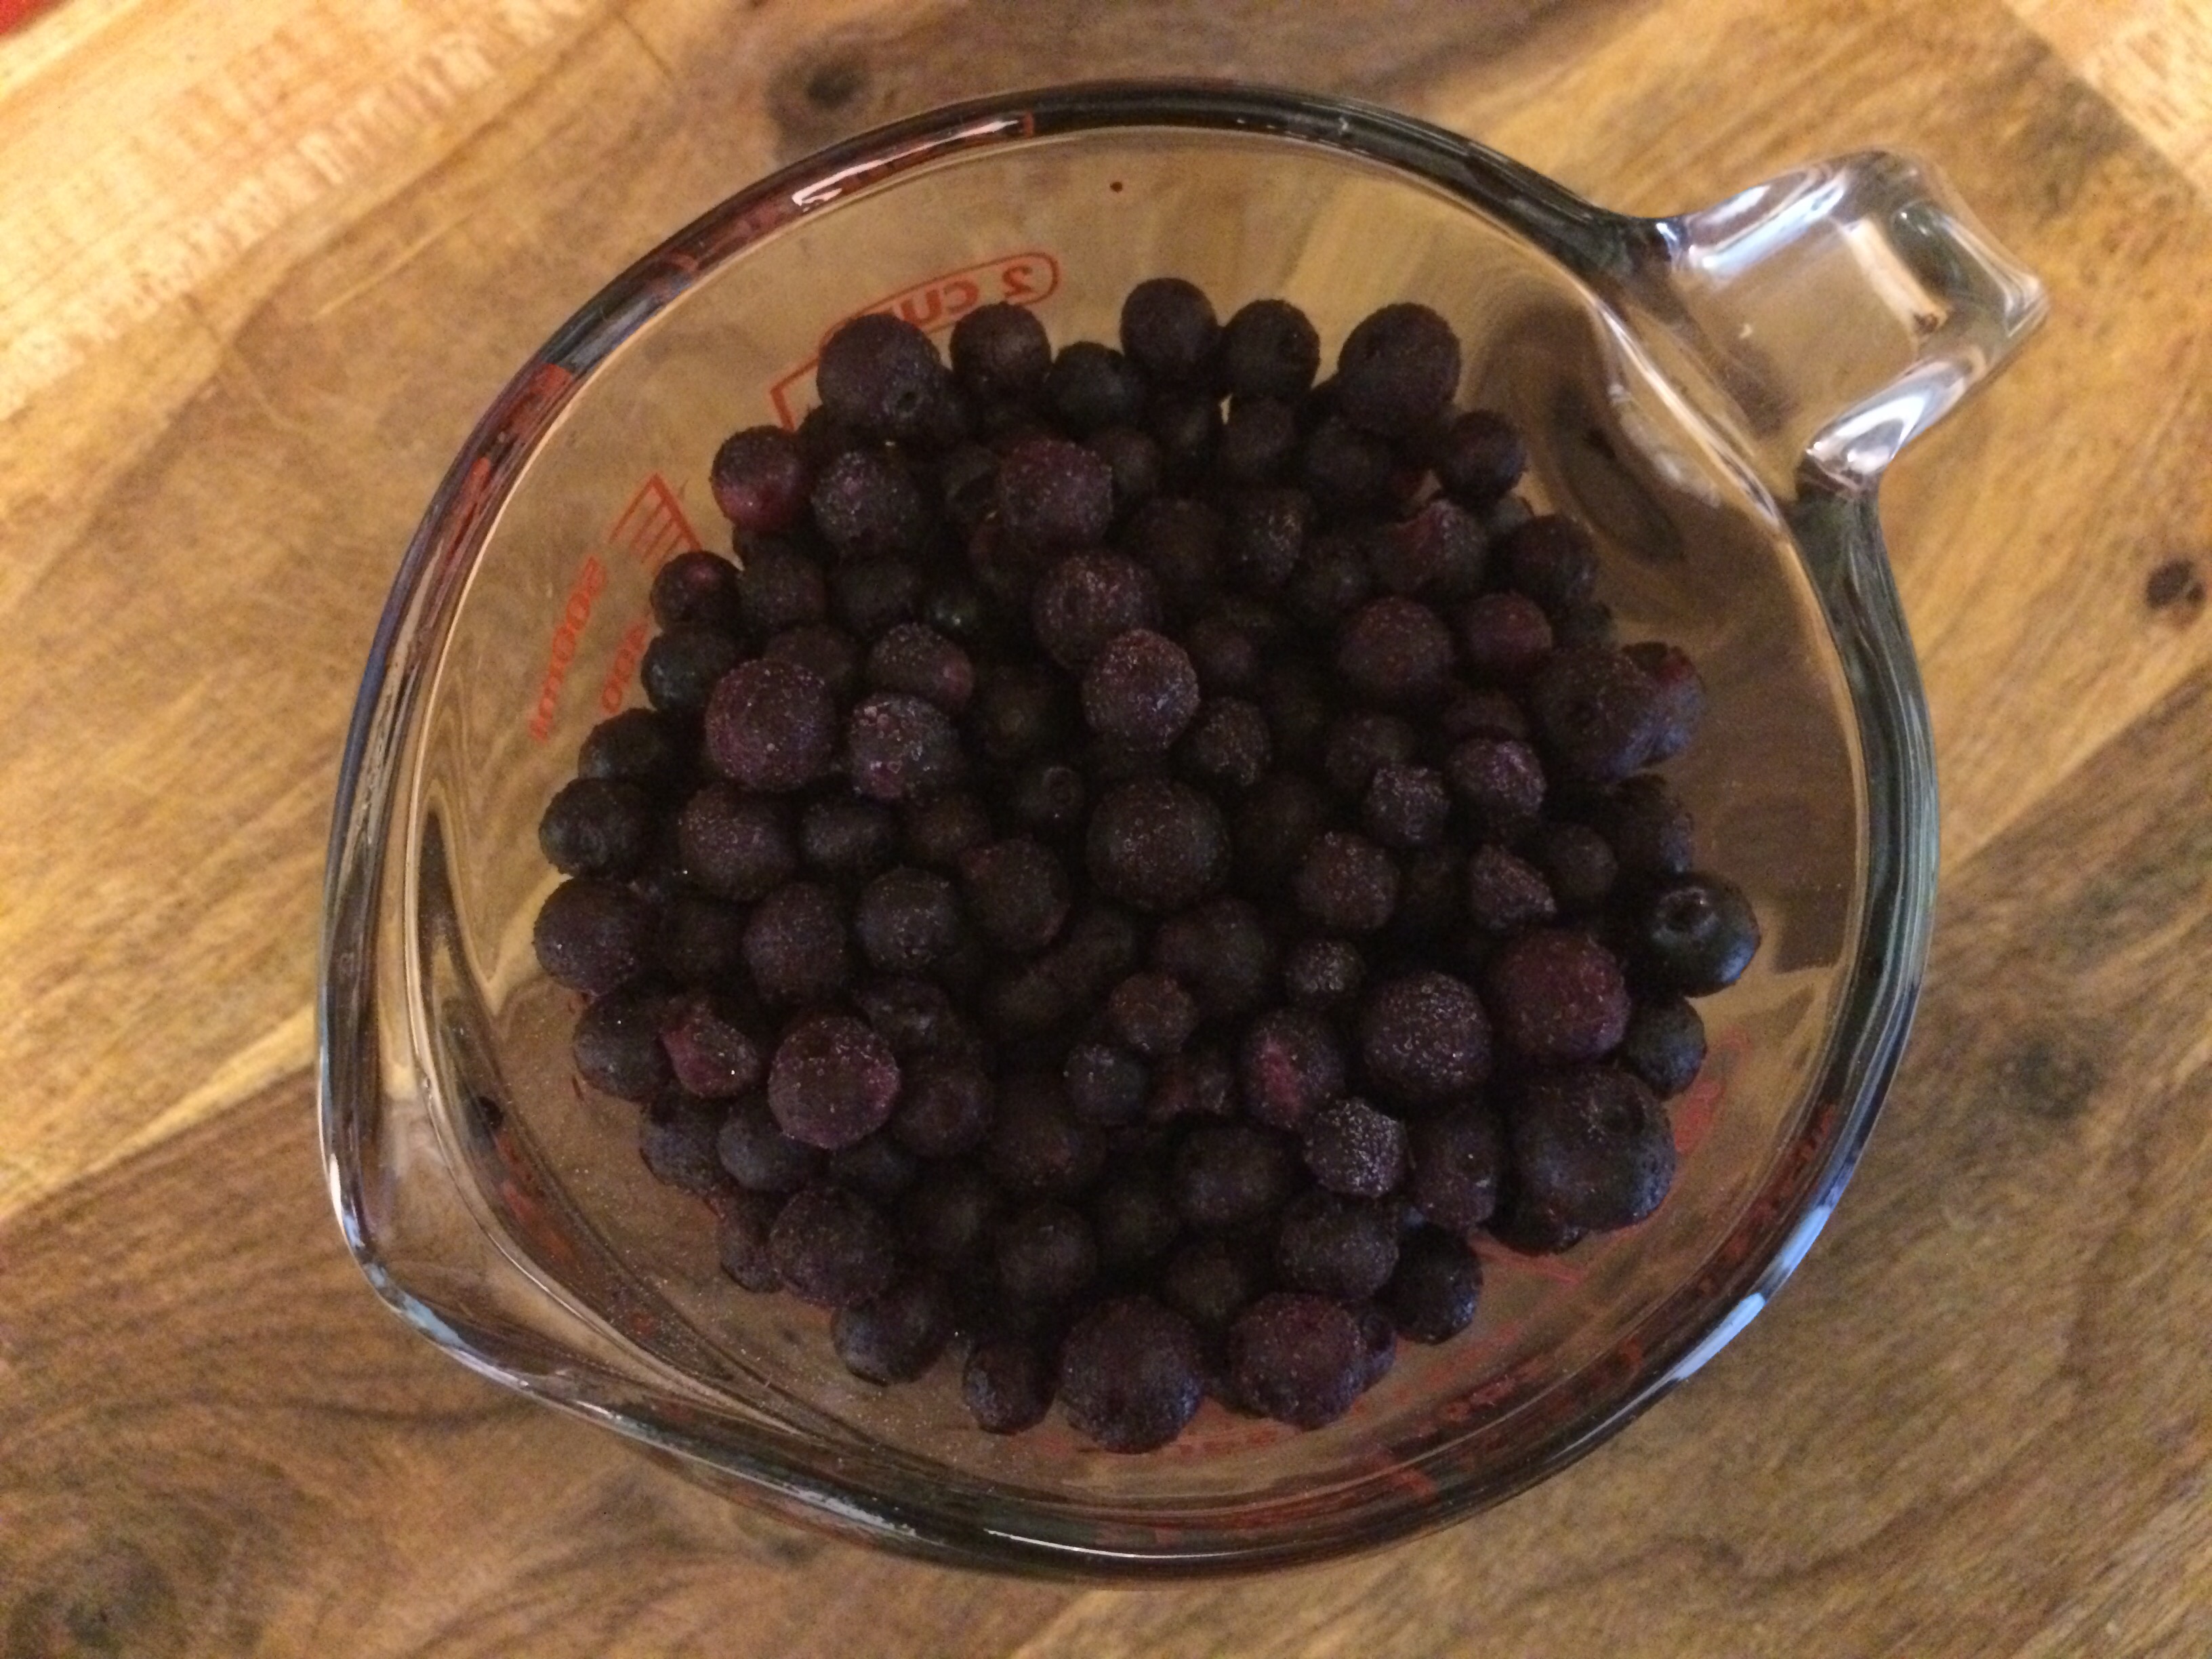
2 pints blueberries, divided

1/4 cup orange juice

3 Tbsp sugar

1/2 cup sugar

1/2 cup water

Zest of 1 lemon

Juice of 2 lemons (1/2 cup)

1/4 cup corn syrup

Directions:

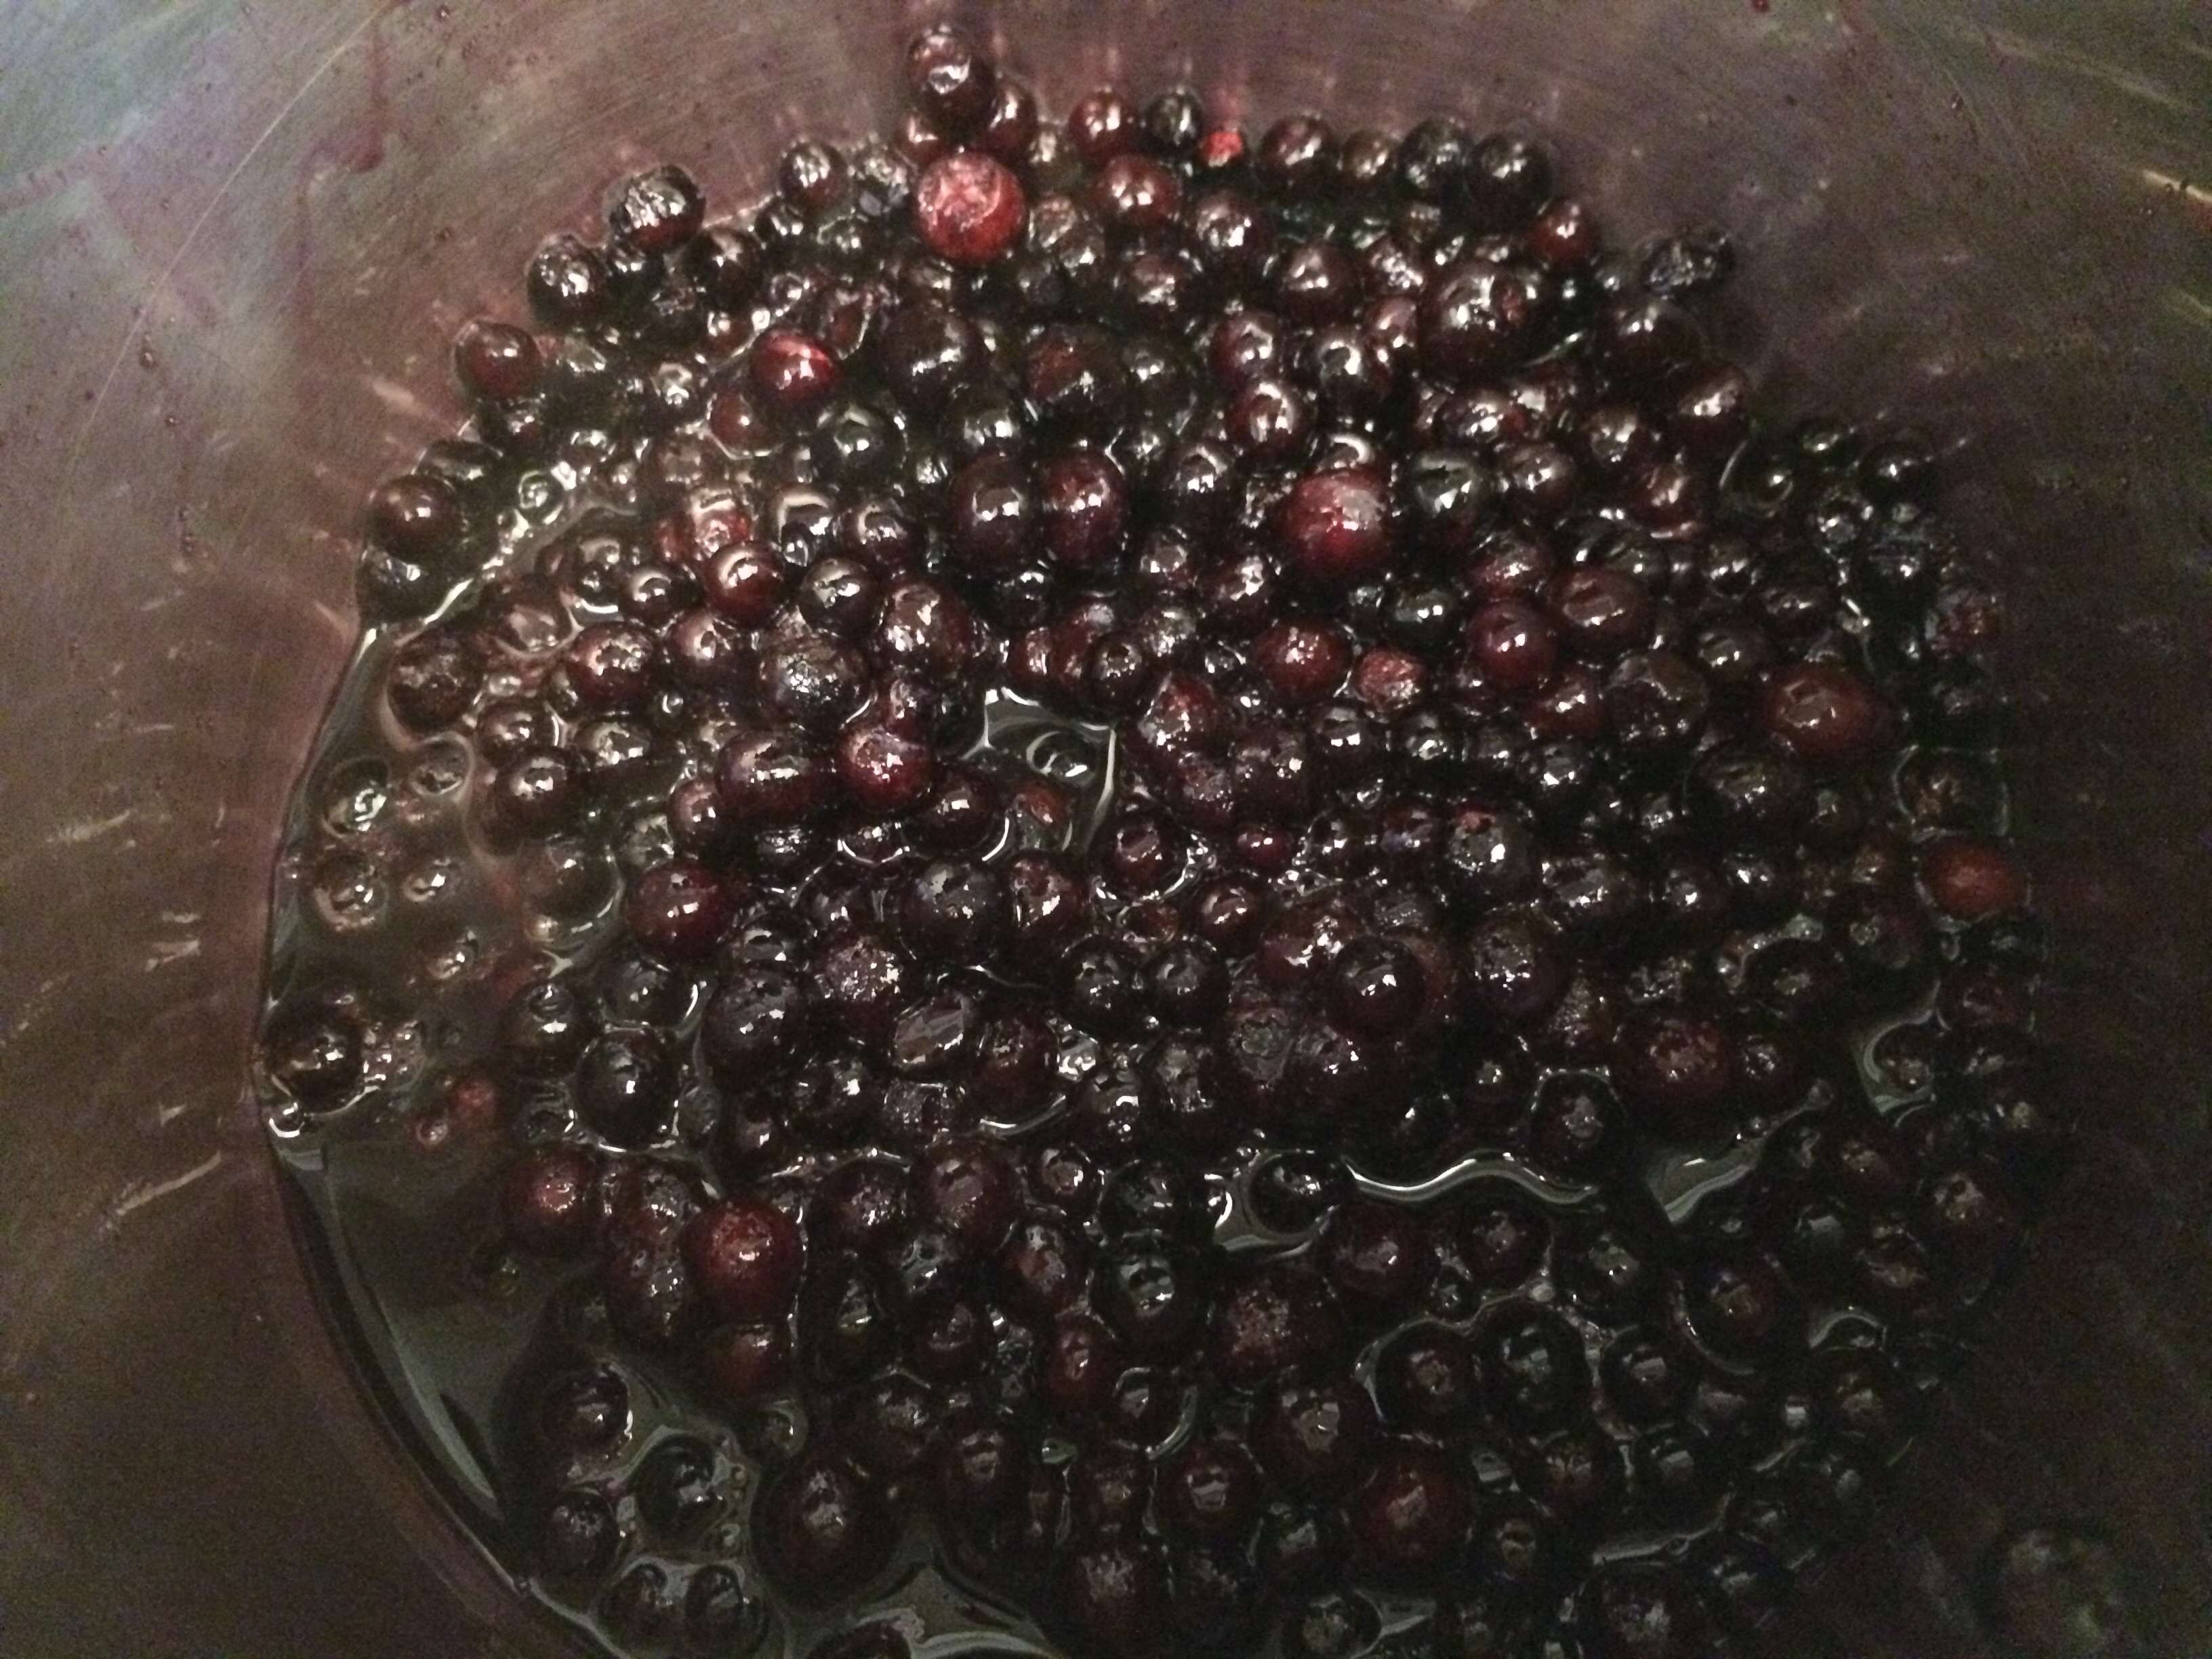
Combine 1 pint blueberries with 1/4 cup orange juice and 3 Tbsp sugar in a medium saucepan. Reserve the other pint in the freezer.

  
Bring to a simmer and cook over medium low heat until blueberries break down and release their juices, 25-30 minutes.


While blueberries are cooking, combine 1/2 cup of sugar and 1/2 cup of water. Stir until sugar dissolves completely.


Zest a lemon into a medium bowl and add lemon juice.

  
 Add simple syrup and corn syrup and whisk until combined.


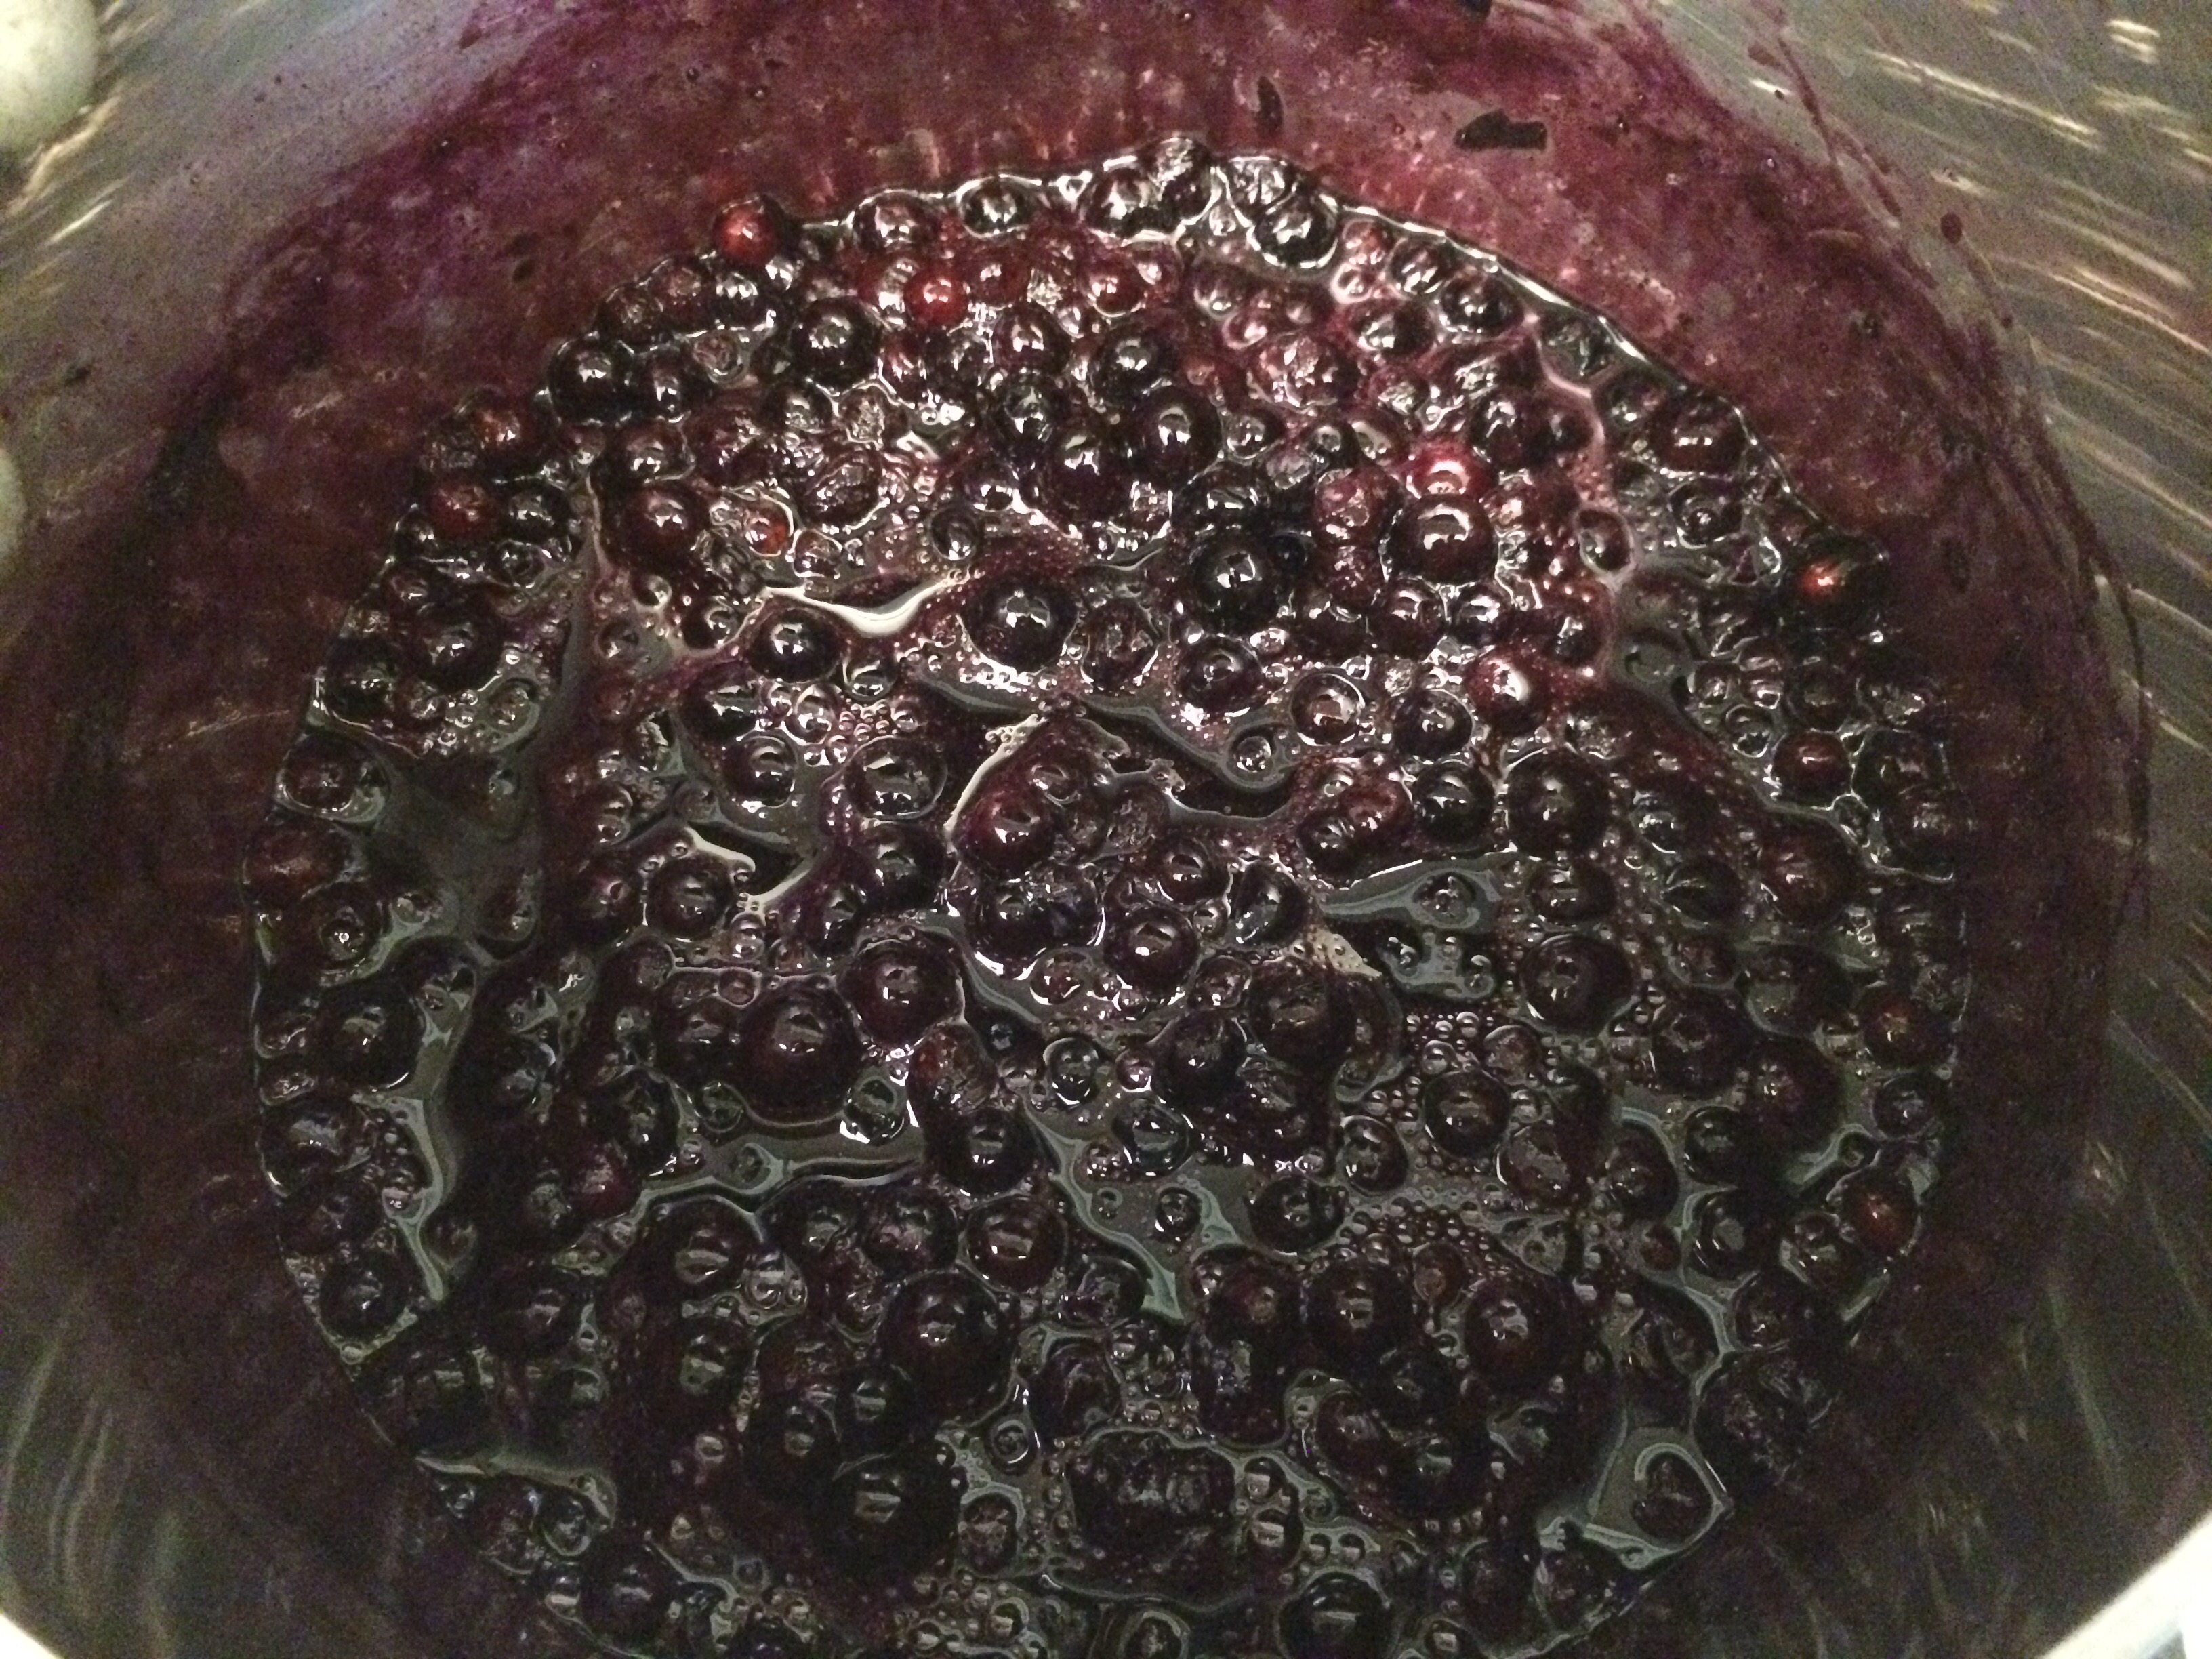
When berries are done, remove from heat and add remaining blueberries. Stir briefly.


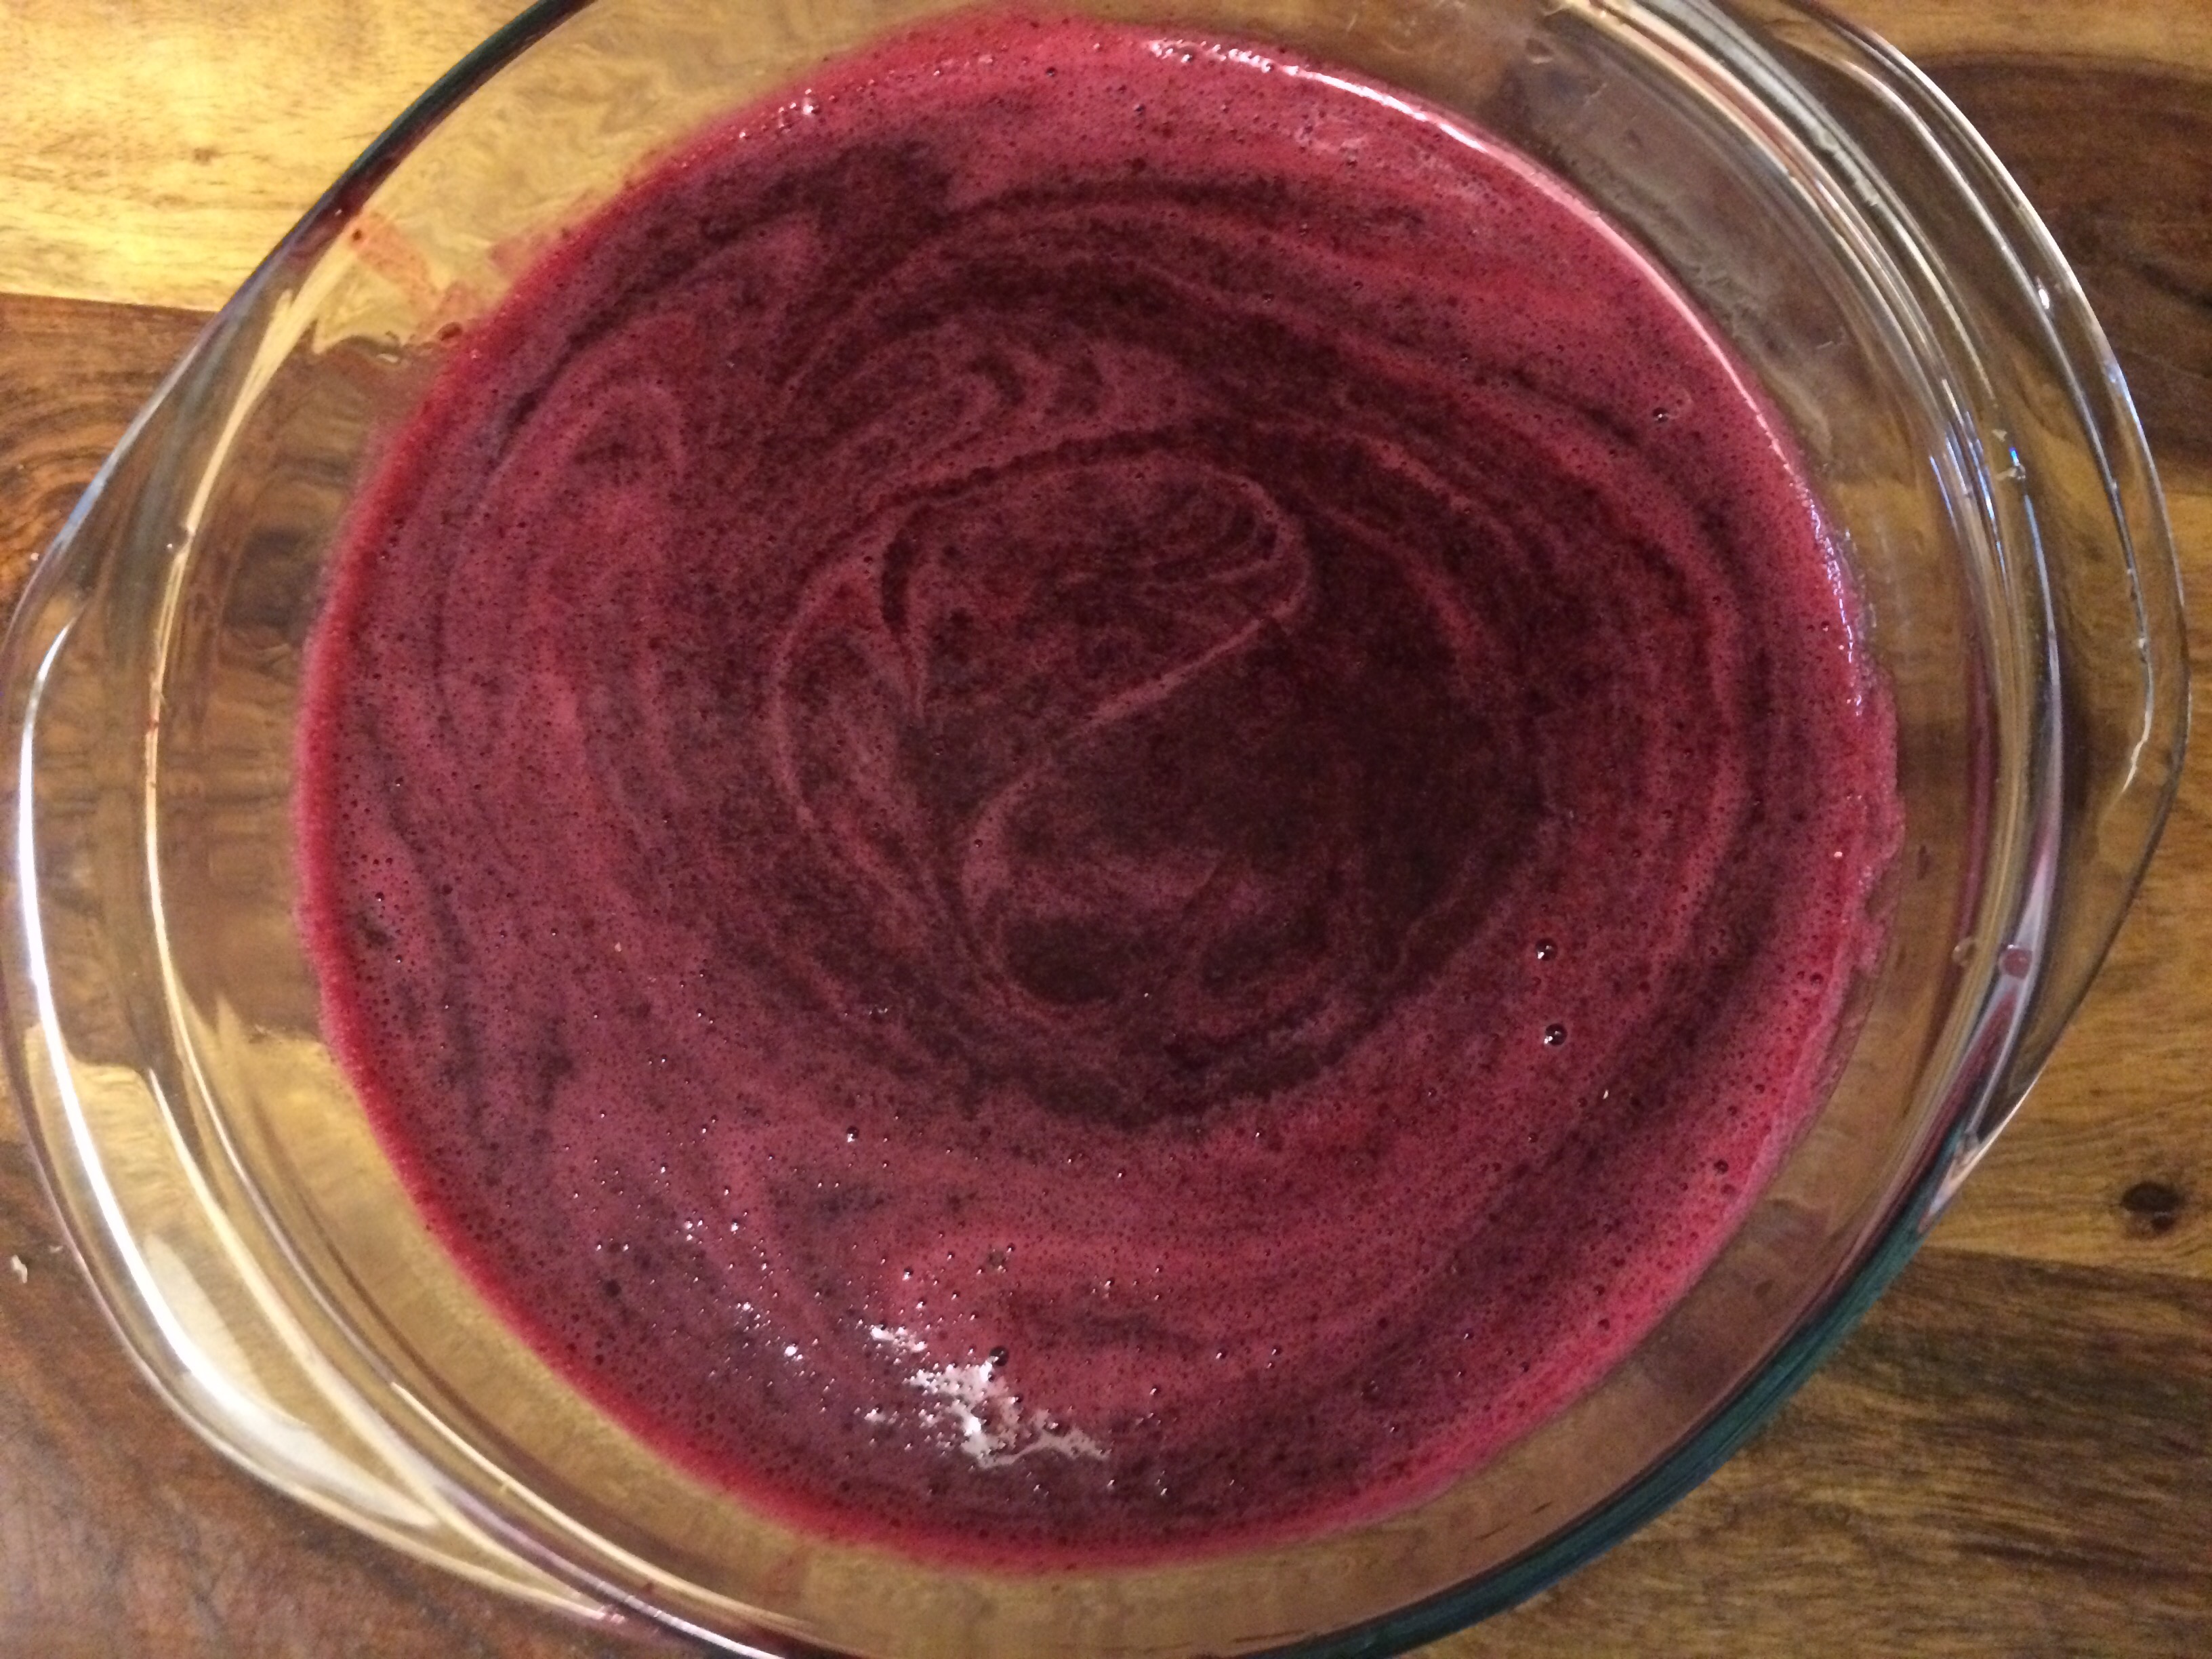
Combine blueberry mixture and lemon mixture in a blender or food processor and puree until smooth.


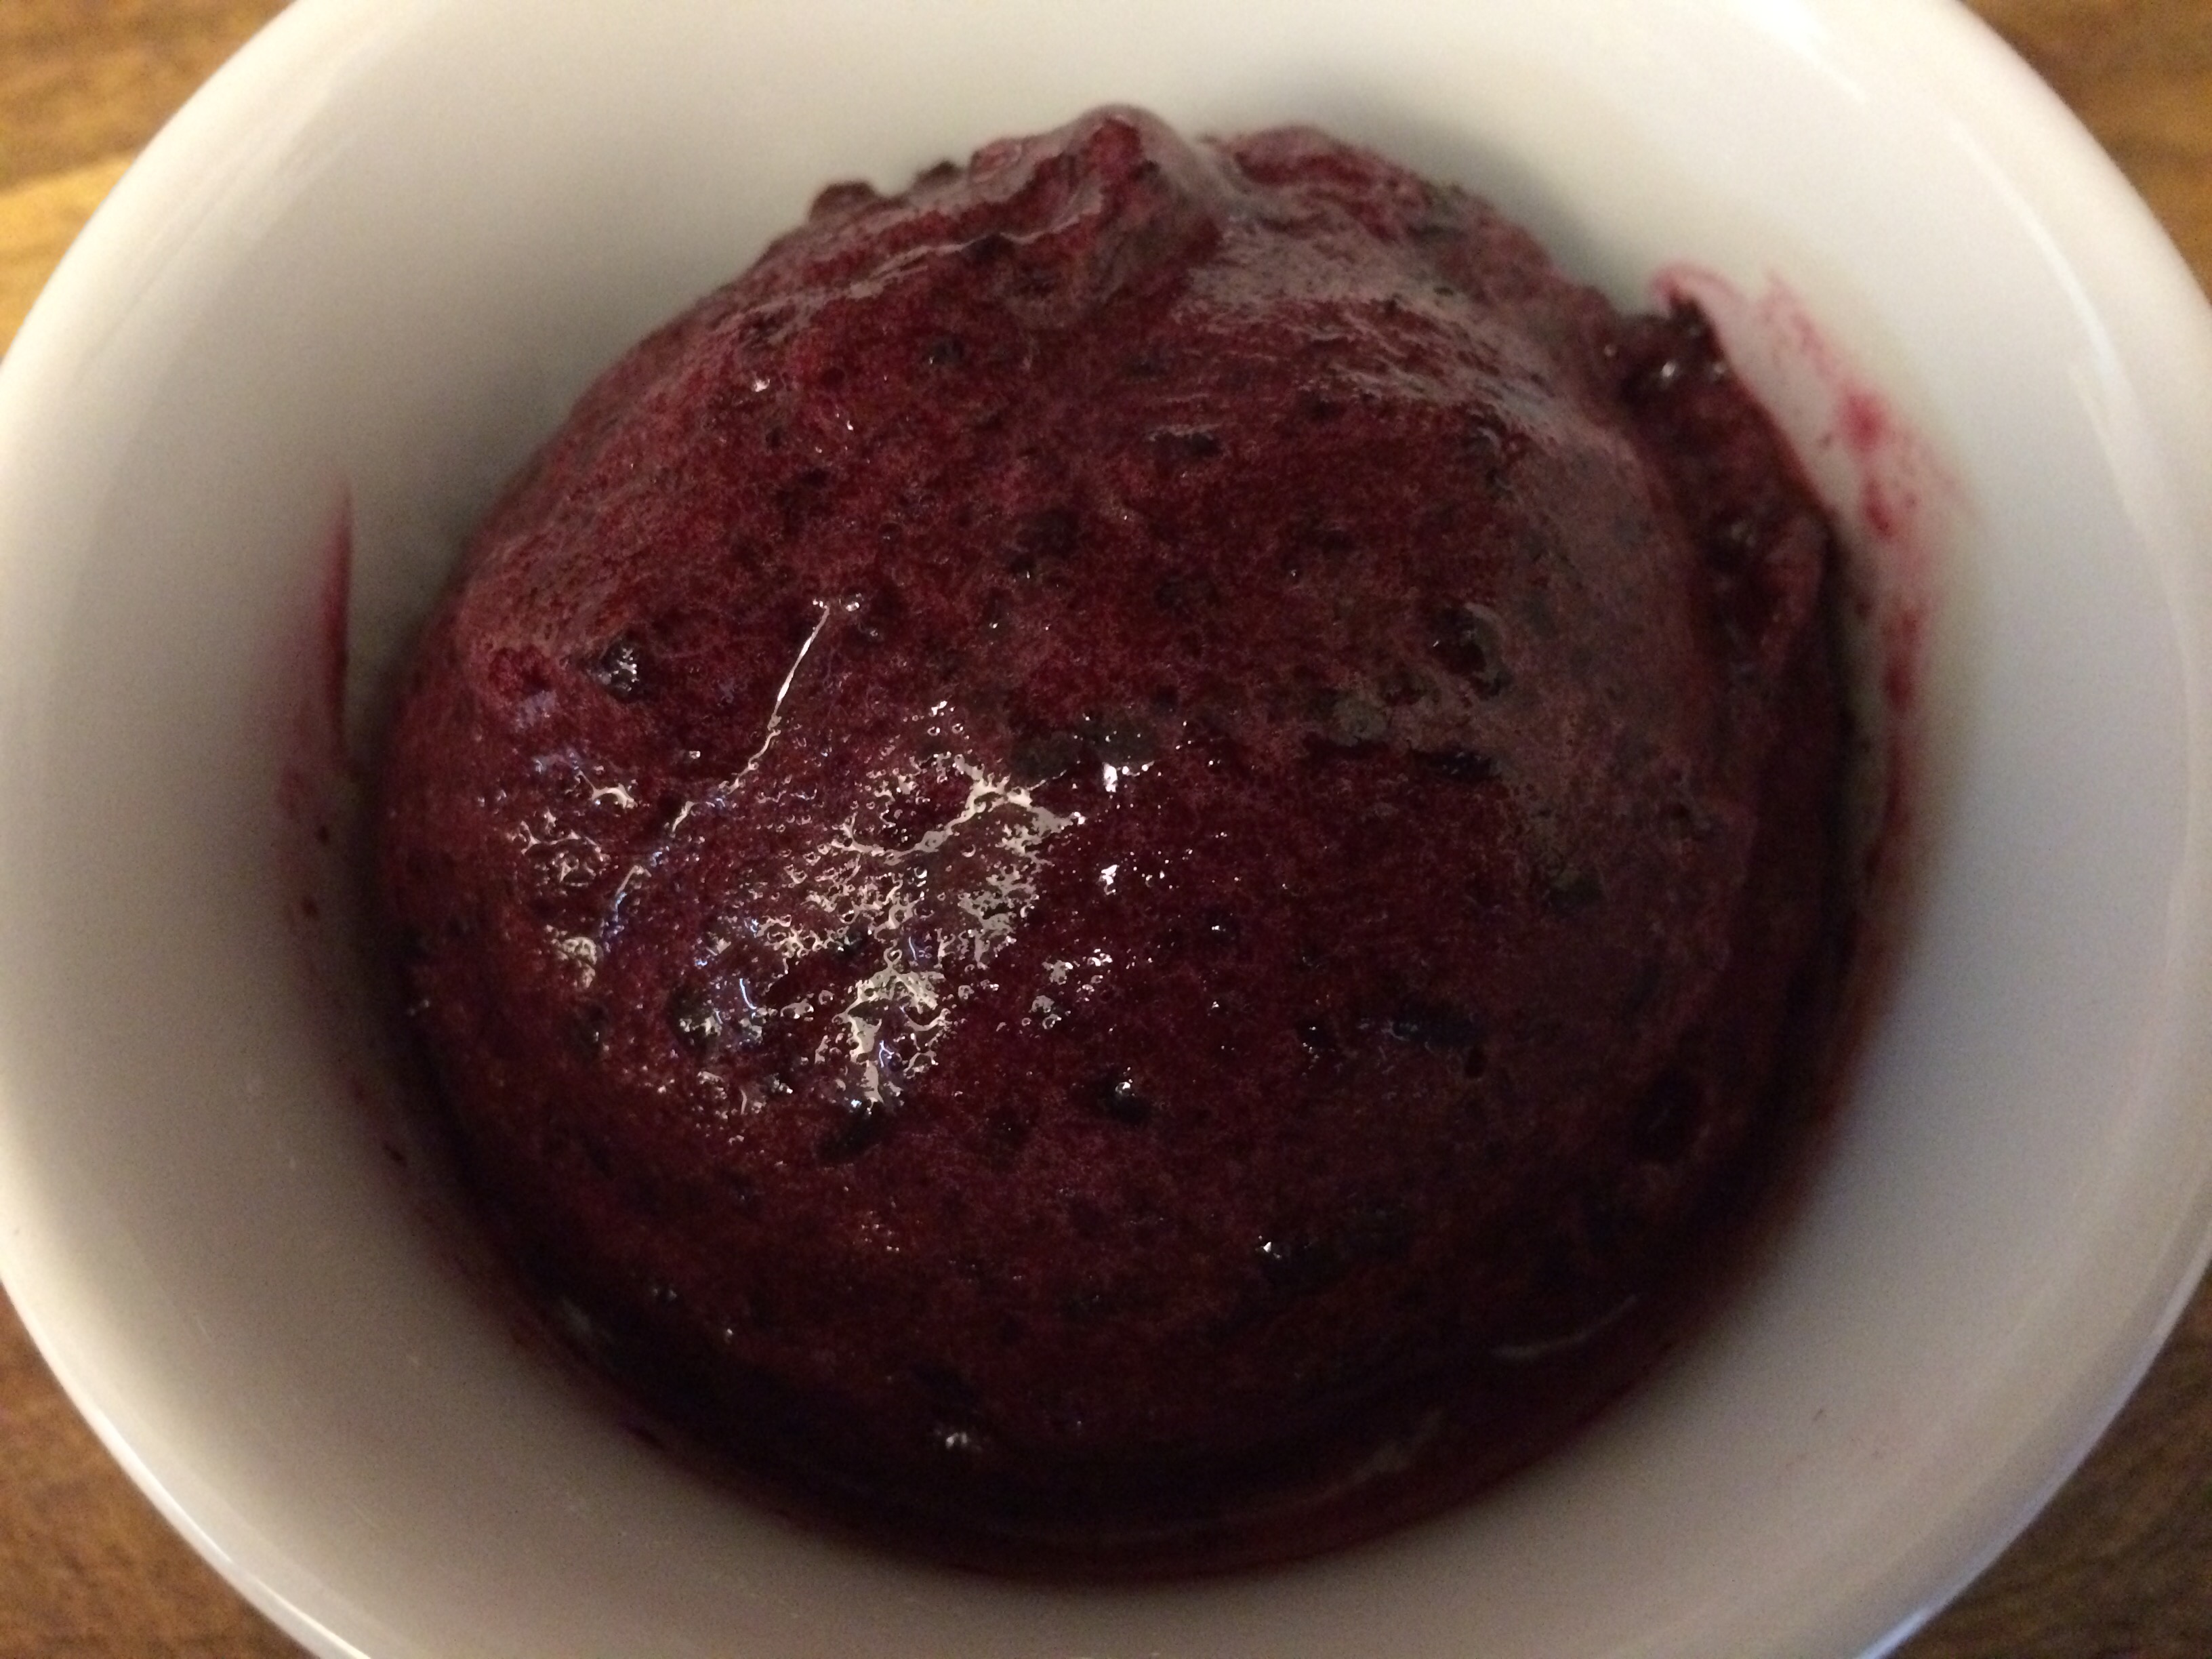
Make sure puree is cool to the touch and process in an ice cream maker according to the manufacturer’s suggestions.

  
It took about 30 minutes in my 1.5 quart counter top model.


When mixture has thickened, transfer into an air tight container and freeze at least two hours before scooping.


Advertisement

Sunday Brunch, Mini Breakfast Casseroles

 Mini breakfast casseroles with bacon and chives 
Mini Breakfast Casseroles with Bacon and Chives


Today we invited some of our friends over for Sunday brunch. I made cranberry orange scones and blueberry muffins but everybody kept coming back for the mini breakfast casseroles I made with bacon and chives. 

  
These hand-held breakfasts have everything you need to get your day started right (except for a cup of coffee). Hash browns, bacon, eggs, melted cheese and chives come together in one convenient, portable package. Best of all, they can be made ahead of time and reheated when you need a quick breakfast on the go.

Mini Breakfast Casseroles with Bacon and Chives


Makes: 8

Ingredients:

48 tater tots, cooked according to package instructions

8 slices thick bacon

10 eggs

1/4 cup chopped chives

6 ounces grated cheese

Salt and pepper

Directions:

Preheat oven to 375 F.

Line a baking sheet with parchment paper, lay bacon slices on top and cook in the oven for 7 minutes. Remove from the oven and lay bacon on paper towels to absorb the rendered fat.

Place 8 six ounce ramekins on a baking sheet (if you do not have ramekins you can use a muffin tin) and coat inside with cooking spray. Line the ramekins with 1 slice bacon each.

  
Place 6 tater tots in each dish and press into the bottom with a measuring cup.

  
Bake in the oven for 14 minutes.

Meanwhile, whip eggs with salt and pepper and set aside.

  
Remove dishes from the oven and increase heat to 450 F.

  
Sprinkle chives and cheese into each dish and pour egg on top.

  
Return to oven and cook 10 minutes, rotating halfway through.

  
Allow to cool at room temperature for 5-10 minutes before removing from ramekins.

Enjoy!


Peach Cobbler

 Peach Cobbler 
Peach Cobbler

Yesterday my wife came home with a big bag filled with peaches she found at a farm stand on the side of the road. They were very ripe and dripped with juice when I bit into them. I knew they wouldn’t last much longer if I didn’t do something with them.

  
I realized that I had never made a cobbler before and this was the perfect opportunity to try it. After reading through some of my favorite cookbooks, I decided to use a recipe from Chez Panisse Desserts, slightly modified. We invited a few friends over to enjoy it with us and I got to work.

I couldn’t believe how simple this was to make. It took very little time and no special equipment. Best of all, everybody loved it so much they had seconds… and thirds!

Peach Cobbler

Ingredients:

Filling:

3 pounds peaches, peeled and sliced

3 Tbsp brown sugar

4 Tbsp flour

Pinch salt

Topping:

1 1/2 cups flour

3/8 tsp salt

1 1/2 Tbsp sugar

2 1/4 tsp baking powder

6 Tbsp butter

3/4 cup heavy cream

Garnish:

1/4 cup heavy cream

Coarse sugar

Directions:

Preheat oven to 375 F

Filling:

Combine peaches with sugar, flour and salt in a large bowl. Toss gently until coated. Place filling in an oven safe dish.

  
Topping:

Combine dry ingredients and whisk briefly. Cut butter into small cubes and work into flour with a stiff whisk until mixture resembles coarse cornmeal.

  
Add the cream and mix lightly until dry ingredients are just moistened.

  
Form the dough into round patties 1/2 inch thick and 2 inches in diameter. Arrange in a single layer over the peaches, leaving some room in between.

  
Brush top with cream and sprinkle with coarse sugar before baking in a 375 F oven for 35-40 minutes.

  
Remove from oven and allow to cool 10 minutes before serving. Serve with whipped cream and butterscotch or caramel sauce.


Cuban Coffee

  
Cuban Coffee

A long time ago, I had the wonderful opportunity to work with an amazing Cuban woman. Every day around four or five o’clock she would get out her moka pot and make Cuban coffee for everybody in the kitchen. She would tell me stories about growing up on a tobacco farm in Cuba where her mother made the same coffee every afternoon for the workers in the fields. I watched her closely and asked many questions and soon I was the one making coffee for the kitchen staff. I have treasured this recipe for years, because of the amazing flavor as well as the wonderful memories and now I would like to share it with you. I hope you enjoy it as much as I have.

Cuban Coffee


Ingredients:

Water

Pilon ground espresso coffee

1/2 cup granulated sugar

Equipment:

Bialetti 9 cup stovetop espresso pot (if you have a smaller or larger espresso pot, this recipe will still work, just adjust the sugar accordingly)

Directions:

Fill the bottom of the espresso pot with water up to the indicator line.

  
Fill filter with ground coffee and tap  gently with a spoon so grounds settle. Do not push grounds into filter.

  
Place filter in base of espresso pot and place on the stovetop.

  
Make sure the screen and gasket are firmly in place and then screw on the top of the pot snugly, making sure you achieve a good seal.

  
Turn on the heat to medium high and measure the sugar into a sturdy coffee mug.

  
When the very first coffee comes out of the spout, quickly pour it into the sugar and return the pot to the stove to finish brewing.

  
Work the coffee into the sugar with a spoon until it is a thick paste. Add a little more coffee if necessary.

  
When the coffee has finished brewing, pour a little into the sugar mixture and stir to dissolve. Pour this mixture into the pot (it is ok to have a little left in the mug) and gently stir if necessary to work out any lumps.

  
The sugar will rise to the top creating a beautiful layer of “crema.”

  
At this point, it is important to leave the lid of the coffee pot open. If the lid is shut and steam is allowed to gather, it will cause the crema to dissolve into the mixture and disappear.

  
Pour into demitasse cups (it helps to wiggle the pot slightly as you pour to coax the crema out, especially for the last few cups). Enjoy immediately!

  
If you prefer your coffee iced, simply combine equal parts Cuban coffee and milk, add ice cubes and enjoy!

The Last Day of Summer

  
I awoke early this morning, made a pot of coffee and headed down to the dock. It was just starting to get light as I cast off and headed toward the east side of the island.

  
Today was going to be the last day of my summer in Maine and I wanted to enjoy every moment. As I rounded the northern point of the island, I could see the first rays of sun breaking through the clouds. I shut off the engine and let the boat drift, enjoying the sound of the lake and the birds.

  
As I sipped my coffee, I thought back on all the great times I had enjoyed over the summer. I remembered fishing on Moosehead Lake with my son, William, our first trip to Montreal, meeting new friends and, of course, lots of great food.

  
After the sunrise, I started up the motor and headed back toward the dock. It was time to make breakfast and get ready for my last day of work.

  
When I arrived at the island, the ducks were already at the kitchen house waiting to be fed. I tossed them a few scraps and set about cleaning and packing up the kitchen for winter.

  
When I was finished, I took one last look around the island. I was going to miss it here but I was excited to head south to the island in Florida and to visit my good friend in Seattle soon for his wedding.

  
I took one last look at the pencil forest and the spectacular view of Mt. Kineo before heading back to camp to pack for my flight home.

  
I was already looking forward to my next summer on Moosehead Lake.


Maine Lobster Mac

 maine lobster mac and cheese 
Maine Lobster Mac and Cheese

Today I wanted to do something special for the other staff here on the island. We had some lobster left over from the last dinner so I decided to make everybody a nice, hearty lunch. 

 maine lobster 
I’ve wanted to make a lobster mac for a long time so I seized the opportunity. The result was even better than I anticipated. I am seriously in love with this dish. Here is my recipe for lobster mac.

 maine lobster mac and cheese 

Maine Lobster Mac and Cheese

Serves 6

Ingredients:

1 Tbsp vegetable oil

8 oz. salt pork or pancetta, diced

1 small onion, diced

2 Tbsp butter

3 Tbsp flour

2 cups milk

8 oz. sharp cheddar cheese, shredded

8 oz. pasta

1 pound cooked lobster meat

1/4 cup chives, chopped

Ground black pepper

Topping:

2 Tbsp butter

4 oz. crackers, crushed

Directions:

Heat a medium pot and add vegetable oil. Add salt pork and cook until the fat is rendered and pork is golden brown.

  
Add diced onion and cook over medium heat, stirring occasionally, until onions are soft, five or six minutes.

  
Add butter and allow to melt. I like to bring all the pork and onion to one side of the pot and let the fat collect on the other before I whisk in the flour, but it is not absolutely necessary.


When the butter is completely melted, gradually add in your flour and whisk over medium heat to make a roux. When all the lumps are worked out and mixture starts to smell nutty, gradually add milk while whisking.

  
Bring mixture to a simmer and cook over medium heat five more minutes, stirring frequently.

  
Reduce heat to low and add cheddar cheese, stirring until completely melted.

Meanwhile, preheat the oven to 450 F and bring a large pot of salted water to a boil.

  
Elbow macaroni is a traditional choice but I didn’t have any so I used these garden ruffles instead.

Cook pasta according to package directions for al dente.

  
Immediately after draining pasta, add to sauce and stir to combine.

  
Remove lobster from the shell, and cut into large chunks.

  
Add to pot along with chopped chives and fresh ground black pepper. Taste and adjust seasoning if necessary.

  
Transfer into a 2 inch deep, oven safe casserole dish.

  
To prepare topping, crumble crackers into a bowl (I used John Wm. Macy’s Asiago and Cheddar Cheese Crisps but just about any cracker will do). Add melted butter and stir to combine.

  
Place crackers on top of the casserole in an even layer and bake in the oven for 10 minutes or until golden brown and bubbly.

  
Allow to cool 5-10 minutes before serving.

Dinner For One: Maine Lobster Carbonara

  
Maine Lobster Carbonara

This take on the Italian classic was perfect for a quick dinner at home. Where I am in Maine, it can be hard to find pancetta, let alone guanciale. What we do have on this side of the Atlantic Ocean is salt pork, which is not so different than pancetta or bacon and considerably less expensive. A little lobster brings this dish the rest of the way across the Atlantic and adds some sweetness to round out the salty fatty pork and the rich, peppery sauce.

Ingredients:

Olive oil

4 oz. salt pork, diced small

1-2 steamed lobster tails, depending on size, cut into pieces

4 oz dry spaghetti

1 egg, beaten

4 oz. Romano or Parmesan cheese, shredded

Black pepper

Directions:

Heat a sauté pan and add a little olive oil. When oil is hot, add the diced salt pork and cook over medium heat until fat is rendered and pork is crispy.

  
Turn off heat and add the lobster pieces, stirring to warm.

  
Cook spaghetti according to package directions, reserving some of the pasta water.

  
Remove spaghetti from water and add to the pan, stirring to coat with the rendered pork fat. Add beaten egg and stir to coat. Add cheese and black pepper as well as some hot pasta water and stir well. The heat from the spaghetti and pasta water should cook the egg just enough to thicken slightly and coat the noodles. Place in a dish and garnish with a little more cheese and black pepper. Enjoy immediately.


Cranberry Orange Scones, Blueberry Lemon Scones

 cranberru irange blueberry lemon scones 
Cranberry Orange Scones, Blueberry Lemon Scones

Recently, on a trip to Bangor, I visited a delightful little coffee shop in Dover-Foxcroft. Center Coffee House is located in a storefront adjoining the theater downtown. They have amazing espresso drinks and the most delicious donuts but the highlight of this particular visit was the cranberry orange scone I picked up on a whim.

I’ve never thought much about scones one way or the other. The few I had tried before were dry and crumbly or nearly hard as a rock. This particular scone looked so inviting, I decided to give it a try. It stood tall in the pastry case with a shiny glaze dripping down its many layers of nooks and crannies.

  
I brought it out to the car, excited to share with my wife. After the first flaky bite, I was hooked. I’ve spent the last several weeks thinking about that scone and how I wanted to make one just like it.

Yesterday, I finally made that dream a reality. I love trying something I’ve never done before, especially when it comes out as good as these scones did! I was surprised and delighted to find out how much making scones was like making biscuits. They were so simple and took such little time, I made two different kinds. Here is the recipe I used from “The Bakers Manual.”

Cream Scones

Ingredients:

2 cups all-purpose flour

3 Tbsp granulated sugar

2 tsp baking powder

1/4 tsp salt

6 Tbsp cold, unsalted butter

1/3 cup currants (I used dried cranberries)

1/3 cup heavy cream

1 large egg

1 tsp vanilla extract

Directions:

Whisk all dry ingredients together in a medium bowl. Using a pastry blender or box grater, cut the butter into the flour until pea-size clumps form. Stir in the currants or whatever (I also added orange zest for the cranberry and lemon zest with the blueberry).

  
In another bowl, whisk together the cream, egg and vanilla. While tossing the flour mixture with a fork, gradually pour enough liquid into the bowl to form a dough when pressed (I found it needed every bit of the liquid). Reserve remaining liquid.

  
Form dough into a disk with your hands, adding cream if necessary. On a floured surface, form dough into around disk 1 1/2 to 1 3/4 inches high; cut into eight wedges with a floured knife.

  
Refrigerate dough 20 minutes (I did this backwards and refrigerated the disk for 20 minutes before cutting). Brush tops of dough with any remaining cream mixture, using additional cream if necessary (I used egg wash instead). Bake at 425 F for 14-16 minutes, or until golden.

  
Additionally, I mixed a little orange juice (lemon for the blueberry) with a lot of powdered sugar to make a sweet glaze to drizzle on top.

  
These scones turned out at least as good, if not better than the one I had at the coffee shop! I was so pleased with the results. I can’t wait to try some different flavor combinations!